NWLA Master Gardeners Seedling
The Publication of the Northwest Louisiana Master Gardeners, The Seedling, is published four times a year. It includes articles by the Master Gardeners and the newsletter editor. This page will include a great compendium of gardening information.
Spring 2024 "Seedling"
Winter 2023-2024 "Seedling"
Fall 2023 "Seedling"

Summer 2023 "Seedling"

Fall 2022 "Seedling"

Summer 2022 "Seedling"
Spring 2022 "Seedling"
Winter 2021 "Seedling"

Fall 2021 "Seedling"

Contents This Quarter
~ President’s Message
~ The Agent’s Corner
~ In the Garden...and much more
~ Making the Cut– propagation tips
~ Garden-to-Kitchen
~ Wildseed Farms Ramble
~ Book Picks
~ 318 Growers –Kickapoo Twist Winery & Vineyard
~ The Art of Seed Saving
~ Events & Goings On, Y’all
~ Editorial Notes
~ President’s Message
~ The Agent’s Corner
~ In the Garden...and much more
~ Making the Cut– propagation tips
~ Garden-to-Kitchen
~ Wildseed Farms Ramble
~ Book Picks
~ 318 Growers –Kickapoo Twist Winery & Vineyard
~ The Art of Seed Saving
~ Events & Goings On, Y’all
~ Editorial Notes
Summer 2021 "Seedling"
Great information can be found in the Summer 2021 Seedling!
Click here to read the full publication.
Click here to read the full publication.

Click here to see the full publication of the
Spring 2021 "Seedling" Newsletter
Contents This Quarter
~ Let’s Talk Tomatoes, plus Tips - Sadie Bolyer, President, NWLAMG
~Spring Fertilizing - Mark Wilson, Northwest Regional Horticulture Specialist and NWLA Master Gardener Ag Agent
~In the Garden...and much more, Chris Bertrand, Seedlings Editor
~ Leaf Mold Compost...try it! - Mike Livingston, Master Gardener
~ From Our Kitchen, To Yours
~ A Tale of Two Gardens - Margie Caplis, Master Gardener
~ Book Picks...for all ages!
~ 318 Growers -Dixie Farms Lavender - Jane Allison, Master Gardener
~ Events & Goings On, Y’all
~ Resources
~ Editorial Notes
Volume 21 #4
The Covid-19 Newsletter: SEPTEMBER/OCTOBER 2020DO YOU SENSE A CHANGE?
IS IT POSSIBLE?
IS IT MAYBE A BREATH OF FALL!
Table of Contents:
President’s Report
Mark Wilson’s Report
The Good, Bad & Ugly
What Attracts Butterflys
Annual Plant Sale
Master Gardener Bulb Sale
Volunteer/ Education Hours
Little Bit of This, Little Bit of That

THE PRESIDENT REPORTS
Our peerless leader has fallen on hard times!
How many of you have had or know someone who has had knee replacement surgery? How many of you have had both knees repaired at once? How many of you know how hard it is to recover from this surgery?
Sadie, can tell you all about it!
For the next 6 weeks or more, Sadie will be recovering from having surgery on BOTH KNEES! Please keep her in your prayers for a swift and painless recovery. It takes a woman with grit and determination to tackle this surgery on both legs at once! Right now, she is moving about with the help of a walker, and worrying about the state of her garden. If you’d like to bring a smile to her face and a lilt to her voice, cover her mailbox with cards of love and prayers for a quick recovery.
Let’s Send Sadie a card shower. Cover her walker with get-well cards!

|
MARK WILSON,
Northwest Louisiana Master Gardener AG Agent LINKS YOU UP WITH GREAT TIPS…. The links below bring Gardening Science and Tips to you, and will wait here until you click on them! Mark gathered them for us a cool tool for finding gardening references! What could be better to have gardening resources right here on your computer! Thanks Mark! Let’s get it growing people! Better yet, Let’s clean up the mess that summer plants leave behind when they’ve finished blooming. Louisiana State University Extension 2020 EDUCATIONAL RESOURCES FOR HOURS ONLINE RESOURCES
JUST CLICK TO GO TO ARTICLE
MOVIES
Take a look at some of these facebook groups – you can find many educational articles on South Louisiana gardening
RADIO
EVENTS MONDAY, SEPTEMBER 14, 2020 AT 12 PM – 1 PMReflections in the Garden: Native Plants in the Home Landscape Online Event DetailsMonday, September 14, 2020 at 12 PM – 1 PM Public · Hosted by LSU AgCenter Botanic Gardens Online Event https://teams.microsoft.com/l/meetup- join/19%3ameeting_MzcyMjk1MTQtN2IzZS00YWZhLWJhZmMtNzgzYTg5NDcxNGZh%40thread. v2/0?context=%7B%22Tid%22%3A%22804b5098-9908-4bdf-9c06- b3df777563aa%22%2C%22Oid%22%3A%22d844bd51-625e-48f1-9a9a- c08c48526e13%22%2C%22IsBroadcastMeeting%22%3Atrue%7D Join us for Reflections in the Garden Online: Utilizing Native Plants in the Home Landscape! INSTRUCTONS: CLICK ON LINK; “MICROSOFT TEAMS” screen comes up; click “Watch on web”- at bottom of screen click join anonymously. Log on about 5 – 10 minutes prior to program in case you have any issues. No need to pre- register for this one. EVENT NOTES:If you are on facebook: search Gardening….then scroll down left side of screen – click Events and turn on “online” and gardening……this will bring up a list of events – the order is not that great – as some dates have passed. Search the list and you may find a program of interest. PLEASE NOTE: Some events require registration, and some have a fee, but most are free. ALSO: please note that not all are pertinent to South Louisiana – just keep that in mind YOUTUBE
LSU AgCenter – Gardening Channel https://www.youtube.com/playlist?list=PLuNFvoHC-if7f1NYpB-aMwQqNgP3Zq037 MS State Extension Service – Southern Gardening – Dr. Gary Bachman https://www.youtube.com/playlist?list=PLF865C9FF9960D0DC Arkansas Division of Agriculture – Blackberries https://www.youtube.com/playlist?list=PLzwlawVM4o4HtqqoP8ZMEBpcwEqmTq3hb Arkansas Division of Agriculture – Fruit Pruning Series https://www.youtube.com/playlist?list=PLzwlawVM4o4GtaH7F03kf8HoV0UACp0LM University of Florida/Institute of Food and Agricultural Sciences – Gardening Solutions Series https://www.youtube.com/playlist?list=PLbnrETfHgIug6UuU-aAlevLinrq9wAIxT The Dallas Arboretum – Plant Features https://www.youtube.com/playlist?list=PLLNCVFwhO0A_Juu3KzI-e6uTUVP_fFD9T The Dallas Arboretum – Drought and Heat Tolerant https://www.youtube.com/playlist?list=PLLNCVFwhO0A-7yLXTGy89G1LDSUVv0XcK The Dallas Arboretum – Plant Lab Live https://www.youtube.com/playlist?list=PLLNCVFwhO0A9J70tzkETPd6ZpVoR9iWh7 The Dallas Arboretum – Plant Tips https://www.youtube.com/playlist?list=PLLNCVFwhO0A-5y3-f78JPT3pVQfU104c4 Clack County Oregon – Master Gardeners: 10 Minute University https://www.youtube.com/playlist?list=PLZEzoOaZqnfoVPUYtXji6wgWSrpzS6l7b Extension PublicationsLSU AgCenter - Lawn and Garden Publications https://www.lsuagcenter.com/portals/communications/publications/publications_catalog/law n%20and%20garden Mississippi State Extension Service - Lawn and Garden Publications http://extension.msstate.edu/lawn-and-garden University of Florida/Institute of Food and Agricultural Sciences – Gardening Solutions Pub. Directory https://gardeningsolutions.ifas.ufl.edu/ Texas A&M Agrilife Extension Service – Landscaping Publications https://agrilifeextension.tamu.edu/library/landscaping/ University of Arkansas Cooperative Extension Service – Yard and Garden Resources https://www.uaex.edu/yard-garden/default.aspx Caddo Parish LSU AgCenter Extension Office Update
Continuing Education (computer based) Horticulture webinars (Check for announcements on LMG webpage) |
HOW LOVELY!
I FOUND WORMS
UNDER THAT GARDEN TRASH!
I FOUND WORMS
UNDER THAT GARDEN TRASH!
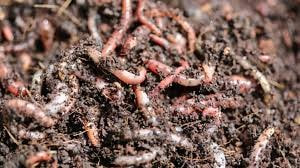
Does the sight of a pile of earthworms make you recoil? Could it be that those slimy, dirty-looking, squirmy and altogether rather repulsive creatures have some good qualities rather than fish bait? Why do some gardeners say “Oh, Wow! Look at those great worms!”, but not “eeeek!” Let’s explore and learn to appreciate these lowly creatures and learn to love them.
There are approximately 2500 different species of earthworms, and each live at a specific soil level. This fortunate habit means that our soil receives different amounts of nutrients at many levels, not just in the first few feet or so.
How do worms enrich the soil? Worms recycle large pieces of organic matter into micronutrient-rich humus. Humus is then pulled into the soil where it is either ingested by the earthworm or beaks down naturally. Listen to this! An earthworm can process up to 5 times its weight in food per day. In other words…1000 earthworms could munch through lbs of waste per week. Imagine what that can do for your compost heap!
Now, the question becomes, how does this process work? Earthworms consume teeny small soil particles , breaks them down, and then excretes in the form of castings. Here are some statistics that are NOT boring!
Furthermore, These casts are five times richer in available nitrogen, seven times richer in available phosphates, and 11 times richer in available potassium than the surrounding upper few inches of soil. That converts to 10 lbs of nutrients!
Additionally, their burrowing around greatly influences the composition of the soil. Worms also take nutrients from the surface level to deeper down in the soil. As they move around clumps of heavier soil is converted to smaller particles, helping with water absorption, preventing runoff, and aerating the soil. Their teeny little tunnels may create habitats for other anthropoids.
The SeedlingNewsletter of the Northwest Louisiana Master Gardeners Association
An Affiliate of LSU Ag Center
www.lsuagcenter.com/nwlamg
Volume 21 #3
MAY/JUNE 2020
LISTEN…
THE SOUNDS OF SPRING ARE AMONGST US.
REJOICE!
Are you outside yet?
Go there!
Tweet, Tweet, Pitter Patter, Splash, Splash, Whoosh, Whoosh,
Close your eyes, Take a deep breath,
It’s the sound of Spring in Louisiana!
Rejoice for every new day!
Table of Contents:
President’s Report
Mark Wilson’s Report
President’s Report
Lessons from a Louisiana Spring
Plant Sale
Streetlights
Checklist for MG’s
Astilbes
Therapeutic Value of Gardening
Notes and Activities Abound
THE PRESIDENT REPORTS….
Another day another week, and we are still under quarantine. But we must look forward to the day when this is over. And, we must do what we can to keep the virus from spreading.
Trying to keep the yard mowed is almost impossible because of all the rain we have been having. But just stop and think--------come July or August and we will be wondering why we do not have rain so we just have to take it as it comes there is nothing we can do about it. On the bright side the weeds pull up much easier but on the bad side the rain just makes them grow that much faster. I have one plum tree that was blown down but that is all. I have been much luckier than a lot of people in our area. I sure hope that all of our Master Gardeners have not had much damage due to the storms.
We had to shut down the Master Gardener class, cancel the plant sale and now have to cancel LaTour but things could be a lot worse.
Life will move on and we will get back to normal sooner rather than later I hope. All we can do is to keep moving forward just knowing that things will are going to get better.
Just keep your spirit up no getting down in the dumps about all of this and if you need someone to talk to there is a whole bunch of Master Gardeners that you can call and talk to.
So moving forward and thinking of much better times I will close and hope the next letter will be about greater things.
MARK WILSON,
Northwest Louisiana
Master Gardener AG Agent
Reports….
As we continue in these uncertain times, I wish to thank you all for your patience and cooperation. I wish to take this opportunity to answer a few questions concerning the AgCenter and Louisiana Master Gardener program. As of April 23, the governor’s stay at home is in effect until April 30. Many of us expect this to be extended, as we are at a point of “wait and see”. With this being said, the LSU AgCenter is still open and operating in many capacities. I along with my colleagues are still working to help our communities to the best of our ability while keeping proper social distance by working primarily from home. I have spoken with many of you about the future of our operations for the year, and I will share with the rest of you what has been said. As of right now, we are closed down and all programs, activities and meeting associated with LSU, AgCenter, and the Louisiana Master Gardener program are postponed until the April 30th. As the situation unfolds and updates are made available, I will do my best to forward pertinent information along. We must continue to follow the governor’s office and the LSU AgCenter’s orders. Lastly, for those also asking, we are trying to reopen some aspects of the AgCenter back up. The Red River Research Station is still closed and will not be selling tomatoes until AgCenter offices are open to the public once more. The soil testing lab in Baton Rouge is reopening at a reduced capacity and is accepting samples again. As always, if you have any questions at all I am here to help. I do ask that you please email me however as I am only able to get the messages once a week from the office.
LSU AgCenter Regional Horticulture Spec.
Mark A Wilson
Are There Lessons to Be Learned from a Northwest Louisiana Spring?
One day the sky is clear blue. Not a cloud in sight! A slight breeze flutters newly born leaves, and they tremble and dance to the music of the wind. The next minute or two, in comes a weather front and we learn to mind our manners around Mother Nature. And now, we don summer clothes. It is hot again!
Spring Teaches Us A Lot About Life
Humility: Daffodils, as beautiful as they are, bow down their heads, expressing humility They seem to say” I know I am bright, beautiful and desirable, but my true beauty lies in my humility and so I don’t have a haughty stance. I keep my head low and sparkle in my inner beauty.”
Hope: After a severe winter, there were no more leaves left on the Pussy Willow tree. Every tree was the same…no leaves. The wind and rain, even in a southern winter, is bitter, yet trees stood strong through it all. But, look-tiny green buds have peeked out and leaflets have appeared and are covering the tree now.
When this happens each year, it gives us a lift…a hope…that even if we don’t escape tough times; we live through them and find that the best times in life are yet to be.
Do you hear their song every morning when you walk outside to pick up the paper, or just look around and see the world surrounding you? The lesson I learn from these chirpy birds every morning is that we sing our song too, the song from your soul…whatever it may be on any given morning, it is the Song of your heart.
Don’t forget the soil! Inside that brown and rather a clumpy bit of dirt, living organisms teem with life in microscopic bits; having awakened from winter’s grasp, and beginning to soar with millions of cells collecting, dispersing, changing, and moving. The beginning of a garden must start with healthy microbial soil; where your plants will survive and thrive.
Count yourself lucky, or fortunate, or extremely blessed. Spring bringing rebirth, and renewal teaches us every day to count our blessings, sing our songs, and love this planet which is our teacher.
The Northwest Louisiana Gardeners' spring plant sale is an event that brings hundreds of shoppers to the front lawn of the Randle T. Moore Center with the eager anticipation of a treasure hunt. We try to have garden staples that fit within their comfort zones, while also offering plants that may be new to them. We try to keep up with current trends in the plant world, such as the push now for the use of native plants and the shift from butterfly gardens to pollinator gardens.
The chairs of both the propagation and the plant sale committees work year-round collecting plants from which cuttings can be taken, caring for plants that need a 2-year cycle of growth, and collecting seeds for future use. The committee itself works from October-April, meeting every Tuesday morning for at least 2 hours, doing whatever is needed to ensure that the greenhouse is full to overflowing. In fact, for the last two years, we have had plants at 3 locations, requiring someone at each location to provide almost daily attention to our plants. A big difference this year is that we did not go to our nursery source for cuttings as we have in the past. Every plant in the greenhouse, plus at the other two locations, was grown by the propagation committee, and we estimate that we had close to 1,000 plants for this year's sale.
Then came COVID-19, and with it the uncertainty and likelihood that we would not be allowed to get our plants to the public. There was no one on the committee who was willing to see the plants in which we had invested so much of our time and effort waste away in the greenhouse, so even knowing our sale would likely be cancelled, the waterers continued watering, the pruners continues pruning, the sprayer continued spraying, all the time we wondered what would come of our plants. It was decided that we would have to trust the goodness of the plant lovers in our area to give our plants a good home. We had already marked everything, so a poster was made, showing the prices of each plant. The greenhouse was left unlocked after a notice went out to all NWLAMG members. it stayed unlocked for three days, and response was good, so it was decided to extend the sale. As response grew and non-members responded to Facebook invites, the greenhouse stayed open for about 10 days. after that time, we decided to shut it down.
It's a hard thing to know what to do in a situation like this. We knew that any money raised would be better that none. Our initial deposit is considerably less than our normal deposit after the plant sale. I am not discouraged, though. We knew that opening the greenhouse was risky and took that risk rather than seeing our plants wither and die. I thank the Master Gardeners for your support. Many of you purchased and brought people with you who also purchased. This is one for the books. and of course, it rained April 4 anyway, so there is that. And believe it or not, the committees are already planning and working on next year's sale. As is said, "To plant a garden is to believe in the future."
John Oswalt
ARE STREETLIGHTS AND GARDEN LIGHTING BAD FOR PLANTS?
Lighting a garden after darkness has fallen brings a magical dimension to the garden bed and the plants you have placed there. As dusk dark draws near, and little lights begin to twinkle amongst your flowers and shrubs, the garden seems to be different, and enchanting.
Don’t you just love the feeling it adds to nighttime, and the way plantings glow?
Lighting is everywhere in a city. Shrubs and trees are planted alongcity streets where there is always light, night and day. Have you ever wondered how these plats have leaned to live without darkness? Let’s talk about it!
Plants have evolved to sense and respond to changes in daylight as seasons shift, except those that grow at the equator, of course. Or those who are under normal as well as artificial light almost 24 hours a day.
Are Streetlights Bad for Plants? Unfortunately, the answer is YES. Deciduous green plants, particularly trees, measure light and detect when days are getting shorter and longer. The changes in temperature and daylight hours prompt the plant to grow dormant or wake up in the Spring. Alas, streetlights can disrupt this important process. Next fall, take notice of trees under streetlamps. The leaves right under the light tend to stay green longer than the rest of the tree. This delayed timing is harmful because the tree is unable to take up the resources from those leaves before they die. Instead, they simply go straight from green and living to dead at the first real frost.
Some garden owners will have automatic switches that allow artificial lighting to come on at dusk-dark, but which are also automatically turned off around bedtime each night. You-the garden owner has the delight to view a garden alit at night, but also the ability to keep regular hours for the both of you by using automatic switches. If you have this feature, use it to restore nature’s rest to your plants
A MASTER GARDENER’S CHECKLIST FOR EARLY SUMMER GARDENING ACTIVITIES
Sigh relief? Whew. Spring gardening is over time to relax in the garden. Bring on the liquid refreshments, settle down in the shade in your favorite lawn chair, and admire your work! Really?
What? You must live on another planet! Early summer in Northwest Louisiana can be a busy time in the garden! The weather is now reliably warm it’s rather hot in the afternoons. Your springtime efforts are producing beautiful blooms, and almost everywhere, the garden is looking good. Your emphasis now isn’t on planting-it’s centered on maintaining and improving plants of all kinds. Bugs are probably already getting great meals from your tender plants. So, let’s re-visit gardening chores that just will NOT be ignored, and examine your checklist for early summer. (Yeah, I understand your pain. I feel it too.)
MEET THE BEETLES: Get your MG Handbook, and identify the bugs that are eating their hearts out in your garden. First Identify who they are. Then apply your favorite pest control product.
RID YOUR GARDEN OF SLUGS AND SNAILS: Depending on whether you prefer OMRI or regular pesticides, begin treatment as soon as they infect your plants.
KEEP UP YOUR WATERING SCHEDULE: High temperatures mean more watering, especially newly planted summer flowers and shrubs.
TRIM PLANTS AND DEBUD AS NEEDED TO PROMOTE BEST GROWTH HABITS: Selective pruning now prevents problems later, and also opens up plants for better air distribution in garden beds.
SUN/SHADE NEEDS: As the sun travels across the sky, take note to provide the best watering and shading necessary for hot weather upcoming.
PRUNE/DEADHEAD: Keep up with this little chore. Plants will reward you with more blooms and foliage.
KEEP MONITORING WATER NEEDS: (Wait! Haven’t we already covered this? Yup. Do it again.) Check mulch. Does another layer need to be added? That first layer may be tired and need to be replenished. Mulch protects tender roots and encourages growth, even in hot weather.
ASTILBES
At the back of the pollinator garden, along the wall of the Randle Moore building, I planted 12 Astilbes bulbs, both pink and purple. Most had already come up when I checked April 12.
Astilbes also known as Meadow sweet and False Spirea produce a tall, fluffy blossom. To my mind the pink ones look a lot like cotton candy. They’re a great pollinator plant bringing in both butterflies and bees. Each plant will only bloom for a couple of weeks, but because there are numerous varieties all blooming at different times, it’s possible to have blooms from late spring till frost. They need phosphorous to bloom and a good dose of 5-10-5 fertilizer sprinkled around the soil twice each season will keep them blooming longer and stronger. I prefer to use Super Bloom from Lowes, but any high phosphorous fertilizer will probably work just as well.
Once started, Astilbes are pretty much trouble free. Few pests bother them, and they aren’t prone to disease. The one thing you must be aware of is their need for water, and partial shade. This is the one tricky part about raising Astilbes. They’re usually listed as a shade plant because they can’t take heat or intense sunlight, as we have here in August and September. But to look their best, they need as much sun as they can get, so my suggestion is to plant your Astilbes in a spot that gets 6 hours of morning sun.
“You’re also going to have to be aware of its water needs. It does love water and will even survive a short drowning in the spring. I know this for certain because I have mine planted with my other high-water plants in the swampy part of my yard, and for several weeks this spring the dormant bulbs were under water. (I wouldn’t recommend this, however. The only reason it happened was because I couldn’t get out in my yard.) Astilbes especially needs water in late summer. If allowed to dry out they will die guaranteed. Some books say that if you give Astilbes extra water during the summer they can be kept in full sun. However, I have found with my Astilbes that the leaves will burn on especially hot, dry days even if you give them plenty of water. Putting mulch around the base of the plant. Will also help hold in the moisture as well as keep the roots cool.
Hellebores make a great companion plant for Astilbes since they have similar water and shade needs, and since we had a lot of extra Hellebores in the greenhouse this year, I planted some next to the Astilbes. (Though the Hellebores like water, they will rot in wet soil so give the Hellebores a slight elevation or well-draining soil when planting them next to the Astilbes.) Hope I have helped someone Mike
THE THERAPEUTIC VALUE OF YOUR GARDEN IN TRYING TIMES.
AS THIS STORY IS BEING WRITTEN I wondered- if someone had told you that you must self-isolate in-home/garden for the next few weeks or even months, how did you regard the prospect? The solitary life does not have to be a bad thing, does it? Many people think they are at their wits end. Gardeners view this notion not as an opportunity, but a real challenge to make a setback in plans a time for new gardening adventures.
Truly, we have been given a BIG gift. Time is a precious commodity to all of us. If the isolation ban has been lifted by the time you are reading today, you will still be in that place where you remember the seriousness of the moment. But it is in this now that we are tested and quarantined with weeds, mis-planted flowers, more weeds, water issues (Too much! Too little!), and unfinished plans. Look around you. Spring is HERE. Mother Nature cares not one whit about a pandemic. You hold the keys to the garden you want. So, smile at the flowers. They are smiling at you too. Relish the worms. They work you underground. Laugh in the rain. Really! How long has it been since you enjoyed splashing in a big puddle?
What about long put off projects such as where the lawn meets pavement? Would you use a sharp knife and do it by hand? Or, do you consider the electric or gas garden tools wanting to be sharpened, cleaned and restored before attacking this chore? Should you reclaim original garden plans (if you can find them) and bring back to your garden today the original intent? So many opportunities! Your choice.
Medical professionals tell us that gardening calms our soul. We are also told that our emotional wellbeing is being dealt with while pulling weeds. In times where uncertainty is the rule, one thing is true. Plants are our soulmates. The physical rewards we receive from them far outweigh the intrinsic reward we derive from digging and planting. This place-the garden where we revive our mind, our heart our soul is where the action is.
Needing Volunteer/Education Hours?
Listed below are terrific opportunities to earn them!
Maintaining the Grounds at the Randle T Moore Center
This project is ongoing. Regular workdays are scheduled during the year and will be announced at regular Master Gardener Meetings. Also, watch your email for notifications. Suzanne Shriver is your contact. Her phone number is 318 286 4454 (cell). Susan also alerts us by email when she is planning workdays. Spring is on the way!
Phone DUTY:
Did you forget? Every Master Gardener is required to man to phones at the Carriage House:
This is a requirement clearly stated and understood by all Master Gardeners in good standing (i.e. Paying dues, attending meetings, participating in Master Gardener projects). Master Gardener Linda Hammond, reports that any master gardener who needs hours or who wants a day to chat up other gardeners can do so by serving phone duty in the MG Office. She says someone is needed every Thursday & Friday from 10-1, on Monday from 8-12, on Tuesday, 9-12 or Wednesday 1-4.
Remember this new policy…The above jobs are interchangeable. Both are critically needed, and only YOU can make it happen!
A Little bit of THIS, And, a Little bit of THAT!
Near-by Events, News, Tidbits, and More
Here is a tidbit from the new owners of one of our all-time and oldest nurseries in Shreveport, Aikens Nursery.:
The nursery has new owners, Jennifer and Mark. Upon purchasing the nursery, they commenced a general cleanup of the far reaches of the nursery-which led to an interesting discovery. There is a crepe myrtle tree there which, upon research, believe that it is the oldest crepe myrtle in Shreveport, and perhaps Louisiana. It is a magnificent tree, with a trunk so big it would take several people to tough hands hugging it. Go by Aikens when you have a tree and take pictures. It is healthy and beautiful. Here is an image…but you need to go view it yourself! Neglected all these years, it has flourished and is still alive and growing! Come and see for yourself!
Because of the Corona Virus pandemic, our governor has called on us to self-isolate, to go forward with caution, and to take the recovery of our lives personally. In this perilous moment, you can make a difference for you, for your family, your home, your city. Take care of yourself. Take care of your family, Take care of others. There is nothing more important than choosing the path that leads you into your garden and through these perilous days.
Needing Volunteer/Education Hours?
Listed below are terrific opportunities to earn them!
Maintaining the Grounds at the Randle T Moore Center
This project is ongoing. Regular workdays are scheduled during the year and will be announced at regular Master Gardener Meetings. Also, watch your email for notifications. See Suzanne Shriver or call her Suzanne Shrive is your contact. Her phone number is 318 286 4454 (cell). Susan also alerts us by email when she is planning workdays. Spring is on the way!
Phone DUTY:
Did you forget? Every Master Gardener is required to man to phones at the Carriage House:
This is a requirement clearly stated and understood by all Master Gardeners in good standing (i.e. Paying dues, attending meetings, participating in Master Gardener projects). Master Gardener Linda Hammond, reports that any master gardener who needs hours or who wants a day to chat up other gardeners can do so by serving phone duty in the MG Office. She says someone is needed every Thursday & Friday from 10-1, on Monday from 8-12, on Tuesday, 9-12 or Wednesday 1-4.
Remember this new policy…The above jobs are interchangeable. Both are critically needed, and only YOU can make it happen!
THANKS TO ALL OF YOU WONDERFUL MASTER GARDENERS FOR READING THIS ISSUE OF THE SEEDLING NEWSLETTER CLEAR TO THE END!
This editor appreciates YOU and invites you to send me your garden stories. I will publish them! True stories from you always generate interest and enthusiasm.
Also, in my state of ‘forgetfulness’, if you have sent me a story, and it wasn’t printed, PLEASE LET ME KNOW.
I WILL APOLOGIZE PROFUSELY AND, PRINT IT IMMEDIATELY!!!!

The SeedlingNewsletter of the Northwest Louisiana Master Gardeners Association
An Affiliate of LSU Ag Center
www.lsuagcenter.com/nwlamg
Volume 21 #1
January 2020
CHEERS TO A NEW YEAR.
ANOTHER CHANCE TO GET IT RIGHT!
Table of Contents:
The President’s Report.
NWLA Mark Wilson- Ag Agent’s Report.
International Wetlands Day
Summer Butterflies (yup…think summer now!)
Winter Gardening
January-A Great Way to Think Spring
WinterBirds of Louisiana Birdwatchers Get it On
A Little Bit of This & A Little Bit of That!
THE PRESIDENT REPORTS….
I just want to say thank you for the opportunity to be your President for the next 2 years. With everyone’s help I hope I will do a good job. The holidays are over and the new year is here. Winter is here so the days will be getting longer so I guess its time to start thinking about the new things that will be growing in our gardens. But as I sit here writing this I am waiting on my daughter to come over because we will be taking down the rest of my Christmas decorations. Just don’t know why I can’t leave them up for this next Christmas but she says no.
Then I look at my yard and it needs to be mowed, the winter weeds and grasses are growing very good. But I don’t think that is going to happen just now because it is cold outside. Oh well, they will be there for another day.
Our new Master Gardener class is just around the corner. I surely hope we get some good students that will stay around and become very good friends and helpers. Its always a good feeling when we are getting ready to begin the new class but it also a good feeling when it is about to be over. I hope all of our members now will take some of the new members under your wing and show them what to do to become a good Master Gardener. So with all of that I will close and get this to Lou. I will try to get it done sooner the next. Warm weather will be here soon and we can all get outside and have everything looking great. Sadie
MARK WILSON,
Northwest Louisiana
Master Gardener Agent
Reports….
Mowing may be done but your lawn may still need you!
As winter arrives and we move into cooler months this is a great time to keep an eye on your lawn and garden. Issues such as “brown patch” in your lawn can easily creep up on you and do a large amount of damage before you notice. Brown patch disease is caused by a fungus that attacks the leaf blade of your lawn close to the soil line. As with many fungi, brown patch thrives in warm moist environments. This issue is seen most often in wet falls or springs with extended periods of humidity or when excessive irrigation is used while the day temperature is below 80°F. Luckily there are several ways to combat this issue. Reduce your free Nitrogen in the soil by reducing the amount of fertilizer being put out, reducing the water if you are irrigating, or with chemical application. The most effective method being the use of a labeled fungicide. Almost all lawn fungicides are labeled for brown or large patch. For a complete list see the Louisiana Lawn BMP publication.
A few of the active ingredients to look for are: maneb, myclobutanil, PCNB, propiconazole, thiophanate-methyl, or triadimefon. As always please read the label of the product you choose and follow its directions.
Mark A Wilson
Northwest Regional Horticulture Specialist
INTERNATIONAL WETLANDS DAY
World Wetlands Day in Louisiana
Is February 2, 2020
The second day of February each year is World Wetlands Day. It is proving to be a time for all environmentalists and nature lovers to raise global awareness about the vital role of wetlands for people and our planet. This day also marks the date of the adoption of the Convention on Wetlands on 2 February 1971, in the Iranian city of Ramsar on the shores of the Caspian Sea.
What are wetlands? Are there any near us? Why is this discussion important?
Wetlands are land areas that are saturated or flooded with water either permanently or seasonally. Inland wetlands include marshes, ponds, lakes, rivers, floodplains, and swamps.
Coastal wetlands include saltwater marshes, estuaries, mangroves, lagoons, and even coral reefs. Fish ponds, rice paddies, and salt pans are human-made wetlands. Approximately half the Nation's original wetland habitats have been lost over the past 200 years.
Caddo Lake in Morringsport, LA is a beautiful example of a threatened wetland. If you want to view a wetland and learn more about the future of them in Louisiana, take a swamp boat ride on Caddo Lake which goes deep into the swamp, where these wetlands abound. We can’t let this swamp disappear! Find one of those mild winter days, gather some friends around, and call Phone: (903) 679-3020 to set up a tour.
Climate change is one of the most pressing problems facing humanity and our planet. Wetlands and Climate Change, the theme to celebrate World Wetlands Day in 2019 drew attention to the vital role of wetlands as a natural solution to cope with climate change.
While Louisiana has 40% of the country's wetlands, over 90% of the total coastal marsh loss in the continental U.S. occurs in our state. It is estimated that between 25-35 square miles of wetlands are lost each year and more than 1,000,000 acres have been lost since the turn of the century.
How can Northwest Louisiana Master Gardeners become involved? (That’s YOU, and me too, by the way!)
The wetlands that protect southern Louisiana, including New Orleans, is a powerful visual representation of just how much land has been lost in the last 200 years.
SUMMER BUTTERFLIES
A Look Ahead
By Mike Livingston
Summer is still six months away but I’m going to give you a glimpse of summer by giving you a look of several of the butterflies found in our butterfly garden (at the Randal T Moore Building). One of the most beautiful is the Pipevine Swallowtail.
This is the original Beauty and the Beast butterfly. It starts out as a cinnamon-colored egg, and within 3-6 days, depending upon the heat transforms into a hideous all-black caterpillar with two rows of orange spikes down its back and long horn-like antenna. That ugly look is warning to predators that this caterpillar is loaded with poison from eating pipevines and is dangerous to eat. Once it has gorged itself on enough pipevine to reach maximum size, it will attach itself to something that allows it to hang safely. Then a hard-shelled chrysalis will form over it and in about two weeks, Beauty will emerge: a nearly all-black butterfly with shimmering blue-green lower inner wings crossed by a single set of white spots and on the outside a single row of orange spots on the hind wing.
Another visitor which isn’t quite as common, but which you should find in our butterfly garden if you look enough is the Giant Swallowtail. This is our largest domestic butterfly, about the size of the average man’s hand. I call it the ‘mouth butterfly’ because the pattern of yellow spots on its open black wings appears to me just like a slightly open mouth. In Florida, this butterfly is hated because its hosts are citrus plants and it does considerable damage to the orange crop. Up here, however, it feeds on Rue and a tree that’s every bit as ugly as the Pipevine swallowtail, the Prickly ash.”
A third butterfly which I know you’ll see is the Gulf Fritillary. This is probably the most common butterfly we have in the garden because of its love for snacking on its host plant: passion vines. This is an orange butterfly with thin black lines on its open wings that a lot of people probably mistake for a Monarch. And with their wings open, they are easy to mistake for a Monarch. This is by design. The monarch, like the Pipevine, is loaded with toxic juices that it gets from devouring Butterfly weed. (The various species of Asclepius). And birds are wary of trying to snack Fritillaries for fear of getting a stomachache that no amount of Pepto Bismol is going to cure. However, if you wait till the butterfly closes its wings you can easily recognize the Gulf Fritillary because it has numerous irregular spots of white interspersed among orange whereas the Monarch has orange wings with thin black lines and a border of black with small white dots.
In the spring the Monarch is easy to recognize because the Gulf Fritillary is a hot weather butterfly which only emerges in July and reaches its peak in August whereas the Monarch will appear in early spring when the temperature gets up to 55 and they’re on their way further north and you’ll see them again in fall as they head for Mexico.
The butterflies that you’ll see next are the various species of Sulphur butterflies that come to eat legumes, members of the pea family, like my Candlestick Senna, but also clovers. Most Sulphur’s are medium sized butterflies in various shades of yellow through orange. They’re also the most common butterflies in the US and so you’re likely to spot some wherever you go.
Another butterfly which you’ll spot in the garden is the Black Swallowtail. It’s often mistaken for the Pipevine Swallowtail and this again is by design. Because it feeds on Fennel and other members of the carrot family it would be quite a delicious tasting to birds. However, because it looks like a Pipevine Swallowtail, birds leave it alone. To a human, it’s fairly easy to tell the difference between a black and a Pipevine because as mentioned above, the Pipevine is almost solid back with its only yellow being that SINGLE row of Yellow spots on its outer wing. Whereas the Black will have a double row of yellow spots on the outer wing and a single row of yellow spots slanting downward in a V shape on the inner wings. Males will generally have more yellow on their inner wings, however, the V shape will never be closed by a top-line into a mouth as it is in Giant. The caterpillar also looks different than the Pipevine. Instead of those ugly red spikes and horns, it is a rather beautiful caterpillar with green and black bands.
The final butterfly which you’ll occasionally see is the Tiger Swallowtail. I call this butterfly the ‘Puddler’ because it will often be massed around a mud puddle sucking up salts that have risen from the soil and which it will later transfer to the female to help with her egg manufacture. This is also one of the butterflies which you’ll find around rotten fruit. And even manure! They don’t care where they get their nutrients. Tigers are handsome, easily identified large yellow butterflies with black strips and a blue border along their lower wings. Around here, their main hosts are either Red Bay or Black Cherry.
That’s all for now. Hope you’ll come out and see or work our garden.
Mike has described them-Now, can you look at the lovely creatures and NAME them?
WINTER GARDENING
A WELL-PLANNED GARDEN SHOULD NOT BE EMPTY OF COLOR OR INTEREST IN THE WINTER MONTHS, AND WORKING OUTDOORS CAN BE A REAL PLEASURE.
There are always jobs to be done in the garden, and tackling them now when the earth is still, relieves the pressure in the spring. ( I do feel pressure when our planet awakens and a soft breeze blows quietly through the garden, don’t you? I want to get my hands in the dirt!)
Yet, there are sometimes when there is no choice but to become an armchair gardener. Remind yourself…it’s okay to be still and quiet. Winter is the time to scan gardening books and plant encyclopedias for ideas, perhaps plan minor improvements or even totally redesign your garden, and of course, drag out seed catalogs and fill in your seed order—some gardeners I know think this is a wonderful way to spend a cold winter evening!
Wintertime is also a good time to test your soil. The Louisiana Ag Center makes it easy to find out all you need to know about your garden soil. Pick up a soil test kit at the Master Gardener Office.
That's right, we’re only at the beginning of January - wet, cold and even with a few snowflakes at times - but let’s review this list of at least 10 things you can do now if you have a severe case of cabin fever. Of course, for the outdoor activities, you might have to wait for a decent day but one will come. That is one of the nicer things about gardening in Louisiana - no matter how nasty the weather gets, there will be a more pleasant day just around the corner. You can bet on that!
1) Planning, Shopping & Ordering – Many of us receive that first seed catalog the day after Christmas and they will continue arriving steadily during the month. I love these catalogs - what gardener doesn't? - and they really get you excited about spring. Now is the perfect time to plan your garden. If you haven't discovered the joys of mail-order, I urge you to order that plant you’ve been drooling about. I find it thrilling to get a live plant in the mail. Some of my favorite mail-order companies are White Flower Farm, Chamblees Nursery, Wayside Gardens, Jackson and Perkins, Burpee’s Seeds. You simply can't find the wide selections in a local nursery that you do from these places. The REAL drawback these days is exorbitant shipping prices. I admit they have reduced my mail-order spending habits quite a bit. The other concern of mail-order is that our local nurseries are really outstanding need to be supported! Often, if you have a special plant in mind, they can be ordered for you.)
A day trip to Forest Hills Nurseries below Alexandria along Hwy 1 is not only a lovely road trip, but is a showcase for an assortment of plants, nurseries, and respected gardening sites making the trip worthwhile. (And, BONUS! you get to stop at Lea’s Sandwich Shop for a ham sandwich, and homemade apple pie!)
2) Planting - Do you have daffodils that you forgot to plant in December? If so, plant them as soon as possible. Some people prefer planting daffodils in January. As long as the bulbs are still firm, they are good and they will come up in the spring - they may not bloom like they would if planted earlier, but they will there for next year.
This is also an excellent time to plant trees and shrubs. The ground can be very wet in January but if you can find a dry time to do it, get them in the ground. (Due to climate change our winter weather is not so dependably wet these days.) Roots of these newly planted items will begin to grow during the remainder of the winter and they will get a head start on the stressful heat and drought of summer.
3) Clean up planting beds and reapply mulch. This is what I did a few weeks ago. I was driving through a sub-division and saw a tremendous mountain of pine needles right there on the street. I have a confession to make - pine needles get me very excited. I was back in a flash with my rake to get them before the trash collectors came by. Seriously, who would throw away pine needles??? The mind reels.
If weather permits, beds can also be prepared for plants, including vegetables. Cover crops, planted in the fall, can be turned under.
4) Clean and sharpen tools. Okay, I HATE this task. But now is a good time to do it! Or take them to Ashley’s Saw Shop. They will not clean them, but they come out very SHARP.
5) Caring for our feathered friends. Winter is a stressful time for wildlife and this includes birds. Providing well-stocked bird feeders is a must and even more important is providing water. I bought a heating element to go in our bird bath so the birds can be assured a water source even in freezing weather. This is also a good time to clean bird feeders.
6) Apply dormant oils. If you have bugs or diseases in your garden and you want to get a head start, consider applying dormant oil (also known as horticultural oil) especially to roses, broadleaf evergreens and fruit trees. The oils are effective and ecologically friendly. They work by smothering the insects that are hiding out for the winter. Do not apply when temperatures are below freezing and apply when temperatures will be above freezing for at least 24 hours.
7) Take dormant cuttings of shrubs and roses. Cuttings can be taken, rooted and placed in a sheltered location, away from winds and sun. They should root by early spring.
8) Prune fruit trees. A subject I know little about but there are other master gardeners (and our best agent, Mark Wilson) who understand pruning. I'm doing my research and will have more information another time).
9) Start seeds indoors. If you have a place in your home that is suitable for starting seeds, you can set up lights and start your vegetable and flower seeds indoors and have them ready in time to plant in the spring. This is an inexpensive, optimal way to begin spring and summer planting.
10) Start a gardening journal or better yet, a blog! - I can't stress the importance of record keeping. A journal can be very rewarding and full of useful information to you in the future. And if you'd rather do it online and publicly, start a blog. Take photos of everything. In years to come, you will look at your older photos and be amazed at how things have changed!
Soil sample boxes are available in the Master Gardener Office. Simply follow directions for gathering a sample from different parts of your garden and ship it to LSU Ag Center office. When the results are returned, you will find more information than you may want to know including the pH of your piece of ground.
Do you grow winter flowers? Winter-flowering plants are designed to last our Louisiana winters, but every now and again, we get a freezing blast from ‘up north and even the hardiest of plants will ‘give up the ghost’! Consider protecting low-growing winter plants and vegetables with a cloche (a shield that can be contrived by covering plants with plastic, or polyethylene atop wire hoops. Or, simply toss a lightweight covering atop the plants. Then, secure the corners so north winds will not catch a blast and uncover everything. It is most distressing after a cold, winter’s night to come outside and find the coverings gone-blown away with precious plants shivering and shrunken.
JANUARY IS A GREAT TIME TO
THINK SPRING!
PLUS…
THE SPRING MASTER GARDENER PLANT SALE IS
AMONGST US!
Greeting, friends. We have some beautiful plants going in the greenhouse, like Blue Potato Bush, red Bottle Brush, coral Porterweed, purple Bougainvillea, and orange Lion's Ear/Paw/Tail.(your choice.) We're working on some seeds for some other plants that will be a hit in the plant sale if we can coax them to germinate, as well as other rootings that we're watching closely. We're not purchasing as much from the propagation nursery as we did last time, and that's where you come in. Every Master Gardener needs to make it a point to donate a set of plants that can go into the sale. I have tried, but I can't think of a reason that we can't have full participation at the sale. I mean, it's what we do. Please grow something to put in the sale. How about some veggie seedlings? We're always light on tomatoes and onions, and I've not seen okra there for awhile. You know what folks will buy. I hope we can count on your personal plant donation. I certainly don't mind selling from the ground because we run out of table space! Thanks!
John Oswalt, the Plant Sale Committee Chairman Says:
Let’s all help John to make this sale profitable and perfect for every gardener who wants healthy Master Gardener Grown plants for their garden!. I see you out there, nodding your head up and down!
Winter birds of Louisiana
(December, January, February)
Winter is the best season for backyard birding. Supplementing the usual group of year-round residents are migrants such as blue-headed vireo, ruby-crowned kinglet, cedar waxwing, orange-crowned warbler, yellow-rumped warbler, American robin, American goldfinch, pine siskin, and white-throated sparrow, among others. American goldfinches usually don’t show up at seed feeders until Thanksgiving or so, after the sweetgum seed—their favorite fall food source—has played out in the wild. Use black-oil sunflower and/or thistle seed for the goldfinches. The smaller millet-type seed will attract white-throated sparrow, along with other wintering sparrows, such as song sparrow, swamp sparrow, or even fox sparrow, that might occasionally show up at feeders.
Winter fruit sources are vitally important for attracting species such as woodpeckers, eastern bluebird, hermit thrush, American robin, cedar waxwing, yellow-rumped warbler, and white-throated sparrow, to mention a few. Most bird gardeners use various varieties of hollies, but hackberry is the undisputed winter fruit champion.
Next to the peak migrational months of April and October, it is the winter months which proves most attractive to Louisiana bird watchers, for there are more birds per unit area in the state in winter than at any other time. The weather during winter is at its best: cool, moist, often sunny, and only occasionally punctuated by cold snaps created by the passage of Pacific or Arctic fronts. Birds present during this time of the year originate from several different seasonal groups including year-round residents, neotropical migrants, and stray migrants from the western and southwestern U.S. and Mexico, along with miscellaneous “lingering” neotropical migrants from the eastern U.S. Raptors such as red-tailed hawk, sharp-shinned hawk, and northern harrier are also abundant throughout the same agricultural habitats during winter. Many wading bird and shorebird species also choose to remain in Louisiana at this time. Especially abundant (again, in agricultural areas) are species such as great blue heron, great egret, white ibis, white-faced ibis, roseate spoonbill, black-bellied plover, black-necked stilt, American avocet, greater yellowlegs, lesser yellowlegs, western sandpiper, least sandpiper, dunlin, long-billed dowitcher, and Wilson’s snipe. Also abundantly present in agricultural habitats in the southern half of the state are species like pied-billed grebe, sora, American coot, laughing gull, ring-billed gull, gull-billed tern, and Forster’s tern.
BIRD FESTIVALS IN LOUISIANA: Pre-Great Louisiana BirdFest Photo excursion: March 29, 2020, St Tammany La Northlake Nature Center, 23135 US -190
Great Louisiana Birdfest in St Tammany, LA April 5-8, 2020.
Catch a glance at rare and beautiful birds, right in our own backyard! Visit the amazing and beautiful Red River Wildlife Refuge in Bossier Parish Address: 150 Eagle Bend Point, Bossier City, LA 71112, Phone: 318 742 1219
A Little bit of THIS, And, a Little bit of THAT!
Events, News, Tidbits, and More
REGENERATIVE AGRICULTURE
Here is an interesting and provocative quote from the Saturday, December 21, 2019, New York Times that engenders a thoughtful discussion, when we consider how and what we eat is connected to everything and everybody.
‘Regenerative Agriculture’. What is it? Why does it matter?
“Regenerative Agriculture is a system of farming principles and practices that increases biodiversity, enrich soils, improves watersheds, and enhances ecosystem services. Regenerative Agriculture aims to capture carbon in soil and aboveground biomass, reversing current global trends of increased atmospheric accumulation.”
When we recognize that our planet is warming, and Louisiana agriculture (our food system) has a role in this event, we master gardeners, connected directly to the Louisiana Department of Agriculture, should be more mindful of the way we garden, consider our food consumption habits as they relate to the environment. Please let me know if you are interested in this discussion, and would like to continue our understanding of the issue.
This is a heavy thought to conclude today’s Seedling Newsletter. But, it bears attention, even if you think you are only one individual, one vote, one life. One becomes many when we unite to solve a problem together.
ONE MORE VERY IMPORTANT THING!
Our January 8th Master Gardener Meeting is very special. At this meeting we will have special honorees attending! The Grants Committee headed by Michele Wiener will introduce the recipients of a grant award/check. Each grant recipient will discuss their grant request and how they will use their funds to enhance, enrich, and make more productive the special gardening needs in their neighborhood. This year the goal of each recipient is very diverse. Here is your opportunity to see your money at work in communities near you.
Eighteen (18) applications were submitted in 2019. You will have an opportunity to meet, greet and understand how Northwest Louisiana Master Gardener funds will enrich and grow the gardening communities in Shreveport/Bossier, Desoto and Red River Parishes.
.
Needing Volunteer/Education Hours?
Listed below are terrific opportunities to earn them!
Maintaining the Grounds at the Randle T Moore Center
This project is ongoing. Regular workdays are scheduled during the year and will be announced at regular Master Gardener Meetings. Also, watch your email for notifications. See Suzanne Shriver or call her Suzanne Shrive is your contact. Her phone number is 318 286 4454 (cell). Susan also alerts us by emails when she is planning workdays. Spring is on the way!
Phone DUTY:
Did you forget? Every Master Gardener is required to man to phones at the Carriage House:
This is a requirement clearly stated and understood by all Master Gardeners in good standing (i.e. Paying dues, attending meetings, participating in Master Gardener projects). Master Gardener Linda Hammond, reports that any master gardener who needs hours or who wants a day to chat up other gardeners can do so by serving phone duty in the MG Office. She says someone is needed every Thursday & Friday from 10-1, on Monday from 8-12, on Tuesday, 9-12 or Wednesday 1-4.
Remember this new policy…The above jobs are interchangable. Both are critically needed, and only YOU can make it happen!
WISHING TO ALL OF YOU
A HAPPY 2020 WHEREVER YOU ARE, WHEREVER YOU GO, WHEREVER YOU GARDEN!
May this Garden be the one you’ve always wanted!
Newsletters wouldn’t matter at all
If there weren’t people at the other end of them.
THANKS FOR BEING HERE!
An Affiliate of LSU Ag Center
www.lsuagcenter.com/nwlamg
Volume 21 #1
January 2020
CHEERS TO A NEW YEAR.
ANOTHER CHANCE TO GET IT RIGHT!
Table of Contents:
The President’s Report.
NWLA Mark Wilson- Ag Agent’s Report.
International Wetlands Day
Summer Butterflies (yup…think summer now!)
Winter Gardening
January-A Great Way to Think Spring
WinterBirds of Louisiana Birdwatchers Get it On
A Little Bit of This & A Little Bit of That!
THE PRESIDENT REPORTS….
I just want to say thank you for the opportunity to be your President for the next 2 years. With everyone’s help I hope I will do a good job. The holidays are over and the new year is here. Winter is here so the days will be getting longer so I guess its time to start thinking about the new things that will be growing in our gardens. But as I sit here writing this I am waiting on my daughter to come over because we will be taking down the rest of my Christmas decorations. Just don’t know why I can’t leave them up for this next Christmas but she says no.
Then I look at my yard and it needs to be mowed, the winter weeds and grasses are growing very good. But I don’t think that is going to happen just now because it is cold outside. Oh well, they will be there for another day.
Our new Master Gardener class is just around the corner. I surely hope we get some good students that will stay around and become very good friends and helpers. Its always a good feeling when we are getting ready to begin the new class but it also a good feeling when it is about to be over. I hope all of our members now will take some of the new members under your wing and show them what to do to become a good Master Gardener. So with all of that I will close and get this to Lou. I will try to get it done sooner the next. Warm weather will be here soon and we can all get outside and have everything looking great. Sadie
MARK WILSON,
Northwest Louisiana
Master Gardener Agent
Reports….
Mowing may be done but your lawn may still need you!
As winter arrives and we move into cooler months this is a great time to keep an eye on your lawn and garden. Issues such as “brown patch” in your lawn can easily creep up on you and do a large amount of damage before you notice. Brown patch disease is caused by a fungus that attacks the leaf blade of your lawn close to the soil line. As with many fungi, brown patch thrives in warm moist environments. This issue is seen most often in wet falls or springs with extended periods of humidity or when excessive irrigation is used while the day temperature is below 80°F. Luckily there are several ways to combat this issue. Reduce your free Nitrogen in the soil by reducing the amount of fertilizer being put out, reducing the water if you are irrigating, or with chemical application. The most effective method being the use of a labeled fungicide. Almost all lawn fungicides are labeled for brown or large patch. For a complete list see the Louisiana Lawn BMP publication.
A few of the active ingredients to look for are: maneb, myclobutanil, PCNB, propiconazole, thiophanate-methyl, or triadimefon. As always please read the label of the product you choose and follow its directions.
Mark A Wilson
Northwest Regional Horticulture Specialist
INTERNATIONAL WETLANDS DAY
World Wetlands Day in Louisiana
Is February 2, 2020
The second day of February each year is World Wetlands Day. It is proving to be a time for all environmentalists and nature lovers to raise global awareness about the vital role of wetlands for people and our planet. This day also marks the date of the adoption of the Convention on Wetlands on 2 February 1971, in the Iranian city of Ramsar on the shores of the Caspian Sea.
What are wetlands? Are there any near us? Why is this discussion important?
Wetlands are land areas that are saturated or flooded with water either permanently or seasonally. Inland wetlands include marshes, ponds, lakes, rivers, floodplains, and swamps.
Coastal wetlands include saltwater marshes, estuaries, mangroves, lagoons, and even coral reefs. Fish ponds, rice paddies, and salt pans are human-made wetlands. Approximately half the Nation's original wetland habitats have been lost over the past 200 years.
Caddo Lake in Morringsport, LA is a beautiful example of a threatened wetland. If you want to view a wetland and learn more about the future of them in Louisiana, take a swamp boat ride on Caddo Lake which goes deep into the swamp, where these wetlands abound. We can’t let this swamp disappear! Find one of those mild winter days, gather some friends around, and call Phone: (903) 679-3020 to set up a tour.
Climate change is one of the most pressing problems facing humanity and our planet. Wetlands and Climate Change, the theme to celebrate World Wetlands Day in 2019 drew attention to the vital role of wetlands as a natural solution to cope with climate change.
While Louisiana has 40% of the country's wetlands, over 90% of the total coastal marsh loss in the continental U.S. occurs in our state. It is estimated that between 25-35 square miles of wetlands are lost each year and more than 1,000,000 acres have been lost since the turn of the century.
How can Northwest Louisiana Master Gardeners become involved? (That’s YOU, and me too, by the way!)
- Visit the Red River Research Station on the Bossier Parkway South, and walk the trails around Lake Caroline. Read and study the literature found there.
- Talk to the people who work there for volunteer opportunities, or to acquire more information about the Research Station, what are the ways normal citizens and master gardeners can help educate our neighbors and friends about this distressing issue of damage to our wetlands.
- Raise public awareness. Share this very disturbing issue on your website, through social media, newsletters or normal interactions with your friends. Write a blog or article for the Shreveport Times or Bossier Tribune. Better yet, write an article for the SEEDLING. (We appreciate Master Gardener Mike Livingston, who, every issue always has something interesting to say about his favorite subject ‘butterflies and what they mean in our environment’!) We are facing a crisis, and only touching the tip of the problem today.
- Inform journalists and other media about how wetlands are important for climate change.
The wetlands that protect southern Louisiana, including New Orleans, is a powerful visual representation of just how much land has been lost in the last 200 years.
SUMMER BUTTERFLIES
A Look Ahead
By Mike Livingston
Summer is still six months away but I’m going to give you a glimpse of summer by giving you a look of several of the butterflies found in our butterfly garden (at the Randal T Moore Building). One of the most beautiful is the Pipevine Swallowtail.
This is the original Beauty and the Beast butterfly. It starts out as a cinnamon-colored egg, and within 3-6 days, depending upon the heat transforms into a hideous all-black caterpillar with two rows of orange spikes down its back and long horn-like antenna. That ugly look is warning to predators that this caterpillar is loaded with poison from eating pipevines and is dangerous to eat. Once it has gorged itself on enough pipevine to reach maximum size, it will attach itself to something that allows it to hang safely. Then a hard-shelled chrysalis will form over it and in about two weeks, Beauty will emerge: a nearly all-black butterfly with shimmering blue-green lower inner wings crossed by a single set of white spots and on the outside a single row of orange spots on the hind wing.
Another visitor which isn’t quite as common, but which you should find in our butterfly garden if you look enough is the Giant Swallowtail. This is our largest domestic butterfly, about the size of the average man’s hand. I call it the ‘mouth butterfly’ because the pattern of yellow spots on its open black wings appears to me just like a slightly open mouth. In Florida, this butterfly is hated because its hosts are citrus plants and it does considerable damage to the orange crop. Up here, however, it feeds on Rue and a tree that’s every bit as ugly as the Pipevine swallowtail, the Prickly ash.”
A third butterfly which I know you’ll see is the Gulf Fritillary. This is probably the most common butterfly we have in the garden because of its love for snacking on its host plant: passion vines. This is an orange butterfly with thin black lines on its open wings that a lot of people probably mistake for a Monarch. And with their wings open, they are easy to mistake for a Monarch. This is by design. The monarch, like the Pipevine, is loaded with toxic juices that it gets from devouring Butterfly weed. (The various species of Asclepius). And birds are wary of trying to snack Fritillaries for fear of getting a stomachache that no amount of Pepto Bismol is going to cure. However, if you wait till the butterfly closes its wings you can easily recognize the Gulf Fritillary because it has numerous irregular spots of white interspersed among orange whereas the Monarch has orange wings with thin black lines and a border of black with small white dots.
In the spring the Monarch is easy to recognize because the Gulf Fritillary is a hot weather butterfly which only emerges in July and reaches its peak in August whereas the Monarch will appear in early spring when the temperature gets up to 55 and they’re on their way further north and you’ll see them again in fall as they head for Mexico.
The butterflies that you’ll see next are the various species of Sulphur butterflies that come to eat legumes, members of the pea family, like my Candlestick Senna, but also clovers. Most Sulphur’s are medium sized butterflies in various shades of yellow through orange. They’re also the most common butterflies in the US and so you’re likely to spot some wherever you go.
Another butterfly which you’ll spot in the garden is the Black Swallowtail. It’s often mistaken for the Pipevine Swallowtail and this again is by design. Because it feeds on Fennel and other members of the carrot family it would be quite a delicious tasting to birds. However, because it looks like a Pipevine Swallowtail, birds leave it alone. To a human, it’s fairly easy to tell the difference between a black and a Pipevine because as mentioned above, the Pipevine is almost solid back with its only yellow being that SINGLE row of Yellow spots on its outer wing. Whereas the Black will have a double row of yellow spots on the outer wing and a single row of yellow spots slanting downward in a V shape on the inner wings. Males will generally have more yellow on their inner wings, however, the V shape will never be closed by a top-line into a mouth as it is in Giant. The caterpillar also looks different than the Pipevine. Instead of those ugly red spikes and horns, it is a rather beautiful caterpillar with green and black bands.
The final butterfly which you’ll occasionally see is the Tiger Swallowtail. I call this butterfly the ‘Puddler’ because it will often be massed around a mud puddle sucking up salts that have risen from the soil and which it will later transfer to the female to help with her egg manufacture. This is also one of the butterflies which you’ll find around rotten fruit. And even manure! They don’t care where they get their nutrients. Tigers are handsome, easily identified large yellow butterflies with black strips and a blue border along their lower wings. Around here, their main hosts are either Red Bay or Black Cherry.
That’s all for now. Hope you’ll come out and see or work our garden.
Mike has described them-Now, can you look at the lovely creatures and NAME them?
WINTER GARDENING
A WELL-PLANNED GARDEN SHOULD NOT BE EMPTY OF COLOR OR INTEREST IN THE WINTER MONTHS, AND WORKING OUTDOORS CAN BE A REAL PLEASURE.
There are always jobs to be done in the garden, and tackling them now when the earth is still, relieves the pressure in the spring. ( I do feel pressure when our planet awakens and a soft breeze blows quietly through the garden, don’t you? I want to get my hands in the dirt!)
Yet, there are sometimes when there is no choice but to become an armchair gardener. Remind yourself…it’s okay to be still and quiet. Winter is the time to scan gardening books and plant encyclopedias for ideas, perhaps plan minor improvements or even totally redesign your garden, and of course, drag out seed catalogs and fill in your seed order—some gardeners I know think this is a wonderful way to spend a cold winter evening!
Wintertime is also a good time to test your soil. The Louisiana Ag Center makes it easy to find out all you need to know about your garden soil. Pick up a soil test kit at the Master Gardener Office.
That's right, we’re only at the beginning of January - wet, cold and even with a few snowflakes at times - but let’s review this list of at least 10 things you can do now if you have a severe case of cabin fever. Of course, for the outdoor activities, you might have to wait for a decent day but one will come. That is one of the nicer things about gardening in Louisiana - no matter how nasty the weather gets, there will be a more pleasant day just around the corner. You can bet on that!
1) Planning, Shopping & Ordering – Many of us receive that first seed catalog the day after Christmas and they will continue arriving steadily during the month. I love these catalogs - what gardener doesn't? - and they really get you excited about spring. Now is the perfect time to plan your garden. If you haven't discovered the joys of mail-order, I urge you to order that plant you’ve been drooling about. I find it thrilling to get a live plant in the mail. Some of my favorite mail-order companies are White Flower Farm, Chamblees Nursery, Wayside Gardens, Jackson and Perkins, Burpee’s Seeds. You simply can't find the wide selections in a local nursery that you do from these places. The REAL drawback these days is exorbitant shipping prices. I admit they have reduced my mail-order spending habits quite a bit. The other concern of mail-order is that our local nurseries are really outstanding need to be supported! Often, if you have a special plant in mind, they can be ordered for you.)
A day trip to Forest Hills Nurseries below Alexandria along Hwy 1 is not only a lovely road trip, but is a showcase for an assortment of plants, nurseries, and respected gardening sites making the trip worthwhile. (And, BONUS! you get to stop at Lea’s Sandwich Shop for a ham sandwich, and homemade apple pie!)
2) Planting - Do you have daffodils that you forgot to plant in December? If so, plant them as soon as possible. Some people prefer planting daffodils in January. As long as the bulbs are still firm, they are good and they will come up in the spring - they may not bloom like they would if planted earlier, but they will there for next year.
This is also an excellent time to plant trees and shrubs. The ground can be very wet in January but if you can find a dry time to do it, get them in the ground. (Due to climate change our winter weather is not so dependably wet these days.) Roots of these newly planted items will begin to grow during the remainder of the winter and they will get a head start on the stressful heat and drought of summer.
3) Clean up planting beds and reapply mulch. This is what I did a few weeks ago. I was driving through a sub-division and saw a tremendous mountain of pine needles right there on the street. I have a confession to make - pine needles get me very excited. I was back in a flash with my rake to get them before the trash collectors came by. Seriously, who would throw away pine needles??? The mind reels.
If weather permits, beds can also be prepared for plants, including vegetables. Cover crops, planted in the fall, can be turned under.
4) Clean and sharpen tools. Okay, I HATE this task. But now is a good time to do it! Or take them to Ashley’s Saw Shop. They will not clean them, but they come out very SHARP.
5) Caring for our feathered friends. Winter is a stressful time for wildlife and this includes birds. Providing well-stocked bird feeders is a must and even more important is providing water. I bought a heating element to go in our bird bath so the birds can be assured a water source even in freezing weather. This is also a good time to clean bird feeders.
6) Apply dormant oils. If you have bugs or diseases in your garden and you want to get a head start, consider applying dormant oil (also known as horticultural oil) especially to roses, broadleaf evergreens and fruit trees. The oils are effective and ecologically friendly. They work by smothering the insects that are hiding out for the winter. Do not apply when temperatures are below freezing and apply when temperatures will be above freezing for at least 24 hours.
7) Take dormant cuttings of shrubs and roses. Cuttings can be taken, rooted and placed in a sheltered location, away from winds and sun. They should root by early spring.
8) Prune fruit trees. A subject I know little about but there are other master gardeners (and our best agent, Mark Wilson) who understand pruning. I'm doing my research and will have more information another time).
9) Start seeds indoors. If you have a place in your home that is suitable for starting seeds, you can set up lights and start your vegetable and flower seeds indoors and have them ready in time to plant in the spring. This is an inexpensive, optimal way to begin spring and summer planting.
10) Start a gardening journal or better yet, a blog! - I can't stress the importance of record keeping. A journal can be very rewarding and full of useful information to you in the future. And if you'd rather do it online and publicly, start a blog. Take photos of everything. In years to come, you will look at your older photos and be amazed at how things have changed!
Soil sample boxes are available in the Master Gardener Office. Simply follow directions for gathering a sample from different parts of your garden and ship it to LSU Ag Center office. When the results are returned, you will find more information than you may want to know including the pH of your piece of ground.
Do you grow winter flowers? Winter-flowering plants are designed to last our Louisiana winters, but every now and again, we get a freezing blast from ‘up north and even the hardiest of plants will ‘give up the ghost’! Consider protecting low-growing winter plants and vegetables with a cloche (a shield that can be contrived by covering plants with plastic, or polyethylene atop wire hoops. Or, simply toss a lightweight covering atop the plants. Then, secure the corners so north winds will not catch a blast and uncover everything. It is most distressing after a cold, winter’s night to come outside and find the coverings gone-blown away with precious plants shivering and shrunken.
JANUARY IS A GREAT TIME TO
THINK SPRING!
PLUS…
THE SPRING MASTER GARDENER PLANT SALE IS
AMONGST US!
Greeting, friends. We have some beautiful plants going in the greenhouse, like Blue Potato Bush, red Bottle Brush, coral Porterweed, purple Bougainvillea, and orange Lion's Ear/Paw/Tail.(your choice.) We're working on some seeds for some other plants that will be a hit in the plant sale if we can coax them to germinate, as well as other rootings that we're watching closely. We're not purchasing as much from the propagation nursery as we did last time, and that's where you come in. Every Master Gardener needs to make it a point to donate a set of plants that can go into the sale. I have tried, but I can't think of a reason that we can't have full participation at the sale. I mean, it's what we do. Please grow something to put in the sale. How about some veggie seedlings? We're always light on tomatoes and onions, and I've not seen okra there for awhile. You know what folks will buy. I hope we can count on your personal plant donation. I certainly don't mind selling from the ground because we run out of table space! Thanks!
John Oswalt, the Plant Sale Committee Chairman Says:
Let’s all help John to make this sale profitable and perfect for every gardener who wants healthy Master Gardener Grown plants for their garden!. I see you out there, nodding your head up and down!
Winter birds of Louisiana
(December, January, February)
Winter is the best season for backyard birding. Supplementing the usual group of year-round residents are migrants such as blue-headed vireo, ruby-crowned kinglet, cedar waxwing, orange-crowned warbler, yellow-rumped warbler, American robin, American goldfinch, pine siskin, and white-throated sparrow, among others. American goldfinches usually don’t show up at seed feeders until Thanksgiving or so, after the sweetgum seed—their favorite fall food source—has played out in the wild. Use black-oil sunflower and/or thistle seed for the goldfinches. The smaller millet-type seed will attract white-throated sparrow, along with other wintering sparrows, such as song sparrow, swamp sparrow, or even fox sparrow, that might occasionally show up at feeders.
Winter fruit sources are vitally important for attracting species such as woodpeckers, eastern bluebird, hermit thrush, American robin, cedar waxwing, yellow-rumped warbler, and white-throated sparrow, to mention a few. Most bird gardeners use various varieties of hollies, but hackberry is the undisputed winter fruit champion.
Next to the peak migrational months of April and October, it is the winter months which proves most attractive to Louisiana bird watchers, for there are more birds per unit area in the state in winter than at any other time. The weather during winter is at its best: cool, moist, often sunny, and only occasionally punctuated by cold snaps created by the passage of Pacific or Arctic fronts. Birds present during this time of the year originate from several different seasonal groups including year-round residents, neotropical migrants, and stray migrants from the western and southwestern U.S. and Mexico, along with miscellaneous “lingering” neotropical migrants from the eastern U.S. Raptors such as red-tailed hawk, sharp-shinned hawk, and northern harrier are also abundant throughout the same agricultural habitats during winter. Many wading bird and shorebird species also choose to remain in Louisiana at this time. Especially abundant (again, in agricultural areas) are species such as great blue heron, great egret, white ibis, white-faced ibis, roseate spoonbill, black-bellied plover, black-necked stilt, American avocet, greater yellowlegs, lesser yellowlegs, western sandpiper, least sandpiper, dunlin, long-billed dowitcher, and Wilson’s snipe. Also abundantly present in agricultural habitats in the southern half of the state are species like pied-billed grebe, sora, American coot, laughing gull, ring-billed gull, gull-billed tern, and Forster’s tern.
BIRD FESTIVALS IN LOUISIANA: Pre-Great Louisiana BirdFest Photo excursion: March 29, 2020, St Tammany La Northlake Nature Center, 23135 US -190
Great Louisiana Birdfest in St Tammany, LA April 5-8, 2020.
Catch a glance at rare and beautiful birds, right in our own backyard! Visit the amazing and beautiful Red River Wildlife Refuge in Bossier Parish Address: 150 Eagle Bend Point, Bossier City, LA 71112, Phone: 318 742 1219
A Little bit of THIS, And, a Little bit of THAT!
Events, News, Tidbits, and More
REGENERATIVE AGRICULTURE
Here is an interesting and provocative quote from the Saturday, December 21, 2019, New York Times that engenders a thoughtful discussion, when we consider how and what we eat is connected to everything and everybody.
‘Regenerative Agriculture’. What is it? Why does it matter?
“Regenerative Agriculture is a system of farming principles and practices that increases biodiversity, enrich soils, improves watersheds, and enhances ecosystem services. Regenerative Agriculture aims to capture carbon in soil and aboveground biomass, reversing current global trends of increased atmospheric accumulation.”
When we recognize that our planet is warming, and Louisiana agriculture (our food system) has a role in this event, we master gardeners, connected directly to the Louisiana Department of Agriculture, should be more mindful of the way we garden, consider our food consumption habits as they relate to the environment. Please let me know if you are interested in this discussion, and would like to continue our understanding of the issue.
This is a heavy thought to conclude today’s Seedling Newsletter. But, it bears attention, even if you think you are only one individual, one vote, one life. One becomes many when we unite to solve a problem together.
ONE MORE VERY IMPORTANT THING!
Our January 8th Master Gardener Meeting is very special. At this meeting we will have special honorees attending! The Grants Committee headed by Michele Wiener will introduce the recipients of a grant award/check. Each grant recipient will discuss their grant request and how they will use their funds to enhance, enrich, and make more productive the special gardening needs in their neighborhood. This year the goal of each recipient is very diverse. Here is your opportunity to see your money at work in communities near you.
Eighteen (18) applications were submitted in 2019. You will have an opportunity to meet, greet and understand how Northwest Louisiana Master Gardener funds will enrich and grow the gardening communities in Shreveport/Bossier, Desoto and Red River Parishes.
.
Needing Volunteer/Education Hours?
Listed below are terrific opportunities to earn them!
Maintaining the Grounds at the Randle T Moore Center
This project is ongoing. Regular workdays are scheduled during the year and will be announced at regular Master Gardener Meetings. Also, watch your email for notifications. See Suzanne Shriver or call her Suzanne Shrive is your contact. Her phone number is 318 286 4454 (cell). Susan also alerts us by emails when she is planning workdays. Spring is on the way!
Phone DUTY:
Did you forget? Every Master Gardener is required to man to phones at the Carriage House:
This is a requirement clearly stated and understood by all Master Gardeners in good standing (i.e. Paying dues, attending meetings, participating in Master Gardener projects). Master Gardener Linda Hammond, reports that any master gardener who needs hours or who wants a day to chat up other gardeners can do so by serving phone duty in the MG Office. She says someone is needed every Thursday & Friday from 10-1, on Monday from 8-12, on Tuesday, 9-12 or Wednesday 1-4.
Remember this new policy…The above jobs are interchangable. Both are critically needed, and only YOU can make it happen!
WISHING TO ALL OF YOU
A HAPPY 2020 WHEREVER YOU ARE, WHEREVER YOU GO, WHEREVER YOU GARDEN!
May this Garden be the one you’ve always wanted!
Newsletters wouldn’t matter at all
If there weren’t people at the other end of them.
THANKS FOR BEING HERE!
Vol. 20: No. 12 November-December Seedling
Table of Contents:
The President’s Report.
NWLA Mark Wilson- Ag Agent’s Report.
Local Public Gardens, Free and at Your Leisure
Your Butterfly Garden NEEDS this plant
Companion Planting-the Science Behind the Idea
Why Indoor Plants Make You Feel Better
People Are Asking
A Little Bit of This & A Little Bit of That!
The President’s Report.
NWLA Mark Wilson- Ag Agent’s Report.
Local Public Gardens, Free and at Your Leisure
Your Butterfly Garden NEEDS this plant
Companion Planting-the Science Behind the Idea
Why Indoor Plants Make You Feel Better
People Are Asking
A Little Bit of This & A Little Bit of That!
The President Reports...
Goodbye, Farewell, Auf Wiedersehen, Adieu…… and so goes the song. This is my swan song. The last President’s Message I will be authoring. It’s been fun, but it’s time for me to take a back seat and let the future take its course. This should be a cakewalk as I’m so used to taking the backseat, being as shy and retiring as you all know me to be. Someone will probably have to sit on me to keep me from jumping up during meetings and grabbing the mic. Seriously, the January meeting will be the first one in over ten years at which I am not going to be required to give a report of some kind. Allow me to reminisce. In 2007, after several years of trying, my good friend Suzy Ryan and I managed to get our schedules coordinated enough to fulfill a promise we made to ourselves to take the master gardener class together. Boy, was that the start of something big. By the time that class was over we had formed friendships that will last the rest of my life, as they did hers. Within just a few months of completing said class our board representative, Margie Caplis, had me signed up for a spot on her LeTour committee that would lead to Michelle’s selection and/or my election as Treasurer for the entire organization the next summer. Be careful what you sign up for. If it weren’t for the advent of Steve Roberts and then Ruth Baker that is a position I would probably still hold. You know I’m kidding, right? During this time we have come a long way as an organization and accomplished good things. We hosted a state conference that almost made money. Congrats, Don. We started a Grants Committee that has given thousands of dollars toward the beautification of our community. With our help the RTM has been renovated. I have served with four presidents and five Ag agents. Four of whom we tried to train, some more successfully than others, but I think I’m leaving you in good hands with Sadie and Mark. We have done a lot in the last few years, and have plans for more in the next.
I cannot begin to tell you how much I have enjoyed being an officer of this august body. The friends I have made and which I continue to make. The things I have learned and continue to learn. The fun I have had continues. So many of you have touched my life in very profound ways, as have so many of those who have been promoted to tend the gardens of the Higher Being. These last dozen years have brought changes in my life that some, I honestly don’t think I could have weathered without the friendships I have found and resurrected among you.
Before you breathe a sigh of relief, I’m not going anywhere. Well, maybe I will someday sell the farm and move to town but that will only mean you’ll see more of me. What else am I going to do? Who else can I bother? I intend to continue working with you all to do whatever we need to do to keep our organization functioning and instilling our love of gardening in our community. So, although I will no longer be an officer, I will be a working member of the group as long as I am physically able to do so. I don’t mention mentally as I’m not sure I ever met that criteria. So again, farewell and “Thank’s for the memories”. L
(editor’s note: Dear Lynn, I think you are still an officer. Your august self will be called-Past President!

|
MARK WILSON,
|
Mowing may be completed but your lawn may still need you!
As fall arrives and we move into the cooler months this is a great time to keep an eye on your lawn and garden. Issues such as “brown patch” in your lawn can easily creep up on you and do a large amount of damage before you notice. Brown patch diseases are caused by a fungus that attacks the leaf blade of your lawn close to the soil line. As with many fungi, brown patch thrives in warm moist environments. This issue is seen most often in wet falls or springs with extended periods of humidity or when excessive irrigation is used while the day temperature is below 80°F. Luckily there are several ways to combat this issue. Reduce your free Nitrogen in the soil by reducing the amount of fertilizer being put out, reducing the water if you are irrigating, or with chemical application. The most effective method being the use of a labeled fungicide. Almost all lawn fungicides are labeled for brown or large patch. For a complete list see the Louisiana Lawn BMP publication.
A few of the active ingredients to look for are: maneb, myclobutanil, PCNB, propiconazole, thiophanate-methyl, or triadimefon. As always please read the label of the product you choose and follow its directions.
Mark A Wilson
Northwest Regional Horticulture Specialist
STANDOUT PUBLIC GARDENS IN NORTH LOUISIANA
When visitors come to town, or when the weather is too beautiful to stay indoors, is there a beautiful garden nearby? YUP!
Here is where we go to find them!
Aseana Garden: Downtown Shreveport, 800 Texas Street across from the First Methodist Church
If you have even 20 minutes to stop whizzing around town, STOP for this garden! The Aseana Asian Garden is a nonprofit garden managed and planted by the Asian community of Shreveport representing 15 countries of Asia in landscaped garden beds. Artifacts and statues are imported from the countries represented and are speckled throughout the multi-leveled public space. Benches are scattered about allowing people to rest as they ponder how a garden brings beauty and peace to humanity the world over. These gardens are open daily and are free to the public.
America’s Rose Garden: America’s Rose Garden at 8878 Jefferson-Paige Road is taking on a NEWLOOK! While always a beautiful garden, it is now becoming a WOW Garden with redesigned gardens, new plantings, more roses, a children’s playground, a well-stocked gift shop with the favorite show stopper every year being “Christmas in Roseland. This garden features roses from around the world, with all gardens being completely redesigned, replanted and more beautiful than ever. The gardens are open daily from 9-5:00. There is no fee, but donations (donation box in the gift shop) are welcomed. If you really want to invest in roses in your garden, join the American Rose Society, ($20.00) per year to receive free admission to the gardens not only in Shreveport but also to ALL public gardens in every state of the USA!
Greenwood Cemetery Garden (130 E Stoner Avenue, 71101…and Oakland Cemetery Garden 1100 Milam, Shreveport, 71101) You might think that a cemetery is the LAST place to find a beautiful garden. We’ve already discovered wonderful sculptures there. Let’s add their developing gardens as well. Both Greenwood Cemetery and Oakland Cemetery have applied for and received Master Gardener Grants which have added trees and plantings that enhance the landscape by adding flowering perennials, shrubs, trees, and garden designs bringing a new dimension to the solemn environment of burial grounds. On one of our beautiful autumn days, visit these gardens. You’ll be pleasantly surprised.
Norton Art Gallery Gardens: 4747 Creswell Ave, Shreveport, LA 71106 R. W. Norton Art Gallery is Shreveport’s largest museum where thousands of American Art and sculptures abound amidst masses of azaleas, a myriad of other plants, trails and much more. While springtime is the most popular time to view the gardens, each season brings its own rewards of hidden sections for children to browse and play, for gardeners of all ages to observe garden design at its best and for the ‘Texas’ cactus garden which presents a big WOW factor. The gardens are free and open daily from 7 am to 7 pm.
Other activities in the garden:
Biedenharn Museum and Gardens, Monroe, LA: Known as Elsong Garden, named after Emmy Lou Biedenharn who had an opera career, the gardens have a vast number of differentiating flowers. Begonias, daffodils, daylilies, Japanese magnolia, tulips, azaleas, bachelor’s button, and sweet olive trees are just some of the varieties you can find at these gardens in Monroe.
Louisiana Tech University Aboretum: Ruston, LA 71272: This lovely Arboretum was officially dedicated on May 12, 1967. The arboretum, on the campus of Louisiana Tech University was established with four objectives: Research, teaching, public education and recreation. The arboretum has grown over time to 74 acres including a 14-acre pond.

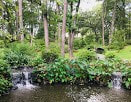

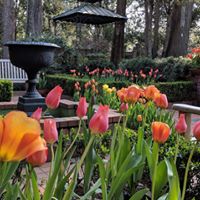
YOUR BUTTERFLY GARDEN NEEDS
THIS PLANT!
By Mike Livingston

Today, I’m going to write about one of the standouts of the butterfly garden: the Candlestick senna. This is the one plant I’m always asked about. I’ve even had people stop on the street and ask me about it if they see me working.
Originally, I got this member of the pea family as a host plant for Sulphur butterflies (The yellow ones), and when the Senna is young it’s a very good host plant. Five different species will attack it, which makes it hard to get started because they will often jump on it as soon as its planted. However, once the plant gets any size to it, it has a unique method of defense.
Instead of placing its nectaries, (the nectar producing organs) at the bottom of its flowers to reward pollinators, the senna has placed its nectaries at the axis of its stems. Why, you ask? Because in that location they attract ants who come to sup on the nectar and if they happen to see any eggs while they’re there they will eat them too.
Sennas have strong antifungal properties and in other countries are used to treat ringworm. To give you an idea of how old I am. Growing up in Arkansas in the forties, Daddy used to put a copper penny on my ringworm and then pour vinegar over it.
Sennas are easy to grow. If you want to start some from seeds, soak them over night. This will break them from dormancy by cracking its tough shell and allowing water to enter. They basically like full sun and well-drained soil and then let them do their thing. The important thing to remember about Sennas is that they are a drought tolerant plant and do not like excessive water either as seeds or full-grown plants. Further south they can become invasive weeds. Here, though, our winters are too wet and generally too cold. If they’re well mulched and the winters don’t go too far below freezing for too long, they’ll often survive a winter or two. But don’t expect them to be permanent.
COMPANION PLANTING, THE SCIENCE BEHIND THE IDEA
Plants who like to live together- Or, are they just not quarreling?
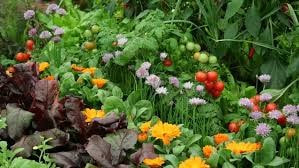
Companion planting is sometimes called ‘intercropping’. Why does it work? Companion planting enhances the growth cycle of plants by releasing chemical attractants or repellents, which provide pollination benefits or protection from insects. For example, companion plants like onions, release odors that help deter insect infestation.
Says who?
What does science say? Some gardening scientists find no scientific basis. The idea could be promoted to sell a book, or promote an individual bias. Or perhaps that’s just the way Grandma did it.
One of the issues about companion planting is that it comes mostly from anecdotal information. Companion planting has no single definition. Some scientists say that if we can’t agree on what it really is, how can we debate its efficacy?
There are plenty of ideas that promote the notion. Like this one…’Modify the Environment’. Plant A can modify the environment for plant B. For example…the tomato provides shade. In the three sisters planting scheme, the squash shades the ground so that fewer weeds grow, which may benefit the bean and corn. However, it may just be false logic. Think about this one. Attract beneficials including pollinators to your garden. Many flowering plants attract pollinators to the garden which then go on to pollinate vegetable crops. Mmmmmmm. Flowering plants also attract pests-they also want the nectar. So, is this a net benefit for partner plants?
Certain plants do keep pests away, so if they are placed next to pest-attractive plants they keep pests away from both plants. Alas. Scientists say this is a myth. ☹
We have been told that growing legumes to provide nitrogen for their partners. And that is good. Alas. Another myth. ☹ The reality is that as long as the legume is growing, it adds very little nitrogen to the soil. There is no benefit to the partner plant. Once it dies and decomposes there is some benefit, but that does not meet the definition of companion planting.
Suppresses Weeds: If Plant A suppresses weeds, then Plant B grows better. Makes sense. But if plant A is not also a crop plant, is it not just another weed that you planted? It competes with B just like the weeds.
Improves Flavor: Is there a plant that you can grow beside your tomatoes to make them sweeter? Some say that planting basil and tomatoes together improves the flavor of both. That sounds interesting, but given the biology of plants and their limited ability to absorb complex flavor molecules through the air or soil…does that make real sense?
Then, what are the real benefits of companion planting? Consider the case of the bean climbing up the corn. Yes! The bean is growing better and is able to get its leaves up higher to catch more sun. Well then, do we care about improved growth when what we really want is a bigger bean harvest, which may or not have occurred?
Corn uses a lot of water and nutrients, so its root system competes with the bean for resources. It also shades the lower leaves of the bean plant. What if the bean plant produces lots of growth but few beans? (Heap big smoke, no fire) Is it still a good companion?
Does companion planting, then produce more food than when the plants are grown separately?
If you are growing an ornamental garden, it makes sense to define improved growth in terms of appearance; more flowers, better leaf color orless disease. It might just work.
Now, the question is: should you try companion planting?
There are certainly some cases where plants benefit from having partners. And there are other cases that are nonsense. One study, after looking at several different vegetable crops in garden-sized beds concluded that “companion planting can offer advantages over monoculture, but these are not achieved simply by combining certain compatible companion species. Crop density ratio and relative planting times all affect the way that companion species interact with one another and their environment. In short-it’s complicated.
This author suggests that if the source of the suggestion does not give a plausible explanation as to why the combination works, don’t believe it. If it lacks references to scientific studies, it probably does not work. Use common sense in the garden.
Okay, people. Did you like this discussion? Why? Or why not? This is not a quiz, but it did give your editor pause for thought. The notion of planting for odd reasons that aren’t based in science is certainly iffy. But then again, I also believe in aliens.
WHY INDOOR PLANTS MAKE YOU FEEL BETTER!

Houseplants are good for your health — and not just for their visual beauty. Why? They essentially do the opposite of what we do when we breathe: release oxygen and absorb carbon dioxide. This not only freshens up the air but also eliminates harmful toxins. Extensive research by NASA has revealed that houseplants can remove up to 87 percent of air toxins in 24 hours. Studies have also proven that indoor plants improve concentration and productivity (by up to 15 percent!), reduce stress levels and boost your mood — making them perfect for not just your home but your workspace, too.
At work, place plants, especially those with broad leaves, on your desk; they will help regulate humidity and increase levels of positivity — seeing greenery and nature help us feel more relaxed and calm, which in turn benefits your everyday mood. Indoor plants serve a practical and aesthetic purpose and will enhance your life.
These helpful ideas of plant placement increase the enjoyment of plants you grow inside, and explain why they make you feel better, even on dreary days.
For an optimal night’s sleep for those sleep-less nights: Did you know that although plants release oxygen during the day, at night, when photosynthesis stops, most plants switch things up and release carbon dioxide. Plants such as orchids, succulents, snake plants, and bromeliads do the opposite and emit oxygen, make them perfect plants for the bedroom.
Too much sun? Most indoor plants don’t like direct midday sun. Be wary of the placement of plants. Look for leaf burn, spotting or sudden leaf fall. It may be a case of not watering them enough, too much or letting the soil dry out a bit. Is there a door nearby, that may be causing a cool draft? If you see leaves curling up and dropping off, this may be the problem.
Indoor plants really are an inexpensive way to jazz up even the most boring of rooms. Adorn your windowsills with succulents, use loud and noisy colors in pots and other containers, and plant containers with fun plants like the String of Pearls succulent. Some indoor plants even like it hot. If you have a room that tends to stay hotter than the rest of the home, fill it with ferns, palms, succulents, and cacti, as they like it hot! Plants mostly prefer a bathroom, if you have good light there. The humidity and warmth of a daily bath or shower make for a happy plant!
If you aren’t lucky enough to have a greenhouse, but lucky enough to have a bit of space, fill your home with plants this winter. Taking care of them is good therapy, is a mindful experience, and is good for your soul.
IT’S NOT TOO EARLY TO BEGIN
THINKING SPRING!
THE SPRING MASTER GARDENER PLANT SALE IS AMONGST US!
John Oswalt, the Plant Sale Committee Chairman Says:
“Here’s a rundown on the plants we are hoping to propagate for the 2020 plant sale. Work has already started with cuttings and seeds (NOW is a great time to collect seeds!) Here is a listing of plants we want to include in the sale. You can help by propagating anything from this list or just by beginning plants from seeds. Let’s fill at least 40 tables offering beautiful, healthy plants in support of our many activities.”
Blue Potato Bush, Lion’s Paw Red Bottlebrush Purple Butterfly Bush Yellow Butterfly BushPurple Butterfly Bush Coral Portweed Purple Porterweed Lemon Ball Sedum Yellow DaturaPurple Bougainvillea, Various Angel Trumpets, Pride of Barbados, Blue Daze, Yellow Butterfly Weed, Red Butterfly Weed, Cuban Oregano, Swedish Ivy, Purple Piecranthus, Mother of 1000s (3 varieties), Yellow Kerria Japonica, White double Althea, Pink Single Althea, White Fringe Tree, White Mexican Petunia, tall, Purple Mexican Petunia, compact, Cleradendron Blue Butterfly, White Guarra, Dark Pink Guara, Raspberry vine, Thornless Blackberry vine, Peggy Martin Rose, Calico Kitten Crassula, Yellow Cestrum, Spurge, Ardisia, Louisiana Iris, Daylily (6 varieties), Vitex trees, Night Blooming Cereus, Tricolor Ginger, Red Buckeye “
Let’s all help John to make this sale profitable and perfect for every gardener who wants healthy Master Gardener Grown plants for their garden!
PEOPLE ARE ASKING…
What can you plant for a winter garden in North Louisiana?
Vegetables: Beets, Cauliflower (transplants), celery, Chinese cabbage, collards, endive, green peas, snow peas, edible-podded peas, kohlrabi, lettuce, mustard, rutabaga , shallots (sets), parsley, radishes, spinach, Swiss chard, turnips and kale.
Will violas flower in winter?
Violas are primarily cool-season bloomers; they are perfect for starting and ending the season in colder climates and for bridging the seasons in warmer zones, where they can remain in bloom throughout the winter. Sep 28, 2019
Do YOU have any questions for the Seedling to ferret out the solution? Send them to [email protected]! I will search heaven and earth to answer each and every one! The answer is always out there, and someone KNOWS WHAT IT IS!
A Little bit of THIS, And, a Little bit of THAT!
Events, News, Tidbits, and More
Hello All,
As you winterize your beds and prepare your plants for the approaching cold and freezing weather, please remember to save cutting, seeds and etc. for the Greenhouse. Or even better, start new plants from those cuttings, seeds, etc. and donate them to plant sale in April. We always run out of space in the greenhouse. Either way, we will be very appreciative of your donation.
If anyone removed two 3 gallon pots full of daylilies that were placed next to the greenhouse please contact me to let me know that you have them.
Thanks,
Gwen
Needing Volunteer/Education Hours?
Listed below are terrific opportunities to earn them!
Maintaining the Grounds at the Randle T Moore Center
This project is ongoing. Regular workdays are scheduled during the year and will be announced at regular Master Gardener Meetings. Also, watch your email for notifications. See Suzanne Shriver or call her Suzanne Shrive is your contact. Her phone number is 318 286 4454 (cell). Susan also alerts us by emails when she is planning workdays.
Phone DUTY:
Did you forget? Every Master Gardener is required to man to phones at the Carriage House:
This is a requirement clearly stated and understood by all Master Gardeners in good standing (i.e. Paying dues, attending meetings, participating in Master Gardener projects). Master Gardener Linda Hammond, reports that any master gardener who needs hours or who wants a day to chat up other gardeners can do so by serving phone duty in the MG Office. She says someone is needed every Thursday & Friday from 10-1, on Monday from 8-12, on Tuesday, 9-12 or Wednesday 1-4.
Remember this new policy…The above jobs are interchangable. Both are critically needed, and only YOU can make it happen!
Newsletters wouldn’t matter at all
If there weren’t people at the other end of them.
THANKS FOR BEING HERE!
Vol. 20: No. 11 September-October Seedling
Table of Contents:
NWLA Mark Wilson- Ag Agent’s Report
Gramma’s Table
The 6th Mass Extinction is underway on our planet
Summer’s Ending, but It is still HOT and You have Gardening Chores!
Vanishing Pollinators…
Community Investment Program
NWLAMG Bulb Sale
A Little Bit of This & A Little Bit of That!
NWLA Mark Wilson- Ag Agent’s Report
Gramma’s Table
The 6th Mass Extinction is underway on our planet
Summer’s Ending, but It is still HOT and You have Gardening Chores!
Vanishing Pollinators…
Community Investment Program
NWLAMG Bulb Sale
A Little Bit of This & A Little Bit of That!
Walking through a field of sunflowers is like having your very own yellow,
eye-level parade!
eye-level parade!


Mark Wilson, Northwest Louisiana Master Gardener Agent Reports….
GOOD NEWS!
2019 NORTHWEST REGIONAL
LSU AGCENTER SUPER PLANTS EVALUATION AND EDUCATION DAY
The focus of this event is to help evaluate the regional Super Plants trail garden, to make suggestions on the future of Super Plants, to listen and learn from Dr. Paul W. Wilson, Professor Emeritus, Food Processing and to learn how to keep your harvest longer.
Registration Required! 318 698 0010
Friday, September 20th, 2019. 9:00 AM-1:00 PM
Register at 318. 698 0010 by September 6, 2019
You will earn 2.5 hours of continuing education for this event!
To see the entire newsletter, click here
| the_seedling_09_2019.pdf |
July-August Seedling
Table of Contents:
Hot Weather Gardening: Landscape Design Tips
Just because it’s Summer-Don’t forget your houseplants
The Gentle Art of Watering
The Butterfly Rose
Let’s talk about ORCHIDS!
Now, It’s YOUR turn to talk!
Fall Bulb Sale (WHAT? ALREADY IT’S HERE? (Where did summer go?)
Table of Contents:
Hot Weather Gardening: Landscape Design Tips
Just because it’s Summer-Don’t forget your houseplants
The Gentle Art of Watering
The Butterfly Rose
Let’s talk about ORCHIDS!
Now, It’s YOUR turn to talk!
Fall Bulb Sale (WHAT? ALREADY IT’S HERE? (Where did summer go?)
Hot Weather Gardening: Landscape Design Tips
Hot Weather has arrived. REALLY HOT WEATHER is on the way! With temperatures reaching for the high 90s, and above, with nighttime temperatures rarely dropping below the mid to upper 70s, we see drooping plants everywhere. The dog days of summer mean it’s time to give some TLC to your garden. Try these tricks during hot weather days and nights and keep your landscape verdant despite the heat.
Key to Hot Weather Gardening: Water Well, Water Deeply
Like people, plants need lots of extra water in hot weather — particularly in their first three years after planting, while they are still getting established. Watering your plants in times of heat and drought might seem like a no brainer, but believe it or not, there’s an art to watering. Here are a few of the ways that we ensure our thirsty gardens get what they need this time of yearDeep watering is essential in times of heat and drought.
1 – Plants want a long, deep soaking, not a quick spritz with the hose. Remember those roots go far below the surface of the dirt, and so you need the water to soak through all those inches (or feet) of soil to get to the roots. A new tree would like 10-15 gallons of water each week. Smaller perennials would like a few gallons each.
The average home garden hose delivers about 5 gallons per minute—so really spend at least 30 seconds to a minute on all your big plants every time you water them, and water them at lest every other day. Recite poetry, sing songs, count to 199, whatever it takes to keep yourself focused on giving each plant sufficient water to survive hot spells and thrive.
2. Concentrate on getting the soil soaked, and try not to water the leaves more than you have to. Plants don’t absorb water through their leaves. In fact, the process of osmosis can leave the plants more dehydrated if you water their leaves. Also, many plants are susceptible to burning from the hot sun when their leaves get wet, which makes them turn brown in spots.
3. Water in the early morning or late evening. This is the easiest time for the plant to take up the water when it’s not being stressed by the hot sun—and it’s the most efficient, since minimal water will be evaporated during these times of the day.
If you can swing it, installing a home irrigation system to automatically water your garden allows you to reap the benefits of a beautiful landscape with less labor. Even if you go out of town for a few days or forget to water daily, they’ll be less vulnerable to extreme heat.
Use Heat-Tolerant Plants
It seems to be self-evident. It is. But we don’t always follow the rules.
While all plants need watering and TLC during their first years, as they get established in their new locations, some plants turn out to be better suited to dry, low-water summers than others. Northwest Louisiana also has long phases in mid to late summer when little or no rain falls on plants, and when we are required to water our gardens regularly. Look around as you visit gardens this summer, and observe where water is readily available (irrigation systems) or where it is mostly hand watered. Your observations can be translated into determining the kinds of plants that are best suited to both irrigation solutions.
You also know about Xeriscaping, which simply means a drought-tolerant landscape. This irrigation style focuses on garden designs that do not require supplemental watering. Xeriscaping plants have very low water requirements once established. Sedum, ornamental grasses, hyssop are examples that you can find locally. The illustration above demonstrates that color in your plants doesn’t have to come from flowers. Just observe the desirable mix of the color wheel in these sedums!
Just Because It's Summer, Don't Forget Your Houseplants
That’s right! Your houseplants get a break in the summertime. They often holiday outside to enjoy gentle summer rains, some fresh air, a breeze or two, and a bit of REAL sunshine. (And, a LOT of heat.)
Did you ever stop to think that this might be a good time to repot them? Doing this job now when they’re apt to be in a growth spurt is a very smart idea.
Your houseplant will give you definite clues that say-“It’s time to REPOT me!” Here is how they tell you they’re squeezed in and need a change.
· A noticeable decrease in soil level or soil that has dropped over time or appears dry and hardened.
· Roots visibly growing out the bottom of the top, top edges of the pot or trying to burst through the pot.
· The plant dries out quickly, drooping almost the day after you water it.
· The plant is obviously top heavy or awkwardly big for its pot without surface area for new growth.
· Notice that water runs right through the pot into the cache plate below. ( a sure sign!)
Most plants really like to be repotted every year, although some slow growers might just need a topdressing to keep them happy.
When is the best time to repot? Springtime is usually the best time to repot, although summer is still a good time for this job. Autumn and winter, not so much so because even houseplants tend to go dormant in winter. They would really NOT be happy to be disturbed while resting.
Would a larger pot help your plant grow big and strong? It seems logical, but research advises us that most plants prefer to fit snugly in the pot. So, don’t size up to a much larger pot. The smaller amount of added soil dries out much quicker and allows more oxygen to reach the roots, which they need to survive. So, add enough soil to give about 2 more inches of soil all around the pot and around the top.
This means if you have a plant in an 8-inch pot, size up to a 10-inch pot for optimal root growth.
So, what about drainage? A container may have holes in the bottom, or it may not. Understand that in a container, drainage is very important, as a pot without a hole presents the problem of standing water in the bottom of the pot and can quickly cause fungal issues or root rot. Pebbles or rocks situated in the bottom of the container do NOT provide drainage. (Why are the prettiest pots always minus the drainage hole? It’s a great mystery of life.) If you MUST plant in a pot without drainage, use small activated charcoal chips to line the bottom. Charcoal actually soaks up moisture like a sponge, and is antibacterial as well, filtering impurities and preventing fungal growth.
What about soil? Repotting isn’t just about a larger pot. It’s not just about providing good drainage. You should also consider the fact that different plants like different kinds of soils. Never use old soil when you repot, even if the plant was doing quite well. Always refresh with soil that is preferred to specific plants. For example African Violets like Africa Violet soil; Cacti and succulents love soil that drains readily. (You get the idea!)
Moisture Retention: Examine the pot you are considering. It makes more of a difference than you might think. For instance, if you tend to overwater; use a ceramic container. Unglazed clay wicks moisture out of the soil, and will dry out a lot faster than a plastic or glazed clay pot. So, the container is an important element not just for repotting, but also for the ongoing health of the plant.
If you sometimes forget to water, use a moisture meter. It really saves your plants.
Yup, it is a good idea to use a bit of gravel over the drainage hole (if there is one). Place a bit of soil at the bottom of the pot, just enough to cover the bottom.
Ease the plant out of its former pot, tipping to catch it as it slides out. If it sticks, use a table knife around the top of the pot to loosen the soil, gently tap the pot and then yank it smoothly out of the pot. You might need to use a little water to loosen up dry soil. If your new plant has a sturdy stem, pull hard as you work it out of the pot. Sometimes, a good squeeze on a soft plastic pot will also have good results.
Once you’ve removed the plant, gently tease old soil from the roots. Use a light touch but don’t be too afraid of doing harm. Observe the health of the roots and the quality of the soil. A few dead roots are normal but a dead root will be slimy or brittle. If the plant has a tiny root ball, consider keeping it in the same pot or even going down a pot size to maintain the few inches of soil surrounding thecontainer. Place plant inside the new container, holding gently by the stem or root ball in the position that you want your plant to live. The soil level should be the same as in the pot from which you removed the plant. Gently fill in the sides of the plant until there are no air pockets.
You NEVER want to push down on the soil, as this can damage roots, but you can gently gather soil around stems and very lightly tamp it down with your fingertips. There is usually a bit of fertilizer in the soil that was in the pot, so don’t add any more at this juncture. If the plant seems to be awkwardly placed or not in the center of the pot, don’t be discouraged. You can always tease the soil to let the plant be moved to the correct place in the pot. Do it by increments, until you are satisfied.
This excellent advice in regard to repotting a plant (which is a bit more complicated than one might have been accustomed to!), is logical and simple to follow. When following this re-potting advice, you may spend a bit more time with your plant than you planned! But, understanding how the plant and the container are going to live together for a long time is the incentive to do the right thing from the beginning…then, don’t forget to water!
THE GENTLE ART OF WATERING
Quench your plants’ thirst with less water
It’s that time of year again where there is a lot of sun, and not so much rain. Moreover, our plants are thirsty. Let’s talk about the gentle art of using water wisely during the upcoming dry weather. Here’s what you need to know. As a general rule, annuals have only a fraction of the year to develop deep roots and most will require regular watering to thrive. Perennial roots, which have more time to develop and grow deeper, can find water deeper in the soil. Which tells us that perennials will require less water to thrive.
Soil has pores. Pores are the spaces between soil particles that can be occupied by either water or air. Large pores allow water to drain freely through the soil, release carbon dioxide, and supply plant roots and microbes with oxygen. Between the larger pores, tiny soil particles are held together in crumbs by fungal root hairs and the sticky residues left by living things.
When it rains, or when we irrigate, water seeps down through large pores and wicks up into the smaller pores. When this wetting filters through and beyond the root zone, the soil is at capacity. This should be our goal.
There is another good reason to use mulch. Mulching the soil surface will dramatically reduce evaporative water loss and since we don’t live in a rain forest, mulching is necessary. As a Master Gardener, you KNOW that organic mulches are best. An organic mulch will slow soil warming and allow water to naturally filter down forming a top dressing that encourages microbial activity.
A slow rain is always the most effective use of water in the garden. That doesn’t happen too often in July and August! However, if you want to know if your garden needs more water, give it the squeeze test. Take a palm- full of soil from about 6 inches down and try to form a ball in your hands. Fine to medium textured soil won’t hold together, telling you it’s time to water. In coarser, sandier soil, where it’s hard to get a ball to stick together at all, you’ll need to water frequently unless you grow drought-resistant plants. Remember, there are other reasons that plant wilt and look thirsty-root disease, stem borers, or extreme midday heat can also cause wilt.
Every watering should be deep. The rule to apply one inch of water per week will only work for plants growing in uniform conditions. In more fluid garden water deeply as well, and let the soil dry out completely before watering again. If you use sprinklers, prevent water waste by knowing how much water the sprinkler will give out in a period of time. Place cans at several distances from the sprinkler to catch and measure the water. Run it for 30 minutes and calculate the amount in each can. Check drip systems by placing cans under emitters. Keeping records will help to fine-tune your watering schedule.
Water is the lifeblood of your garden. Water deeply and only when needed for the best growing conditions. Your garden cannot help but be a healthier and more beautiful place when you understand and utilize best irrigation practices. Your thirsty plants will thank you by blooming, growing and perfuming the air.
THE BUTTERFLY ROSE
For the most part, roses are not good butterfly plants. They have too many crevices and folds. Butterflies need a flat, landing platform. This is because butterflies taste with their feet and need to be able to scratch the surface of the petals in order to taste the nectar. They also need an open landing space to accommodate their fragile wings. Zinnias and Daisies are perfect examples of butterfly plants.
But I’m going to tell you about a rose which makes a perfect butterfly plant. In fact, its common name is THE BUTTERFLY ROSE. However, it got the epithet because of its appearance rather than the number of butterflies it attracts. Mutabilis or china roses produce masses of fragrant blossoms that start out yellow and change from light pink to deep red. Because each blossom can be a different age and therefore a different color, the effect is of a mass of different colored fluttering butterflies. These faux butterflies combine with numerous real butterflies so that the effect is quite startling.
Mutabilis also has a light, delicate fragrance, going from sweet on young blossoms to spicy on older blossoms.
This is also one tough plant. Last August, I needed to dig up and move my Mutabilis. Now as anyone can tell you, you never transplant anything in August. But I had to, so I tried to prepare it as much as possible. First, I dug my hole so it could be planted immediately. Then 24 hours before moving the plant, I drenched it so it would be fully hydrated. Then I dug it up and carried it over to the hole via a burlap sack to save as much of the root system as possible. Finally, once it was on the ground, I watered it again.
Even doing all that it still lost all its leaves and I was afraid I’d killed it. However, barely a month later leaves started coming out and this year on April 7, it burst alive with dozens of multicolored blossoms.
Mutabilis requires full sun, medium moisture and good air circulation. It is disease resistant and with good air circulation, you can control most foliar diseases, including Black Spot, Powdery Mildew. However, it does have insect problems, especially aphids, borers, spider mites, and leafhoppers, and here you must be careful because it is a butterfly and pollinator plant. Do not use any systemic insecticides because these nicotinoids reach into every part of the plant including the nectar and pollen and will kill your bees and butterflies. If you must spray use Neem. It will kill most of the bad insects as well as some of the fungal and bacterial diseases. It should not be sprayed on the plants when bees or butterflies are active.
When the cutting I took off my own Mutabilis gets large enough I will be putting it into the Randle Moore garden and I strongly recommend it for anyone wanting a pollinator garden. Hope this helps.
Happy gardening, Mike
Thank you, Mike Livingston, for always teaching us something new!
YOU CAN GROW ORCHIDS
AND THIS IS HOW YOU DO IT.
Did you ever come home from shopping with a grocery store orchid? Ultimately, it just doesn’t thrive. What to do with that grocery store orchid when it is finished blooming to make it bloom again?
First, when you return home, take the inner pot out of the outer pot. This can be a pain if it is wedged in, so be careful. Use needle-nose pliers if the inner pot is stuck. Get a good grip on the inner pot and just pull it out.
Place something that won’t rot in the bottom of the new outer pot – I usually use rocks, but if you have a glass/ceramic outer pot, then you might use large marbles or uneven pebbles in the bottom of the container. Replace the inner pot containing the orchid back in the container. The orchid may be loose and a bit wobbly, but this slight imbalance is good. It greatly improves the air flow that is so important to those root-like structures and is also best for the long-term health of this plant. I also believe that it makes it easier to give a quick inspection of the roots. Using the above instructions, keep your plant reasonably happy over the next year, and in response to your good care, there will be another great bloom that will last months and months – to your great joy! And, if you continue just as carefully for the following years, you will find another and another bloom for you to enjoy.
It is so rewarding to have orchids in your home or office because the blooms last so long. It is an awesome feeling to make a new bloom next year and it becomes just as beautiful, for just as long – again and again, and again.
Most Important Rule
Don’t over-water. Those rootlike things like to dry out between waterings. For grocery store orchids (primarily Phalaenopsis) it is a given- the most common issue in growing an orchid at home is a failure to thrive. Generally, it will be one issue which causes newby orchid gardeners much angst, and it is – over-watering. Your orchid may be potted in bark chips; because the coarse nature of the bark allows plenty of needed air flow. To provide for this essential need, but to also keep the moisture level high, do this: observe those root things when they have just been watered; they will look green. They need to dry out to look a bit white before watering again. So if you pull the inner pot out of the outer pot to look at those root-like structures, (it’s okay to do this) you will not harm your plant) and find them green, then put your orchid back and wait until it has had time to dry out a bit more.
What if your orchid is potted in sphagnum moss?
Again, feel the moss with your fingertips. If it is bone dry, even crispy feeling - then it is ready to be watered, but not until then! Some of my grocery store orchids only need to be watered every two weeks, whereas, in bark, then need to be watered weekly.
Most grocery store orchids are Phalaenopsis (Phal’s). They have dark green leaves and are fairly easy to grow. Phal’s like light – as much as you can give them. But direct sunlight, for any length of time, will kill. Lots of filtered light – and Phal’s will produce blooms. Some orchids need a 10-15 degree F temperature difference between daytime and nighttime temperatures to stimulate blooming. That seems to happen normally for me in central Texas. Perhaps you might run an experiment, and notice the temperature variation in your location to determine if this variation exists in your home, or outdoors.
Don't leave Phal’s outside in temperatures that will drop below 50 F. (This is very important!) I lost an enormous number of good leaves to temperatures colder than the weatherman predicted. Boo Hoo! (Some of those survived but have not yet really recovered.
For more tips on growing your grocery store orchid, go to www.orchidbliss.com – a very nice blog dedicated to orchids.
Thanks go to your editor’s son, Ted Price from Manor, Texas, for this article, and his hands on orchid advice.
From a budding novice to a true orchid grower and lover of this beautiful plant, Ted nurtures his orchids in his home and outside garden. They make a stunning display year around. Try this blog if you want expert advice.
A CELEBRATION OF TEA
The American Rose Center and the Ark-La-Tex Herb Society of Northwest Louisiana will present a traditional Herbal Tea at Klima Rose Hall in the Gardens of the American Rose Center July 20, 2019.
This late summer Green Thumb Seminar is designed to celebrate herbs in the gardens that we see, the blossoms that we smell, taste and touch, and gently remind us of the herbs that enhance our lives all year long. Indeed, this Green Thumb Seminar is not just a stodgy British thing…no,no,no! We are going to party as we learn!
Also, you might think this is an all-female event. Not so. Real men drink tea too. And, the program is looking to be fascinating. Herbs abound in our lives. They greet us in tea bags, in food preparation, in healing ointments, and in a myriad of everyday life activities. What would food taste like were it not for the herbs that develop the taste, enhance the smell, promote good health, and delight our palates as we eat? Men eat too. So, Men, come sip some herbal tea, enjoy a scone smeared with lemon curd, and discover that herbs are more than salt and pepper!
This seminar is not a 'dress-up' event, you may wear a hat (or not!), you may dress to the teeth (probably not!) you may come in flip flops and be quite at home with all of the mystery of herbal lore.
Rose Kelly, a longtime member of the Ark-La-Tex Rose Society, and the driving force behind the Ark-La-Tex Herb Society will be the speaker for the morning session. She is a dedicated and most knowledgeable member of the Herb Society. Rose serves on ArkLaTex Herb Society Board, as co-chair of the Herb Garden Project, and teaches classes on herbs at LSU-S and at Louisiana Nursery
The number to call for reservations is 318 938 5402. Ask for Lucy Medvec who holds the reservations list.
See you there Garden Lovers, Plant Finders, Tea Drinkers and anyone who loves a good time.
At the June Master Gardener meeting, your editor asked for you to take a turn at the Seedling Podium. YOU have a vast amount of practical learning and innate knowledge gained from real-world experience. I have also asked the different committee heads to speak about their work in our varied committees to talk about their jobs for this year.
You have stories to tell lessons to learn from other master gardeners. Read on….
“Every year I grow tomatoes and then they are great until diseases begin. I dislike using chemicals and find one of the best things I have tried is getting rid of any leaves touching the ground. I also keep pruning any leaves that are beginning to show problems. Could Mark or other successful gardeners make other suggestions that would solve this problem?.”
Thanks for your comments, Eileen. During a symposium this spring, I heard at a symposium this spring something similar...’ black spot on roses and disease on other plants most often begin with the lower leaves becoming diseased. This phenomenon occurs because irrigation systems and/or hand watering often splashes water on lower leaves where the humidity and moisture begin the fungus Diplocarpon rosae known as black spot disease to grow and damage plants.."
So, our learning curve on disease prevention begins when we water carefully but intelligently!”
And from Gwen, who is taking care of the Greenhouse as plants come in and out!
The Greenhouse Committee reporting on inside news from the Greenhouse:
The main focus of the greenhouse committee is to collect, propagate and grow plants for the annual plant sale. We usually start in late October and continues through the plant sale in early April. During this period volunteers are asked to meet once per week as a group to perform the duties required to get plants ready for the sale. Some of these duties include preparing the soil medium used for potting, potting plants, checking for insects and disease, fertilizing, pruning and watering duties. This is a fun group to work with where you can continue to learn about plants.
Gwen Phelps
And, from Kristy Braud
WHAT IS THAT SWEET SMELL?
As I stroll through our garden on these late spring evenings, I am reminded of the wonderful scents that fill the air this time of year. It is such a sweet reward for the labor of love of gardening– the smell emanating from large magnolia flowers, gardenias, and jasmine, to name a few. The scents conjure up thoughts of rockers on southern porches, kids running through the yard chasing fireflies, evenings enjoying the company of good friends and good food in the courtyard. It is with strong encouragement that I believe gardeners working on creating their own paradise at home, an escape from the less pleasant smells of the city, consider dotting their landscape with such sense-provoking plants.
In the early spring, we enjoy the aroma of fresh banana coming from our “banana shrub” or Magnolia figo. A beautiful, fragrant rose here and there in a sunny spot offers an opportunity to take the time to stop and smell. And now in late spring – magnolia (especially Grandiflora, little gem, sweet bay…), gardenias (August Beauty, mystery with its large flowers, jubilation, there are so many varieties), and jasmine, confederate being my favorite, covering an arbor or climbing a pole or fence, are in abundance for us to enjoy. I dare not forget the butterfly ginger with its graceful white flower and beautiful scent that when cut and placed in even the simplest vase will impact a room. We don’t grow many herbs, but those placed near the kitchen including the mint for flavoring drinks and the rosemary used in cooking allow us to combine two senses – touch and smell. It is often that we rub the leaves between our fingers and bring them up to our noses just for the fun of being reminded of how good they smell. Honeysuckle has made its presence known again this year, not necessarily where we want it though, as a vine growing within our bridal wreath spirea. Once it blooms I will cut it back to the ground, but I just can’t bring myself to do it now while its fragrant blooms are present. And we are anxiously watching the new growth on our night-blooming jasmine (Cestrum nocturnum), which though it dies back to the ground in winter, reliably returns in the spring; there is not a scent quite like that of this handsome shrub, a sweet perfume that fills the air for about 3 weeks on summer nights. An added bonus is to step out into the darkness with a flashlight, point it towards the foliage, and witness the sphinx moths which look like hummingbirds, feeding on the white flowers that act as “reflectors in the moonlight.” It is quite a fun sight to behold.
Whether stepping out to go to work on a weekday morning or stepping out in the evening to take out a bag of garbage, one might be stopped in their tracks by the flowery scents being carried by the gentle breeze, and it is a reminder to awaken our senses and enjoy more of what Mother Nature has to offer.
SUBMITTED BY Kristy Braud
Thank you for this wonderful story Kristy!
RON WOULD HAVE YOU BELIEVE THAT IT IS TIME FOR THE BULB SALE.
HE IS RIGHT!
“I’m amazed at how fast time moves as I get older! It seems like the year just started and yet our “Plant Sale” and “LeTour” have already come and gone. The last major event of the year, for us Master Gardeners, is the upcoming “Bulb Sale.” The way things are going, October 26th will be upon us before we know it. Your bulb sale committee has already started meeting and planning but as usual, we need your help. We will offer a lot of the standards and some new things but would love to know if you have seen something growing in your yard or elsewhere that we might try to sell at our sale. If you do have any suggestions, check and see if they are supposed to grow well in our area – then just let us know their name. Cost is always an issue so don’t ask us to order any overly expensive bulbs. Also, and just as important, we ask that you mark any bulbs you will share with us for the sale. You can label them in the ground to be dug up sometime in August. Or, you can dig bulbs now, label them and put them in mesh bags or pots – place them in a cool dry place until time to pass them on to us. If the bulbs are small, like rain or copper lilies, dig them and put them in pots with soil, label and bring them to us when we start asking you to bring us your bulbs. If you don’t know the color or even the kind of bulb that’s alright – we can fill mystery bags with unknown bulbs. Finally, talk the bulb sale up to friends. Word of mouth is always the best advertisement. Thank you in advance.”
Ron Calk, Bulb Sale chairman
March-April Seedling
The Friendly Plants you want around your house and garden
Spring Has Sprung “The Plant Whisperer”, A Book Review
Sponges, to Grow Seeds (part one)
Overcoming Problems When Planing Seeds (part two)
Take another look at the USDA Plant Hardiness Map
Chemical vs Natural Pesticides
The Friendly Plants you want around your house and garden
Spring Has Sprung “The Plant Whisperer”, A Book Review
Sponges, to Grow Seeds (part one)
Overcoming Problems When Planing Seeds (part two)
Take another look at the USDA Plant Hardiness Map
Chemical vs Natural Pesticides
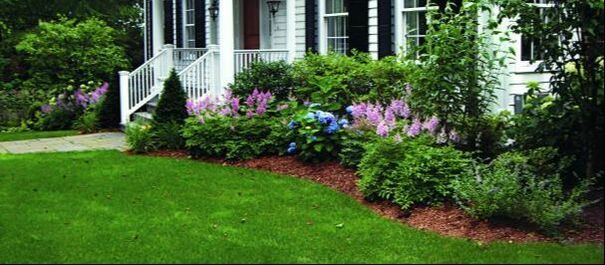
THE FRIENDLY PLANTS YOU WANT AROUND THE FOUNDATION OF YOUR HOME AND GARDEN
Are those friendly plants around your front door ready for the compost pile? Or, unless you are moving into a brand new home with NO garden in sight, or unless the winter of 2019 did a number on the shrubs and plants around the foundation of your home, why are we even thinking about this now?
For any number of reasons. Foundation Plants get old just like we do. Old, crotchety, rickety shrubs usually begin to look tired after a number of years have passed no matter how you try to please them and appear to be eager to become mulch in the compost pile. Or, maybe those rose bushes have been badly pruned for so many years, they ‘look funny’ and bloom in most unconventional ways. Maybe it’s just that you’ve painted the house and it needs a ‘new look’ to finish off the paint job. Furthermore, that group of shrubs and the way you placed those plants around the front door have grown big, and are no longer welcoming to family and friends. Furthermore, we certainly want to provide easy access to the folks who delivery packages from Amazon and UPS happy don’t we?
During the past Christmas Season, we looked at new ways to create a welcoming holiday look for the front door. In this section of The Seedling, we’re going to reconsider how to improve and redesign the first thing people see when they come through your garden to the front door, or simply drive past your home. First, consider those house hugging plants that bespeak of your gardening passions, and which will invite anyone who visits you to pause, sigh and smile. The idea is simple, like most things that are pleasing to the eye and to all of your senses. Foundation plants should enhance your home, make it more welcoming, and tie it to the surrounding landscape. Think about it. The plants which you might find at a front entryway are often stiff evergreen shrubs that do little for the house, and even worse, are often pruned into things that look like bubbles, triangles, or even green loaves of bread instead. (However, YOU are in charge of the plants around your home! If you favor this planting scheme, keep and enjoy it! Change is hard, and not only that…it is expensive!) This spring, if you are aching to improve the first image of your home and garden to create a stronger, better, prettier begin by doing some research. Below you will find some suggestions to improve or jumpstart an improved garden. Use these suggestions to redo or refresh the greeting card for all guests…your front garden.
• Work with the present architecture of your home. Which is it? Formal symmetry, centered by the front door, with windows lined up on either side? Ranch style, Colonial Revival, Federalist, Casual and Informal? Single story, Two Story? Your planting choices will want to match the design of the overall house design.
• Avoid elements that detract from the main entrance and the house in general, such as tall plantings that block views of your home or windows or which form mirror images on either side of one another. Symmetry offers many people a sense of completeness and quiet. But, this solemn look is not for every home or for your lifestyle. Also, consider that the area around the entry to your home is the first place people will be welcomed and made to feel at ease. Keep it quiet and peaceful.
• Plan before you plant. This sentence seems counter-intuitive. Don’t go to the nursery without a strategy! Without a plan, it is so easy to overspend. Examples: not taking into consideration the mature size of a plant, or choosing a plant which at maturity will cover windows or other architectural features. This mistake usually means you will one day have to reinvest in re-making the garden bed. A thoughtful purchase of plants you love will prevent a lot of pruning problems later. Furthermore, you will save money and time.
Examples: Tall plantings placed at the corners of the house will help soften its edges and tie it into the landscape. They can also give the illusion of extending a small house, making it appear larger. Use medium-size flowering trees like Dogwood, Redbud, Crabapple, and Dwarf Crape Myrtles which have a loose feeling will suit a casual cottage-style home. More traditional homes can be planted at each end with upright ‘pencil plants’ or other ‘tallish’ plants that add a column like an effect. If your home doesn’t have a raised foundation to disguise, but which has other architectural features to display, a simple ground cover or mulch may be all that is necessary to tie two areas together -and make maintenance and mowing easier.
• Choose plants that are now, and will be the Right Size and Scale. If you ever wander through a new subdivision and see baby trees that will grow 20 feet tall, and 10 feet wide at maturity, but planted only 4 feet from the corner of a new home, you will know that the tree surgeon will be on call in a few years! Choosing shrubs of the right size will also help keep pruning to a minimum. Look for dwarf varieties that max out at 2-4 feet tall of under windows and other tight spots. • Just say it again…Make a Plan. Take a photo of your house and trace the outline of it on paper. Add a few key features you want to keep, then start experimenting, sketching in the plants (at their full-grown size and shape) which you are considering. This process will help in designing the layout, determining exactly how many plant/shrubs, including existing plants that you can incorporate, and establishing a thoughtful and economical approach to putting foundation paintings that truly enhance your home.
• An exuberant mix of the foundational plan for this welcoming garden should also include Evergreen Shrubs, Summer-flowering Shrubs, Perennials, and Ornamental Grasses, Bulbs for early spring interest, and the quiet annuals of late summer and early fall. Whether you are starting from the foundation up with a new home, or tearing out the existing plants and moving to a new design, or restoring the garden that is already there, the above suggestions should peak your interest enough to make you drag out your garden books, examine the pretty pictures, go to local nurseries here and abroad, and whet your appetite for getting into spring. Also, remember that the Master Gardner Plant Sale April 6, 2019, will have beautiful new and fresh plants to finish off your front garden all summer long.
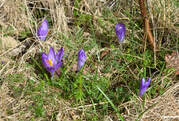
Do You have the “Gardening Itch”? If it hasn’t hit you yet. get out that thermometer! You must be sick!
With Spring amongst us, with weeds proliferating, with warm days and cool nights still causing angst, dreams of our summer gardens never far away. The seed catalogs entice, and we wish that local nurseries would hurry to buff up their garden centers and shelves, with beautiful, healthy plants and hints of spring. Google Weather tells us that “climate models have been unusually stable and in good agreement in depicting the colder look for the eastern and southern U.S. for the remainder of winter and into early spring, Early March gardening can be threatening, daunting, and still very cold! At night there remains the risk of frost and freezes.”
MARCH 2019 LONG RANGE WEATHER FORECAST FOR DEEP SOUTH
Dates Weather Conditions
Mar 1-3 Sunny, warm
Mar 4-7 T-storms, then sunny, cool
Mar 8-19 A few t-storms; warm, then cool
Mar 20-24 Sunny, turning warm
Mar 25-31 T-storms, then sunny, cool
March temperature 60° (4° above avg.)
Precipitation 5" (1" below avg.)
Now, with the weather in mind, let’s talk about some of the ways you can assuage your need to get dirt under your fingernails when the weather won’t cooperate. As our president said in the winter Seedling Newsletter, she gets rid of the winter blues when the Seed Catalogs appear in her mailbox. We can all relate! Here are some suggestions to help you dream about, shop for, then implement your best summer garden ever!
1. Go ahead and dream. But also, go ahead and jerk up that plant that for the last three years has been impossibly puny and spindly. (Talk to it first! 😊😊 Something like “I’m doing this for your own good you uncooperative thing!”)
2. Follow through on your New Year’s Resolution and keep a journal of your current garden plants and how they survived last Summer and the winter of 2019. This simple review of what worked, and what was a miserable failure will prevent you from making costly mistakes. It really isn’t so hard to do, and a record of last summer will help save you money and time in creating the 2019 garden. It helps to keep a notebook and pencil nearby the tools that you need every time you work in your garden. Here is what Julie Ashman, President of the Richmond Rose Society has to say about record keeping;” Each year, I update my journal and garden drawings with modifications in the garden such as replacing plants or adding more plants. Keeping a record of my fertilization program, helps me to reflect from year to year what products are really the most beneficial. When I go to meetings or conferences, I take notes and keep handouts to hole-punch and organize into my binder. Last but not least, I keep my receipts of garden purchases in the folder pockets. During the winter months, I take great pleasure reading through my binder to reflect upon the previous growing year. It is inspiring to reflect and dream about the new gardening year for my roses. Journaling is a very rewarding experience. If you haven’t tried it, then 2019 is definitely the year to start a journal.”
3. Invest in GOOD garden tools, and toss the ones with broken handles, dull tools, or those with broken parts. (Yes, even those tools you got for Christmas three years ago, and which never served the purpose for which they were designed.) Your sweet and generous great-aunt will not even know about it.
4. Along with sometimes very cold weather, we have absolutely beautiful warm days in March as well. Don’t miss any of them! Seize the day and go outside! Pull a weed. Rearrange your mulch a bit, check for plants that live outdoors in containers. Do they get enough winter sun? Are they flooded or thirsty? Check on garden art. Is your favorite sculpture leaning a bit precariously? Has it mildewed over winter’s humidity? Don’t let these favorite things deteriorate from neglect! Snap off dead and diseased foliage…cast your eyes about and refocus your gaze on how beautiful it will be in the summertime!
5. Don’t be afraid to try a new plant, a different container, a new way of arranging the patio plants. And, do not neglect those that you dearly love.
6. When rain does NOT come, take note. You may ‘forget to remember’ that you must water plants in late winter and early spring when you expect your garden beds to be wet and a bit muddy. But, take an hour or two here and there to pay attention and take care of these winter loving plants that are thirsty or need a little love.
7. Cover bare ground. 2-3 inches of mulch to prevent weeds from growing.
8. Look carefully around the garden, and make note if plants have grown too big for the space in which you intended them to live. Now is the perfect time to dig and transplant leggy and overgrown plants.
9. Read garden books, magazines and leaflets. Gather new ideas for fun projects, and then begin to implement new designs and secret gardens.
10. If you adhere to these suggestions, it will be full-blown spring and your late winter/early spring chores have paved the way for a beautiful garden. Just do it and smile. (Talk to your plants as you work around them! 😊😊)
TAKE ANOTHER LOOK AT THE USDA PLANT HARDINESS MAP

When was the last time you examined the USDA Plant Hardiness Zone Map? It is always an interesting read.
After viewing this small copy, if you want a larger version of the USDA Hardiness Map (upon which we place almost all of our information regarding plants and planting times), one is available through the US Department of Agriculture Web site.
With Springtime in the offing, it is a good time to look at it again, with some commentary about the map and how we continue to rely on it for the daily planning and planting needs.
The plant hardiness map reveals the lowest temperatures that can be expected each year in the United States. A digital version of the map may be found at the link below.
This version of the USDA Plant Hardiness Zone map is one we have looked at many times since it was published in 2003. It has more zones, 15 rather than 11, each of which represents a 10 degree Fahrenheit (F) difference in average annual minimum temperature. Each zone is broader and easier to follow as your eye move westward and the mountains make climatic gradients more complex. West of the Rocky Mountains, more discrete, rounded divisions have replaced the crazy tangle of zones that marked the 1990 map.
The zone ratings are intended to indicate excellent adaptability of the plants. Many plants may survive in warmer or colder zones, but survival alone is not considered the best predictor of garden performance. Of course, the right plant in the right place can predict survival rates, but the gardener is still the best predictor of plant performance!
So take a moment to review our friendly map again. This hardiness map is only a guide, albeit a very important one to any gardener anywhere in the United States. The guide allows YOU a lot of latitudes. The performance of a plant in your garden is still based on the care you provide throughout the seasons.
As we rush from the many gardening tips and advice we receive throughout the gardening year, it is always worth the few minutes it takes to examine the future of your garden, based not only on the care and love you give it, but also (maybe mostly!) to help better understand that every plant has a right time to bloom, a right place to be, and loving care to survive!
To print a larger copy of this map, click/control here: https://planthardiness.ars.usda.gov/PHZMWeb/
“THE PLANT LISTENER” By Julie C Kilpatric A Book Review
Julie Kilpatrick is a gold medal-winning garden designer and lecturer. She is the editor of the online gardening advice website http://www.gardenzine.co.uk. In her book“The Plant Listener” she points out that our plants are listening to us every day. And, she wonders; “Are you listening to them?
Let’s discuss her book, and you can make up your own mind. You may want to haul yourself off to Barnes and Noble or Amazon.com after considering that this book is a worthwhile read.
“The Plant Listener” is divided into 5 sections:
Part One: The Evolution of Plants. Plants came about as bacteria and algae evolved into mosses and other similar ‘green things’ This took a L.O.N.G. time. But, it is this story of our planet and the domestication of plant life, which is also the story of the domestication of humans.
Part Two: Plants have sex on the brain! And, our author gives amusing analogies to explore this finery of color and shape of the plant is sending a clear signal-: I’m here. I’m sexy! C’mon over…lets have fun! (Ahem, this is a family newsletter!) We know that flowers don’t limit themselves to one technique of reproduction (pollination), rather they throw themselves to the winds, or make sure their petals have the necessary appeal and shape to make it easy for bees and other pollinators to do their job.
Ms. Kilpatrick writes about the world’s largest seed, the coco de mer seed which takes five to six years to mature. Wonder how much that beauty weighs!
Lodoicea Plants Description: Lodoicea, commonly known as the sea coconut, Lodoicea, “coco de mer, or double coconut”, is a monotypic genus in the palm family. The sole species, Lodoicea maldivica, is endemic to the islands of Praslin and Curieuse in the Seychelles.Wikipedia
Part Three: A New Life Begins. This section is ALL about seeds, their life, development, and their needs. Her advice in this section is valuable because it has to do with caring for your seeds, how to start them indoors, how much light is necessary and the hardening off process before planting in garden soil.
Part Four: Worshiping the Sun. She discusses how vital sunlight is for all plants, but that all plants have different requirements for the amount of sun that is necessary, making the point that in a rain forest epiphytes live in shade, and get nutrients without soil.
Part Five: Getting Enough to Drink. In this section, Ms. Kilpatrick explains the ways plants do talk to each other and offer support to one another. (This is NOT spooky!)
Part Six: We All Have to Die Sometime. If this section is about death-and compost, it discusses all types of flowering plants, including trees and shrubs. There is even advice about design, using planting methods that incorporate planting in groups of three, five and seven for more pleasing eye candy.
This is not a big book. But, it carries a BIG STORY. If you like plant science which is brief but clear, if you want to have a better understanding of the way plants have developed and become a beautiful part of our lives, this is the story you want to read and enjoy.
Charles Darwin believed “that the tips of a plant’s roots behaved like the brains of lower animals, receiving information from the environment, communicating that information to other parts of the plant, and directing movement accordingly.”
(Ed note: One last thing. How many of you talk to your plants? And, if you do talk sweetly to your flowers, shrubs, weeds, and trees, do they listen? I rarely have a sweet-talk to my weeds. Do you?)
USING SPONGES FOR SEED GROWING- TRY PLANING SEEDS IN A SPONGE! (PART ONE)
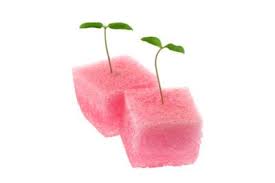
Information for this story is from “Gardening Know How”, a favorite website for fun projects, interesting tips and where to find good gardening supplies.
Calling all you ‘crafty types’! Doesn’t this look like an interesting idea? Since starting plants from seed is often a mystery to even gardeners with a ‘green thumb’, let’s study this method. and perhaps you and especially your grandchildren and friends might find it useful.
When seeds are started this way, you can transplant them easily into the potting medium of your choice as well as into your garden plot itself. I LIKE this idea!
There are good reasons for using sponges for the seed medium of choice and NOT directly into the garden bed.
• You can choose this method to watch more carefully how seeds grow and roots develop.
• Sponge seed germination happens quickly.
• Small spaces are no problem with this method of germination.
• Sponges can be reused if seeds turn out to be unviable.
While any seeds may be started this way, here are a few that are good choices for sponge-growing seeds. Lettuce Watercress, carrots, mustard, radish herbs, and tomatoes. Or try some of your favorites from your own garden!
Begin with sponges that have not been treated with anything, such as detergent or antibacterial compounds. You can always treat the sponges with diluted bleach to prevent mold growth, but do rinse them thoroughly if you try this method. Use the sponges whole or cut them into smaller squares. Soak the sponges in water and place them in a shallow tray.
You can begin putting seeds in the sponges, by pressing small seeds into the many nooks and crannies of a sponge or cut a larger hole in the center of each sponge for a single seed. Cover the tray in plastic wrap and put it in a warm location.
Check under the plastic wrap occasionally to be sure there is no mold growing and that the sponges have not dried out. Give the sponges a regular mist of water to keep them moist but not soaking wet. To transplant your sprouted seedlings, either remove them entirely and place in a pot or outdoor bed when ready or trim the sponge down and plant the roots with the remaining sponge still attached to them. The latter is useful if the roots are too delicate and can’t be easily removed from the sponge. Once they’re big enough, you can use sponge-grown seedlings as you would any seeds you started in soil.
Read more Gardening Know How at: www.gardeningknowhow.com
OVERCOMING PROBLEMS WHEN PLANTING SEEDS (PART TWO) BY MASTER GARDNER, MIKE LIVINGSTON
It’s that time of year again when we start planting seeds indoors to make our flower and vegetable gardens beautiful, but many of us find problems with seeds, so I thought I’d share a few of the problems that I’ve had as well as, some of the tricks I’ve learned to make seed growing more efficient. First, understand that I grow my seeds out in my cold garage under fluorescent shop lights listed as cool at 6500k. This is generally considered best for foliage and seeds.
One of my earlier problems was not paying attention to the planting instructions on the back of the seed packet. Those instructions are very important and can tell you how deep to plant the seeds, how long it’ll take to germinate; whether the plant needs light to germinate, whether it needs stratification, (a chilling period) scarification (nicking the seed to allow water in) or a period of soaking in water to break its coating.
1. Make sure your seeds are getting enough light. Florescent lights are much weaker than the sun, about the strength of a bright sunny day. Make sure your seeds are getting enough light. So, to increase the strength of your lights, you can do three things. a) Move them closer to the plants. (About 2-3 inches above the plants). b) Leave them on longer. I have mine set on a timer at about fifteen hours. There’s also a third trick you can use, place one of those cheap aluminum cooking sheets under your seedlings so that the light is reflected.
2. A heating mat will help. Seeds germinate best at between 65-75 degrees. It won’t really help the tiny seeds, though, which need to be left on top of the soil. What’ll happen is that the bottom up to about the middle of the tray will heat, but the top will remain cold. Most likely they’ll still germinate, but it’ll take the maximum amount of time. If it says 14 to 21 days. It will take 21 days, and even a tiny bit more.
3. On this same subject, DO NOT BECOME IMPATIENT. This is probably my own biggest personal problem. If seeds don’t sprout immediately don’t give up on them. If it says 14 to 21 days and they still haven’t germinated at 21 days give them a couple of days more.
4. Make sure that your seeds have plenty of moisture. If you’re using a seed tray, cover it with plastic. But make sure you take the plastic off once they’ve germinated. I’ve learned the hard way if you don’t, they’ll rot. Also, once they’ve germinated do not over water them. They’ll drown. This is a problem that we still have in our greenhouse.
5. Another problem that I’ve had in the past, is damping. My seedlings germinate but within a week they’re rotting in the middle and falling over. This is caused by a fungus that becomes deadly because of two things: overwatering, never allowing the soil around the seedlings to dry out and overcrowding, not thinning out your plants so that there is no air circulation between them. A fan will help in three ways: air will be circulated between the seedlings so that moisture on the vulnerable stems will be evaporated,the top of the soil will be dried out and it will create stronger plants by forcing them to resist the wind, and watering from the bottom will also help this problem. I set my seed trays in a large plastic tub filled part way up with water.
Hope I’ve helped. Happy gardening,Mike
REPLACING CHEMICAL PESTICIDES WITH NATURAL BIOPESTICIDES?*
There are currently 7,714,576,923 individuals living on our planet earth! ** Every one of us must have a safe food source to survive. Imagine Feeding so many people!
Timeout for a science lesson!
Timeout for a science lesson!
Because you are aware of the fact that there may be chemicals and preservatives in our food, we read labels on the groceries that we purchase. And, sometimes (probably not very often!) we think about genetic engineering as it relates to our daily meals. Because many of us generally prefer to buy organically grown food and know that it is important to understand this biological science as it relates to plants that are in our vegetable gardens, or which we purchase in stores. It is further incumbent on us to make decisions which are science-based, human-friendly and will give the most good to the relationships between science, the human population, and the wellbeing of our planet. A tall order, isn’t it?
So, stick with me now, as we parse the value of biopesticides which may have been used in growing food for human consumption.
Are you still concerned about the ultimate safety of plants (foods) which have been treated with BT? If so, the conundrum for many people has not been resolved and you are not alone. Research is ongoing to find less bothersome synthetic pesticides that appear to be nontoxic to humans and other organisms; and through their research, chances are good that this discussion will be resolved. REPLACING CHEMICAL PESTICIDES WITH NATURAL BIOPESTICIDES?*
Jennifer Hsiao, a Ph.D. candidate in the Biological and Biomedical Sciences Program at Harvard University is the author of this study.
*Biopesticides are certain types of pesticides derived from such natural materials as animals, plants, bacteria, and certain minerals. For example, canola oil and baking soda have pesticidal applications and are considered biopesticides. Google gives this definition: Bacillus thuringiensis is a Gram-positive, the soil-dwelling bacterium, commonly used as a biological pesticide.
** According to this Google search term: ‘population of planet earth in 2019’.
*** After a pesticide is Registered, the EPA Reevaluates its safety every 15 years. Before the EPA allows a pesticide to be used on crops, it sets a maximum legal residue limit for each treated food, and if that residue limit is exceeded, government action will be taken.
Stay awake, master gardeners! You will not find BT on food labels. Read, Learn, and Know as much as you can about current food science. Do the research yourself, if this story has piqued your interest.
So, stick with me now, as we parse the value of biopesticides which may have been used in growing food for human consumption.
- Biopesticides are derived from natural materials such as plants, animals, bacteria, and minerals. There are three main categories of biopesticides:• microbial pesticides, which are microorganisms (e.g. bacteria, fungi, viruses or protozoa) that have relatively specific pest targets.
- biochemical pesticides, which are naturally occurring substances that control pests using nontoxic mechanisms (mimicking insect sex hormones).
- plant incorporated, which are pesticides that the plants themselves produce after genetic material has been added to them (Bacillus thuringiensis (BT)
- Bacillus thuringiensis (BT) occurs naturally in soil that produces proteins specifically active against certain insects. We are learning that many crops such as corn, cotton, and soybeans have been genetically engineered to direct the BT genes that act as insecticides. Using BT controls pests as well as or better than chemical pesticides. The EPA has analyzed BT crops and found that they do not pose any significant risks to human health.*** Because genetically treated plants behave as one would expect for a dietarily safe product, and because they are not structurally related to food allergens and do not show toxicity when administered orally at high doses, they have been deemed safe for food production.
Are you still concerned about the ultimate safety of plants (foods) which have been treated with BT? If so, the conundrum for many people has not been resolved and you are not alone. Research is ongoing to find less bothersome synthetic pesticides that appear to be nontoxic to humans and other organisms; and through their research, chances are good that this discussion will be resolved. REPLACING CHEMICAL PESTICIDES WITH NATURAL BIOPESTICIDES?*
Jennifer Hsiao, a Ph.D. candidate in the Biological and Biomedical Sciences Program at Harvard University is the author of this study.
*Biopesticides are certain types of pesticides derived from such natural materials as animals, plants, bacteria, and certain minerals. For example, canola oil and baking soda have pesticidal applications and are considered biopesticides. Google gives this definition: Bacillus thuringiensis is a Gram-positive, the soil-dwelling bacterium, commonly used as a biological pesticide.
** According to this Google search term: ‘population of planet earth in 2019’.
*** After a pesticide is Registered, the EPA Reevaluates its safety every 15 years. Before the EPA allows a pesticide to be used on crops, it sets a maximum legal residue limit for each treated food, and if that residue limit is exceeded, government action will be taken.
Stay awake, master gardeners! You will not find BT on food labels. Read, Learn, and Know as much as you can about current food science. Do the research yourself, if this story has piqued your interest.
November-December Seedling
Parish Agent, Master Gardener Report
Decorating for the Holidays? Start with your Front Door!
Feral pigs...Coming to your Backyard!
The Secret to Fast Composting
Eyes to the Sky...Birds are Still Migrating!
How About Adding Ornamental Grasses to Your Landscape?
Parish Agent, Master Gardener Report
Decorating for the Holidays? Start with your Front Door!
Feral pigs...Coming to your Backyard!
The Secret to Fast Composting
Eyes to the Sky...Birds are Still Migrating!
How About Adding Ornamental Grasses to Your Landscape?

Mark Wilson,
Northwest Louisiana
Master Gardener Agent
Reports….

|
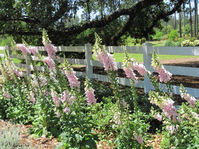
As we move further into fall, this is a great time to do a flower bed “turnover”. What I mean by turnover is simply that this is a great time to go ahead and tear out what remains of your spring and summer flower beds, and replace and them with your cool season favorites. Cool season bedding plants thrive in mild days with chillier nights such as those we have in the fall, winter and early spring. This is what makes the latter part of October and the beginning of November an ideal time to do your fall flower bed planting. Most cool season flowering plants can easily tolerate temperatures in the low twenties or even the upper teens with little to no damage. Furthermore a good number of them will provide you with blooms throughout the remainder of fall through winter and even into the early spring. Once you’ve decided to plant a cool season garden, it’s time to select your bedding plants. Your local nurseries and garden centers will offer a wide variety and selection of many of your favorite cool season bedding plants in both transplants and seeds. While transplants do provide a quick, “instant garden” look, many of your cool season bedding plants are easily grown from seed and may be directly seeded into the beds themselves. Some of these include: alyssum, annual phlox, blue bonnets, calendula, Johnny-jump-up, larkspur, nasturtium, poppies and sweet peas. Something to keep in mind when selecting your cool-season flowers is size. Cool-season flowers come in a variety of shapes and sizes, from the ground-hugging alyssum and lobelia to the towering hollyhocks, delphiniums, or foxgloves. Plant heights should be considered when selecting and placing bedding plants into the landscape. Should you choose to plant them by seed, remember that a few of our cool-season favorites such as foxgloves are biennials, meaning that if you plant them by seed this year the first year’s growth will only produce roots and foliage. The plant will not flower until the second year, at which time it will produce the standard 2 to 5 foot tall flower stalk and flowers.
Plant highlight: Camelot Foxglove (Digitalis species and hybrids) are biennials or short-lived perennials. Here in the Deep South, however, we grow them as cool-season annuals. That is, we grow them during the cool season which runs from October/November to April/May. They bloom in spring or early summer and then typically die in the heat of summer. The Camelot series foxgloves are bred to be especially strong and vigorous growing. And these foxgloves are somewhat more heat-tolerant than the foxgloves used in the past, allowing Camelot foxgloves to bloom well into late May or early June. These plants produce large flowers displayed on 16- to 18-inch-long flower spikes. The flowers are larger and the spikes are taller than previously grown varieties. The bell-shaped flowers of foxgloves are arranged around a strong, tall stem that grows from the center of the plant. Typically, the flowers tend to hang down, and you cannot see into the beautifully spotted throats. The flowers of Camelot foxgloves, however, are held more horizontally, which creates a fuller-looking flower spike and reveals the spotted interior of the flowers. And the flowers face outward, instead of down, for the best show. They make an outstanding display anywhere but are great in tall borders or background plantings. Rose, Lavender, and Cream are recommended for the best performance. Growing Information: • Grows 36” tall by 12” wide • Full sun to part shade • Grows 36" tall by 12" wide • Space 12"-16” apart • Best planted Oct - Feb • For superior results, purchase when young and before the colorful display begins • Hardy during the winter • Plant into well-prepared beds that have been amended with compost or other decayed organic matter • Apply a light application of general-purpose fertilizer at planting and again in early spring • Removing old flowers will extend the bloom time on these plants |
DECORATING
FOR THE HOLIDAYS?
START WITH YOUR FRONT DOOR!
FOR THE HOLIDAYS?
START WITH YOUR FRONT DOOR!

As the Thanksgiving and Christmas holidays creep up on us, are there any better ways to express the happiness and joy of the season than choosing real-live plants for your decorations? You hobbyists can also find items to suit your fancy online, in stores, and in your back yard! Your Seedling editor has scoured the internet for new and fresh designs. Let’s look at a few of them.
This is an easily made and welcoming door decoration. One long fat ribbon laden with simple green wreaths tells a story about your design style.
To make this design, secure the ribbon to the door carefully. Use sticky spots that will not mark paint, and can be easily removed. The simple, undecorated wreaths and one large bow welcome guests with a smile.
If you have space, two identical urns or other modest containers that are about 2/3 of the height of the door will balance the composition. This time of year you can find plenty of natural greenery that will fill the containers. You may want to add a centerpiece to the planting, as shown in this image, but the greenery that matches the doorway makes a statement all by itself.
You could also use odd and interesting items such as pine cones, magnolia leaves, live plants or small holiday balls to complete the design. Easy!
Check out this iteration of a welcoming Christmas themed doorway which uses traditional colors for a more formal look. This design fits the way many of our homes are designed, and its simple construction mirrors the more formal doorways. It is hard to see in this image, but the basket is woven; such baskets can be readily obtained at local hobby shops and garden centers.
What would you think about removing the urns? This project would do very nicely on its own, without the urns at the door, especially is space is an issue. You might instead, find a pretty doormat that mirrors the colors to complete this happy scene. Those stunning standard plants can fit your decorating scheme somewhere else.
Here is a pretty picture. If you have room to expand your design think about adding some pizzazz to the tree with homey items from the attic or garage.
A skinny tree bedecked with balls the color of the front door and then filled in with coziness around the bottom of the tree.
This idea is cool because you don’t have to consider using tape, nails, or other tools to hang something on the door itself. I rather doubt that anyone would sit in this chair, but the postman would find it handy under which to leave you a Christmas package!
Moreover, it is a cheery way of welcoming guests or family to your home.
|

|
Well, let’s not forget the inside of our front door! It may need some love too. This design would work either way, outside as a front door or anywhere inside your home. It does seem happy inside this home though, doesn’t it?
Very little needs to be said about this image. It speaks for itself as it adds a bit of whimsey to your interior decorating. The garland could be omitted if you prefer the mantra of ‘less is more’ when decorating for the holiday season.
The style works in both contemporary and traditional settings. I think it would put a gleam in the eyes of children, adults, and grandparents.
Okay Master Gardeners, the holidays are fast approaching. If and when you get that decorating mood…and who doesn’t during this crazy decorating time of the year, take some cues from these examples simple to elegant or just for fun. Find some nearby woodlands for beautiful greenery to bring indoors, check out your summer containers and put them to a new use for winter time. Most of all, enjoy yourself! Decorating for the holidays is fun. Let’s get in gear and do something special this 2018 holiday season.
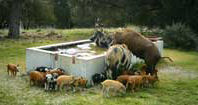
|

FERAL PIGS…COMING TO YOUR BACKYARD!
|
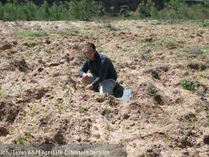
Raise your hand if you have or have had the nuisance/experience of feral pigs in your garden space. If you know personally about these animals, you should be writing this story. I am sure you have lots of tales about them.
In fact, feral pigs are a disaster in our environment, for us personally, for agriculture, and for wildlife who live alongside them. Here is what you should know about Feral
This is the Wikipedia definition: “The words Pig, Hog, and Boar essentially describe the same animal, but there are some distinctions. A boar is an uncastrated male domestic pig, but it also means a wild pig of any gender. A hog often means a domestic pig that weighs more than 120 lbs. Pigs are also called swine. Feral pigs are found in Louisiana in the wild, or in semi-occupied land and forest. No one keeps a feral pig for a pet. Do not confuse with the ‘Pot-Bellied Pig” who many kept and loved decades ago.
Why are these swine different? How do feral pigs compromise the environment in which we live and garden? Why is there so much animosity regarding this ugly creature? Can’t we live together in the same spaces? On this subject, most people reflexively say ‘Quick, let’s trap/kill this beast!’ One small caveat about the theme; after they are killed, there is a definite group of people who think feral pig meat is better tasting than store bought pork. However, this fact is under consideration. Furthermore, one would have to eat a LOT of pig to make a dent in their population!
Here is what integrated pest management (IPM) experts have to say on the subject of feral pigs.
The picture at the right displays feral swine slurping water at the cows drinking trough. Just look at all of those babies! Aren’t they cute? (Wait up. You need to read more about them before forming this opinion!)
Wild pigs usually live to be 4-8 years old. Full grown males are usually 200 pounds at adult weight, while females weigh in at about 170 lbs. They consume a lot of food to become this hefty! Female pigs mature at 6 months of age and can mate and have 2 litters of 5-6 babies in each litter every year. These animals prey upon reptiles, amphibians, and small mammals. Their rooting behavior overturns and tills the soil, uprooting plants and creating opportunities for weeds to invade. They disturb native and naturalized vegetation and reduce available forage for livestock and other wildlife. Their wallowing disturbs springs and creeks, and they are known to cause damage to stock water troughs by rooting around their bases and undermining the troughs. Their rooting and wallowing behavior also disturbs riparian (wetland areas) and reduces habitat sustainability for native and endangered wildlife species. In urban areas, the rooting behavior of wild pigs can cause extensive damage to lawns and gardens.
The voracious appetite of this animal results in billions of dollars of economic damage nationally to agriculture. The rooting behavior overturns soil, uproots plants, and creates opportunities for weeds to invade. Their foraging behavior reduces the amount of food available for our native animals. They carry five major waterborne pathogens that can be infectious to humans, domestic livestock, and native wildlife.”
As you can see from this story, Feral Swine in Louisiana is a growing issue among not only farmers, ranchers, and gardeners of every sort, but are proving to be difficult to eradicate by anyone living and gardening in rural settings. This story is not ending well. It goes against our philosophy to kill animals indiscriminately. However, these animals are ruining the balance of ecology in our home and vegetable gardens. There is no solution in sight to bring the feral pig population down. As stewards of our environment, and to maintain a balance of nature, we must be vigilant and take every action available to curtail this population explosion of Feral Swine.
Thanks to Donna Sheilds who brought this interesting story to my attention.
Ed note: Sections of this article came from research at UC IPM, University of California
THE SECRET TO FAST COMPOSTING
By Master Gardener, Mike Livingston
By Master Gardener, Mike Livingston

As master gardeners, we know how to make compost: add greens and browns and a little water and let it set.
And as long as everything we’ve added was once alive, it will decompose… eventually.
That type of cold compost has three problems.
Number one, it can take quite a while, up to two years.
Number two, it will be full of weed seeds which will immediately sprout as soon as they’re spread around your precious flowers or vegetables.
Number three, all harmful pathogens will still be present.
The solution is a hot compost, that heats up to between 145 and 160 degrees. This will burn off any weed seeds and pathogens and can be finished within four months. So how do you do it? This was a problem I faced several times as Compost manager at Highland Community Garden. And I didn’t really understand the secret until this year.
Let’s set up the steps for you. First, you need greens and browns. Greens are your nitrogen materials like grass, green plants, and manure. Browns are represented by dead leaves, paper and even wood. (Though wood should be kept to an absolute minimum because it takes so long to decompose.)
Next, cut up your greens and browns. This is to allow the microbes doing the actual decomposing will have a larger surface area to eat. If you simply throw in whole leaves or whole stalks of plants, your composting will go much slower because the microbes won’t be able to get a good bite. The best option is to run over your greens and browns once with a lawn mower, but only once. You don’t want to make your materials any smaller because they’ll pack together and shut off the flow of oxygen.
Lastly, combine them. The best proportion is to stick to a ratio of five browns to one green. In other words, five hand or forksfull of leaves to one of a grass. Now as you’re throwing in your greens and browns you need to moisten them. The water will awaken your microbes from dormancy and allow them to move, eat and excrete.
Now, add moisture. Moisten means exactly that: it is very important not to drench your pile. When you’re finished adding water, you should be able to squeeze your mixture and get no more than a drop coming out. This was one of my first mistakes. The first time I made up compost I drenched the pile, thinking after all if a little water allows the microbes to move around and eat, wouldn’t a whole lot of water get them to move faster?
Within a week I had a stinky, pile that smelled like a sewer. The drenching drowned the good bacteria, which are aerobic (air-breathing) and was replaced by anaerobic bacteria which gave off the sewer smell.
Once the greens and browns have been mixed and moistened you’re finished for the moment. But only for the moment because now comes the hardest part, and the secret: you need to turn your pile at least twice a week. This is done to get new oxygen to your fungi and bacteria .Think of it as a fire in a fireplace. When the flame starts to go out what do you do: you stir it. This brings new oxygen to the fire and sparks it back to life. The same thing happens in your pile. After a fierce start, the oxygen runs out and needs a new infusion.
This is one of the advantages that a hand composter has over a pile that you’ve set on the ground. The hand composter may be easy to crank and you can turn it several times a day. The more you turn it the faster it will decompose. Whereas, turning a pile the size LSU recommends: 4’ high, 4’ wide and 4’ long, is going to tire your back out quickly. In a super short time, you’re going to find yourself turning it less and less. Remember this very important fact, you should turn your pile once a week, or at a minimum least every two weeks. This method and the effort you have made is worth the work. The finished product will not only enrich the soil, but it will also grow your plants organically and safely.
EYES TO THE SKY…
BIRDS ARE STILL MIGRATING!
BIRDS ARE STILL MIGRATING!
|
|
North Louisiana has been known to attract birds not found in the rest of the state. You can find many of these birds at the Red River Wildlife Refuge where we have been holding our meetings.
For Instance, the rare migratory Smith’s Longspur (1) enjoys the Bermuda Grass growing on Caddo Lake. “This bird is found in Northwest Louisiana but nowhere else,” states Larry Raymond, president of the Shreveport Bird Study Group. The beautiful white-breasted nuthatch (2) is another uncommon bird for Louisiana, but one who pays us a visit. This common feeder bird has clean black and gray and white markings. Don’t they dress well? Birding hotspots include Caddo Lake that stretches into both Louisiana and Texas and is a habitat for many species of aquatic birds such as grebes, herons, ducks and terns. The horned grebe (3) have been known to winter here year-round. Osprey (4) arrives in late spring and fall. The Red River National Wildlife Refuge is a great habitat for a bird we don’t see anywhere else. This is where you might find wintering ducks and shorebirds, such as sandpipers and yellowlegs. Birders have also sighted a short-eared owl and a yellow rail (5) in the forest and lowlands around Lake Caroline. Louisiana now ranks as one of the population centers for bald eagles (6), who may live here year-round. Perhaps one day you might see these majestic birds soaring above Lake Caroline. The Red River Wildlife Refuge is free and open to the public but use this tip: if you are visiting to find birds, it is always much better to go with someone who knows where to find the best birding spots. The Red River National Wildlife Refuge is one of five refuges managed in North Louisiana Refuge complex. If you live out towards Cross Lake, you will also find it to be a good site for birdwatching. Master Gardeners, if you have an interest in birding, learning about bird habitat and ways to renew their lives in Northwest Louisiana, you are missing an opportunity by not taking advantage of birding at any of these Wildlife Refuges. If you have a hankering to know more about birding in general, the Shreveport Bird Study Group meets on the second Tuesday of the month January to June and September to December at the LSU-Shreveport Museum of Life Sciences in Shreveport. Speakers give talks on birding and natural sciences and the group takes occasional field trips. They are ready to teach new ‘birders’ how to find and recognize the birds in our environment. For more information contact: (318) 797-5338. Parts of this story are from Louisiana Life, May June 2018 issue. |
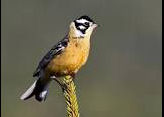

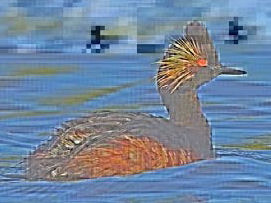

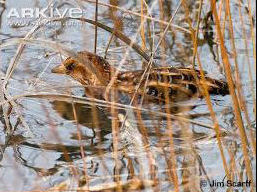

HOW ABOUT ADDING
ORNAMENTAL GRASSES TO
YOUR LANDSCAPE?
ORNAMENTAL GRASSES TO
YOUR LANDSCAPE?

WOW! ISN’T SHE STUNNING?
Should you be interested in designing a garden space with ornamental grasses, or if you have a hankering to try your hand at a grassy garden sculpture, read on.
Should you be interested in designing a garden space with ornamental grasses, or if you have a hankering to try your hand at a grassy garden sculpture, read on.
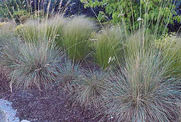
Landscapers will tell you that trees and shrubs are the ‘bones’ of a garden. These two elements usually form the basis from which we create the framework of a garden. Then what? Who are the reliable performers, year after year? Perrenials, of course!
What component comes next? Annuals are our sturdy and stately go-to plants. Annuals could be called the jewelry which brings pleasure to the viewer. Hmm. Jewels in the garden? How appealing. If this is true, how do grasses fit into the scheme of landscaping? Have you looked around lately and admired lovely ornamental grasses floating above the flower bed, or bending and tossing in a breeze? On the 2018 Le Tour des Jardin, we saw many gardens where grasses added flourish to the flower bed. Ornamental grasses present a unique element in the garden. Indeed, they are a combination of the bones, the flesh, and the decorative and ornamental accents which meld together and form the whole picture. Bringing graceful motion, attractive forms, interesting textures and striking colors, grasses may not be that which the eye falls upon first, but they are certainly the element which, when you do see them, the entirety of the picture emerges. Other attractive advantages to ornamental grasses are multi-season displays, lovely additions to flower arrangements and a tendency to retain form and color in either fresh or dried form. If ornamental grasses are a novel idea to you, here are some of the advantages of placing grasses in your garden. Generally, grasses are drought tolerant, even if drought sends them into dormancy. Grasses can be found that love shade, that love heat, that remain evergreen year-round; all properties that are suitable to zone 8, where we grow our gardens. Grasses are generally divided into cool season, or warm-season varieties. Cool season varieties grow well in the cool months of spring but are less aggressive in late spring to warm weather. They may even die back or go dormant. Warm season varieties are just the opposite. They begin to grow in late spring after the weather begins to warm up. They are happiest in the hottest of temperatures, with a penchant for 85 to 95 degree days. (we have a lot of that in our summers!) This is the weather that will produce those showy seedheads which last into autumn. Cooler weather and frost puts a stop to all of that. But there will still be winter interest with stalks and seeds that dry and change color. Bring them into your home for beautiful Thanksgiving arrangements! Grasses can be tufted with relatively short growth that spreads in all directions like porcupine quills. Grasses can be mounded with stalks growing upwards and then bend to the ground with a shape like a mushroom cap. They can be divergent upright with stalks spread out like a fan. Sometimes, ornamental grasses grow both upright and arching! There are even creepers, spreaders and runners! (Consider Mondo grass!) The creepers, spreaders, and runners have bad habits. They can be invasive, but that works well if you are looking for a ground cover. Grasses usually are not fussy about the soil in which they grow and will do very well in soils which many plants despise. Ornamental grasses do appreciate good drainage and hate wet feet. They will do well with an all-purpose fertilizer applied once in the spring. When planting, dig a planting hole twice as wide but no deeper than the root ball. Amend the soil with some compost as well as the fertilizer. General pruning should be a simple haircut that molds and trims but doesn’t change the general shape of the plant. You may simply leave them to overwinter naturally, providing seeds for birds and other creatures. If grasses should die out in the center, this is an indication that your plant needs to be divided. Simply divide while the plant is in an active growing stage, but not flowering. Keep divisions moist until the new plant is established. Warm-season grasses can be divided from the time new growth emerges in mid-to-late spring until mid-summer. Garden Design Tips: With the increasing variety of grasses being used today, there are multiple ways to integrate them into your garden. They can be used alone or in combination with other grasses, flowers, shrubs and trees, or in planters. Some ornamental grasses will grow from 5-12 feet-such as full-sized pampas, millet or maiden grasses. These make a dramatic statement and a distinct focal point. They also provide a graceful sense of movement, from wispy breezes to the swaying of a surging wind. Large ornamental grasses make wonderful privacy screens. You can take a mid-sized grass and use them to create a second tier of interest as a single specimen or as elegant accent pieces. Ornamental grasses will provide the elements of balance, harmony, and rhythm when used in pairs or groupings of three or more. Tufted varieties: Use black Mondo and Japanese forest grass as well as the colorful Carex varieties as beautiful gems in the garden. For normal settings, use grasses that have similar growth and similar habitats together. Bachelor’s Buttons, Bee Balm, Black-eyed Susan, chamomile, coneflowers, daisies, foxglove poppies and yarrow all combine well for a natural look. From small bunny-tail tufts to majestic stands of giant Miscanthus, there is a size, color texture of ornamental grasses that will make your garden pop with gracefulness, color and beauty. I can’t wait for spring! Roses get Rosette Disease. Other favorite plants require special soil, frequent fertilizing, and multiple prunings. Grasses are healthy. Grasses are perennials. They stay beautiful year to glorious year. There are so many stunning ways to incorporate grasses into the existing garden, Watch for them as you tour gardens in your neighborhood, nurseries, shopping centers, businesses and shops. |

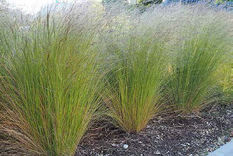


|
September-October Seedling
Parish Agent, Master Gardener Report (Rose Rosette Disease)
Overton, Texas Field Trials
The tale of Donkey-Doo
The Magnificient Monarda
Why Should We Plant Native Trees?
Planting Containers That Weather Winter, and Thrive!
Fall Garden Chores
Parish Agent, Master Gardener Report (Rose Rosette Disease)
Overton, Texas Field Trials
The tale of Donkey-Doo
The Magnificient Monarda
Why Should We Plant Native Trees?
Planting Containers That Weather Winter, and Thrive!
Fall Garden Chores

|
Mark Wilson, Northwest Louisiana Master Gardener Agent Reports…. |
I have been busy lately gathering information regarding Rose Rosette disease as it makes its way into North Louisiana Parishes. These are the problems posed for rose gardeners in our area, how to recognize the disease, how to prevent the spread of the disease to other gardens, how to eliminate rose rosette from your garden, and how to restore your garden to a friendly place to grow roses again.
“Rose rosette disease is caused by a virus known as Rose Rosette Virus. It is a devastating disease of roses-particularly since all cultivars are susceptible, including Knock Out roses and wild
Symptoms produced by the rose rosette disease are highly variable, depending on the cultivar or species of the rose and the plant’s age. Several different types of symptoms have been reported on infected roses, but some of the more recognizable symptoms of rose rosette disease include “witch’s broom”, which displays an excessive thorniness, thickened new canes, and abnormal discoloration or excessive reddening of new foliage.
Infected roses produce a cluster of new shoots from a single point on the parent canes. The new shoots elongate rapidly and appear like a “witch’s broom”. Infected canes produce excessive thorns that are green or red and soft in the beginning but later harden off as the disease progresses. Presence of excessive thorns, especially on newly infected canes is one of the most reliable symptoms to help with diagnosing Rose rosette disease. Another symptom that may be used to diagnose rose rosette disease is that infected canes are thicker than parent canes. Reddening of the new foliage and shoots also is associated with Rose rosette disease. Remember, however, that these symptoms can be used to potentially recognize Rose rosette disease but that positive confirmation of the disease requires molecular testing.
Although Rose rosette disease produces unique symptoms on roses, those symptoms can be easily confused with symptoms caused by other diseases, pest stressors, and other factors. Improper use of herbicides such as Roundup, or other powerful chemicals may result in distortion and clustering of new growth that looks like a“witch’s broom”. Abnormal discoloration and distortion of new foliage have been constantly associated with Rose rosette disease, but feeding injury from chili thrips which is also a very significant rose growing issue in Louisiana can cause similar symptoms.
Rose rosette disease is transmitted by a tiny eriophyid mite. Or by grafting. These mites crawl from plant to plant or move long distances with the wind. The virus is systemic and can persist in the live roots of infected rose bushes, but it is not soilborne. Grafting of virus-infected scions on healthy rootstock and vice-versa may also result in the virus transmission.
You cannot manage this disease! Once a rose is infected, there is no cure.
To avoid introduction of the disease or to reduce the spread to healthy roses, remove infected roses completely, including roots and soil. New growth from infected roots and soil may serve as a source of the virus. Dispose of infected roses immediately by burning, or by bagging infected plants for safe disposal.
If, after all roses infected have been removed, and you wish to reinhabit your garden with new varieties of roses, start your search by choosing mite-free roses. Properly space roses to prevent mites from crawling from plant to plant. Clean tools and other equipment used for pruning. Good cultural practices, such beginning with new healthy soil, six hours of sun daily, following a regular spray program, and careful watering should help you begin growing healthy roses again.
Mark closes his article by asking us to notify LSU AgCenter Raj Singh at 225.578.4562 or [email protected]. should you find rose rosette disease in your garden.
Mark, Thank you for this up to date information regarding Rose Rosette Disease. Let us all pray that the angel of rose rosette death passes us by and never comes back!
OVERTON, TEXAS FIELD TRIALS
WHAT A GREAT GARDENERS TRIP!
As Recorded and Visited by
Master Gardeners Donna Shields and Judy Emberton
WHAT A GREAT GARDENERS TRIP!
As Recorded and Visited by
Master Gardeners Donna Shields and Judy Emberton
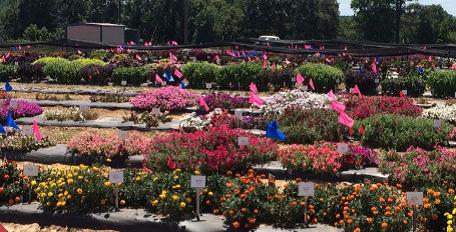
Donna Shield and I made our annual trek to Overton,Tx. on June 28 to the Texas A&M AgriLife Horticulture Field Trials. I introduced this event to Donna in 2005 and we try to make the short trip each summer that the date fits our schedules. The trials actually began in 1993 as a way to help meet needs of seed companies, nursery managers and garden enthusiasts. The field trials feature more than 500 ornamental and vegetable plants. The varieties of annual and perennial ornamentals and vegetable plants are on display in a large, open field planted in garden style rows in the Texas heat. To drive through the gates and into the field is to drive into a sea of floral color. For those of us who love plants, the sight is breathtaking. The purpose of the mass plantings is to discover which plants will survive and even thrive in the hot, humid summers of East Texas. And, considering the proximity to Shreveport/Bossier, plants that do well in this part of East Texas should do well in Northwest Louisiana.
The trials and lunch are free to those who attend. The day begins with registration and a tour of the field trials followed by a tour of the demonstration garden at the Texas A&M AgriLife Research Center. That's where Donna and I stopped and visited with Dr. Allen Owings. He was taking time to speak in Nacogdoches and tour the trials.
In addition to the plantings at the demonstration garden, there was a separate area addressing the trapping and control of wild hogs. There were several examples of traps and how to construct them set up for viewing. There was also a free booklet concerning the issue of wild hogs.
After a delicious bar-b-que lunch, it was time to go into the much-needed air-conditioned research center and listen to the afternoon's speakers: Dr. Brent Pemberton--A report of what survived the summer of '17. Many of those become Texas Superstar plants. Jenny Wegley-- Vice President of Horticulture Operations at the Dallas Arboretum and Botanical Gardens. She spoke on the Happenings at the Dallas Arboretum. Daniel Cunningham-- Program Coordinator at Texas A&M-- Thought for Food: A green Industry ( Growing an Edible Garden). DottyWoodson-- Extension Program Specialist at Texas A&MAgriLife Extension Water University-- Rain Barrel Demonstration. As always it was a fun and informative day. Mark your calendars for the for the last weekend of June, 2019!
Submitted by Judy Emberton
Thanks to Judy and Donna for this lovely look at a wonderful way to view the flowers you either just planted or that you fall in love with and want to plant!
Why Does Master Gardener Patty Leath Wear that Great BIG Smile?
Many of you recall Patty and David Leeth’s Garden when it was on tour in 2018. Blooming then with eye-popping color, totally weed-free, starring varieties of plants that we could not even pronounce.
Yes, you remember it!
(Question) So, does it still look great in this scorching summer heat?
( Answer: Yes!) How does she maintain this level of the WOW factor, and health and beauty too?
Many of you recall Patty and David Leeth’s Garden when it was on tour in 2018. Blooming then with eye-popping color, totally weed-free, starring varieties of plants that we could not even pronounce.
Yes, you remember it!
Many of you recall Patty and David Leeth’s Garden when it was on tour in 2018. Blooming then with eye-popping color, totally weed-free, starring varieties of plants that we could not even pronounce.
Yes, you remember it!
(Question) So, does it still look great in this scorching summer heat?
( Answer: Yes!) How does she maintain this level of health and beauty?
Patty is giving away some of her soil secrets, one of which is when it comes to her plants, she has NO SHAME! If it is a plant, a garden ornament, a special design-an amazing product…if it is available, Patty will have it! Like all of us passionate gardeners, we try to find a way to make it happen.
Her latest foray into soil amendments is the acquisition of fresh DONKEY DUNG. Yup…you heard it right.
This is how she found this free source for organic fertilizer.
There is a donkey in her neighborhood, the sweet looking, amiable, active creature that he is. Patty often sees him in a field nearby her home. One day she got a gleam in her eye; thinking…“This sweet little creature poops! Poop = Fertilizer!” And she knew that this furry creature would just make more of it every day. “Wait!”, thought Patty, “Donkeys have a bad rep. I know they make terrible sounds braying. I understand they are stubborn. And sometimes they seem downright mean. But, all I want is their poop! Moreover, they are cute.”
Thinking these good thoughts, Patty took herself up to the neighbor asking the not so subtle question; “May I have some of his poop, please?”
Patty put forth her sweetest smile.
Looking at Patty curiously, the neighbor answered, “Yes, take all you want”. So, with this awkward moment having passed, Patty now has a never-ending, new source of organic fertilizer for her compost pile, and ultimately for the garden. But, we all know that her work to change animal waste to garden fertilizer will take a little bit of work.
If you are serious about obtaining rich, dark manure, you need to ask yourself;
Question: Which animal droppings are best for making fertilizer?
Rabbit Droppings: Rabbit waste is like gold in the garden because it is high in both nitrogen and phosphorus. The next best thing about rabbit poop? It does not have to ‘mature’ before using. Just scoop under the rabbit boxes and use immediately, wherever it is needed.
Cow Manure: Cow manure is a great all-purpose fertilizer since it has a bit less nitrogen, but enough to the balance of all nutrients. Cows have four stomachs (We found this out in grade school, much to our amazement.) This means the food is digested well, and the manure is less likely to have grass/weed seeds in it. But it still must be composted before use in the garden.
Goat or Sheep Droppings: This waste material is generally drier than those from chickens, cows, and horses, so it can be added to the compost pile sooner. Often, it is less stinky (a good thing). Weeds abound in this poop. It will need to be heated before use in the garden.
Horse Manure: Surprisingly, horse manure is not particularly high in nutrients, but it is rather wonderful as an all-purpose fertilizer. You may find more weeds in this manure, so you will want to make sure your compost pile reaches 140 degrees to kill them. You can use a compost thermometer to gauge the inner temperature, or you can also make sure your compost pile has the more brown matter in it than green matter. This way, you naturally build a good balance so the animal waste serves as a perfect complement to your pile rather than overtaking it. (This refers to donkey poop as well.)
Chicken Droppings: Chicken poop is very high in nitrogen, so will easily ‘burn’ plants if not adequately composted. This means compost for at least 6 months before using. Which brings to mind another caution: This poop is highly stinky! To be sensitive to your neighbors nose, and to keep them happy, don’t put the compost pile too close to their fence line!
We are not all so lucky as Patty to find a source for animal waste. But there are alternatives. It is no more time consuming than locating and composting the above organic fertilizers, and the end result is a healthy fertilizer for all plants. Below, you will find an excellent substitute to which many gardeners (including me) find to be quite successful.
FORTIFIED GARDEN TEA
30 Gallon garbage can with a lid. Fill almost to the brim with water.
24 cups Alfalfa Meal or Pellets
½ cup Epson Salts (Magnesium Sulphate)
4 cups Fish Meal
1 cup organic fertilizer
1/3 cup Sequestered Iron
Place alfalfa in water. Stir. (The handle end of a rake is good). Stir, and cover. Every day or so, stir carefully (long handle again) Allow to ferment for several days. It smells bad right now.
Stir in the other ingredients, stir well to get sediment well mixed. It still stinks but is not so powerful now.
Pour 1-2 quarts around the drip line of plants, shrubs, trees.
Application for this tonic is best accomplished in October, January, March-April, June. Do not apply in hot weather.
This all-purpose fertilizer not only feeds plants, it also is good for the soil. You might try it now, or wait til next spring. For healthy plants and for soil development this is a great alternative to ‘store-bought’ fertilizers.
Many of you recall Patty and David Leeth’s Garden when it was on tour in 2018. Blooming then with eye-popping color, totally weed-free, starring varieties of plants that we could not even pronounce.
Yes, you remember it!
(Question) So, does it still look great in this scorching summer heat?
( Answer: Yes!) How does she maintain this level of the WOW factor, and health and beauty too?
Many of you recall Patty and David Leeth’s Garden when it was on tour in 2018. Blooming then with eye-popping color, totally weed-free, starring varieties of plants that we could not even pronounce.
Yes, you remember it!
Many of you recall Patty and David Leeth’s Garden when it was on tour in 2018. Blooming then with eye-popping color, totally weed-free, starring varieties of plants that we could not even pronounce.
Yes, you remember it!
(Question) So, does it still look great in this scorching summer heat?
( Answer: Yes!) How does she maintain this level of health and beauty?
Patty is giving away some of her soil secrets, one of which is when it comes to her plants, she has NO SHAME! If it is a plant, a garden ornament, a special design-an amazing product…if it is available, Patty will have it! Like all of us passionate gardeners, we try to find a way to make it happen.
Her latest foray into soil amendments is the acquisition of fresh DONKEY DUNG. Yup…you heard it right.
This is how she found this free source for organic fertilizer.
There is a donkey in her neighborhood, the sweet looking, amiable, active creature that he is. Patty often sees him in a field nearby her home. One day she got a gleam in her eye; thinking…“This sweet little creature poops! Poop = Fertilizer!” And she knew that this furry creature would just make more of it every day. “Wait!”, thought Patty, “Donkeys have a bad rep. I know they make terrible sounds braying. I understand they are stubborn. And sometimes they seem downright mean. But, all I want is their poop! Moreover, they are cute.”
Thinking these good thoughts, Patty took herself up to the neighbor asking the not so subtle question; “May I have some of his poop, please?”
Patty put forth her sweetest smile.
Looking at Patty curiously, the neighbor answered, “Yes, take all you want”. So, with this awkward moment having passed, Patty now has a never-ending, new source of organic fertilizer for her compost pile, and ultimately for the garden. But, we all know that her work to change animal waste to garden fertilizer will take a little bit of work.
If you are serious about obtaining rich, dark manure, you need to ask yourself;
Question: Which animal droppings are best for making fertilizer?
Rabbit Droppings: Rabbit waste is like gold in the garden because it is high in both nitrogen and phosphorus. The next best thing about rabbit poop? It does not have to ‘mature’ before using. Just scoop under the rabbit boxes and use immediately, wherever it is needed.
Cow Manure: Cow manure is a great all-purpose fertilizer since it has a bit less nitrogen, but enough to the balance of all nutrients. Cows have four stomachs (We found this out in grade school, much to our amazement.) This means the food is digested well, and the manure is less likely to have grass/weed seeds in it. But it still must be composted before use in the garden.
Goat or Sheep Droppings: This waste material is generally drier than those from chickens, cows, and horses, so it can be added to the compost pile sooner. Often, it is less stinky (a good thing). Weeds abound in this poop. It will need to be heated before use in the garden.
Horse Manure: Surprisingly, horse manure is not particularly high in nutrients, but it is rather wonderful as an all-purpose fertilizer. You may find more weeds in this manure, so you will want to make sure your compost pile reaches 140 degrees to kill them. You can use a compost thermometer to gauge the inner temperature, or you can also make sure your compost pile has the more brown matter in it than green matter. This way, you naturally build a good balance so the animal waste serves as a perfect complement to your pile rather than overtaking it. (This refers to donkey poop as well.)
Chicken Droppings: Chicken poop is very high in nitrogen, so will easily ‘burn’ plants if not adequately composted. This means compost for at least 6 months before using. Which brings to mind another caution: This poop is highly stinky! To be sensitive to your neighbors nose, and to keep them happy, don’t put the compost pile too close to their fence line!
We are not all so lucky as Patty to find a source for animal waste. But there are alternatives. It is no more time consuming than locating and composting the above organic fertilizers, and the end result is a healthy fertilizer for all plants. Below, you will find an excellent substitute to which many gardeners (including me) find to be quite successful.
FORTIFIED GARDEN TEA
30 Gallon garbage can with a lid. Fill almost to the brim with water.
24 cups Alfalfa Meal or Pellets
½ cup Epson Salts (Magnesium Sulphate)
4 cups Fish Meal
1 cup organic fertilizer
1/3 cup Sequestered Iron
Place alfalfa in water. Stir. (The handle end of a rake is good). Stir, and cover. Every day or so, stir carefully (long handle again) Allow to ferment for several days. It smells bad right now.
Stir in the other ingredients, stir well to get sediment well mixed. It still stinks but is not so powerful now.
Pour 1-2 quarts around the drip line of plants, shrubs, trees.
Application for this tonic is best accomplished in October, January, March-April, June. Do not apply in hot weather.
This all-purpose fertilizer not only feeds plants, it also is good for the soil. You might try it now, or wait til next spring. For healthy plants and for soil development this is a great alternative to ‘store-bought’ fertilizers.
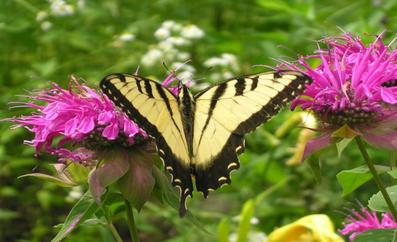
THE MAGNIFICENT MONARDA
Rising from a clump to a height of 2-4 feet, and shooting out spider-like blossoms of pink, red, purple and even white, Bee Balm is one of the prettiest of the butterfly/pollinator plants. But it is no dig-a-hole-drop-it-in-and-forget-it plant. Bee Balm takes extra care if it is to look its best and survive more than a single season.
First, it needs morning sun. I have my patch behind two large Abelias. If exposed to the hot afternoon sun of August it will tend to be shorter with smaller, poorer looking flowers. Though if it gets plenty of water this can be mostly overcome. Second, Bee Balm roots need to be kept constantly moist. If you allow them to dry out they will die. It’s important, however, that you don’t create swampy conditions where the plants will drown. ( Both these seemingly contradictory statement can be achieved if you work in a good supply of compost.)
Bee Balm has few insect problems, but mildew and other leaf diseases are a constant threat in our humid weather. To lessen the chances of Bee Balm getting mildew, don’t crowd your plants. Space them 18” to 24” apart. Don’t overhead water and keep weeds or anything else which hinder air circulation to an absolute minimum. If it does get mildew use a fungicide quickly.
I hope you give Bee Balms a try and that they come out healthy and beautiful.
Happy gardening: Mike.
Thanks as always Mike, for reminding us that butterflies are always at the heart of every beautiful garden.
Year
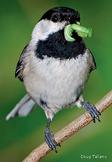
Why We Should Plant Native Trees and Plants?
Because our Native Birds Must Have Them!
Because our Native Birds Must Have Them!
Year Round, we attract and cherish the birds that inhabit our gardens and green spaces. We place bird feeders and butterfly puddlers in strategic locations that have easy and safe access. But, consider the habitats that our favorite backyard birds populate? Certainly, we can live side by each and can also provide a quality of life for all of us.
As a case to point out our dilemma, this is what could be observed about 35 years ago, in South Shreveport.
Youree Drive from Kings Highway south was mostly made up mostly of small homes and cottages, slowly being converted into small businesses. A few churches had sprung up on corners. Crossing Southfield and Youree Drive, there were some local gardens and small bungalows, always more than stores, plus lots of cotton fields. Yes, a small strip shopping center with a movie theater was close by, and a sprinkling of fast food restaurants had begun to appear. Big changes began when Captain Shreve High School was built, and a bunch of cotton fields disappeared.
These changes are not unique for a growing city like Shreveport, but, this is what happened.
Former cotton and farmland, forested land, wetlands, and natural areas were gobbled up for residential living,
shopping centers, and entertainment venues. These changes continue all over Caddo and Bossier Parishes today, continuing that steady march in every direction. (Even the YMCA Camp at Ellerbe Road has been long since torn down, and a major shopping center has taken over the land and pond.)
Sadly, on another front, in those years, (and still today!) there were gardening discussions both in live sessions and in written articles found in gardening journals that presented the ‘New Look’ in garden design. This change of focus encouraged gardeners to use many tropical and non-native plants that grew well in our southern gardens. In the not-too-distant past, lectures, and presentations at the Barnwell Center extolled the value and beauty of non-native plants that were being introduced and which could be found in all of the plant nurseries around us.
Were you as struck crazy over these beautiful new introductions of plant material as most of us? (It’s okay to admit it!)
Today, statistics tell us that about 80% of suburbia is landscaped with plants from Asia. Not only did we set aside our beautiful native plants, we forgot about the food web of plants and animals which is also being disrupted when we plant trees and shrubs that have no dietary value for birds, insects and other creatures in the food chain. When non-native plants replace natives, entire food chains are interrupted by the loss of specialized plant-eating insects (which is the most important food for animals ranging from other insects and spiders or reptiles and amphibians to mammals and birds).
Read what Dr.Courtney Wotherspoon has to say;
“Plants are as close to biological miracles as a scientist could dare admit. After all, they allow us, and nearly every other species, to eat sunlight, by creating the nourishment that drives food webs on this planet. As if that weren’t enough, our native plants also produce oxygen, build topsoil and they hold it in place to prevent floods, sequester carbon dioxide, buffer extreme weather and clean our water. Considering all this, you might think we gardeners would value plants for what they do. Instead, we tend to value them for what they look like.
When we choose beautiful plants from all over the world, it is often without considering their ability to support life within our local ecosystems.
Last summer I did a simple experiment at home to measure just how different the plants we use for landscaping can be in supporting local animals. I compared a young white oak in my yard with one of the Bradford pears in my neighbor’s yard. Both trees are the same size, but Bradford pears are ornamentals from Asia, while white oaks are native to eastern North America. I walked around each tree and counted the caterpillars on their leaves at head height. I found 410 caterpillars on the white oak (comprising 19 different species), and only one caterpillar (an inchworm) on the Bradford pear.
Was this a fluke? Hardly. The next day I repeated my survey on a different white oak and Bradford pear. This time I found 233 caterpillars on the white oak (comprising 15 species) and, again, only one on the Bradford pear.
Why such huge differences? It’s simple: Plants don’t want to be eaten, so they have loaded their tissues with nasty chemicals that would kill most insects if eaten. Insects do eat plants, though, and they achieve this by adapting to the chemical defenses of just one or two plant lineages. So some have evolved to eat oak trees without dying, while others have specialized in native cherries or ashes and so on.”
So, there are serious ecological consequences to such choices; another exercise you can do at home makes it very clear. Next spring, if you live in North America, put up a chickadee nest box in your yard. If you are lucky, a pair of chickadees will move in and raise a family. While they are feeding their young, watch what the chickadees bring to the nest: mostly caterpillars. Both parents take turns feeding the chicks, enabling them to bring a caterpillar to the nest once every three minutes. And they do this from 6 a.m. until 8 p.m. for each of the 16 to 18 days it takes the chicks to fledge. That’s a total of 350 to 570 caterpillars every day, depending on how many chicks they have. So, an incredible 6,000 to 9,000 caterpillars are required to make one clutch of chickadees.
And chickadees are tiny birds: just a third of an ounce. What if you wanted to support red-bellied woodpeckers in your yard, a bird that is about eight times heavier than a chickadee? How many caterpillars would that take?
What we plant in our landscapes determines what can live in our landscapes. Controlling what grows in our yards is like playing God. By favoring productive species, we can create life, and by using non-native plants, we can prevent it.
An American yard dominated by Asian ornamentals does not produce nearly the quantity and diversity of insects needed for birds to reproduce. Some might argue that we should just let those birds breed “in nature.” That worked in the past, but now there simply is not enough “nature” left. And it shows. Many bird species in North America have declined drastically in the past 40 years.
Fortunately, more and more gardeners are realizing that their yards offer one of the most empowering conservation options we have and are sharing their properties with the nature around them.By the way, you might assume that my oak was riddled with unsightly caterpillar holes, but not so. Since birds eat most of the caterpillars before they get very large, from 10 feet away the oak looked as perfect as a Bradford Pear tree.
To conclude this study in ecology and in regard to the birds in our habitat, we rediscover that nothing lives alone. Everything lives in harmony with one another. Plants, animals insects, microbes, creatures of all kinds inhabit our world in North Louisiana, each supporting and using one another to survive. It is helpful to remember how interconnected are our lives, and how knowing this helps us to make choices that are compatible with the life that surrounds us.
(The story about Patty and the fertilizer and this one, about local native plants keeping alive the animals/and birds in our environment, reminds us how interconnected we are living on this planet we call Earth. From recognizing that soil isn’t just dirt, we continue to keep alive homes of microbes and microscopic creatures that build soil and which make it healthy-ultimately keeping plants growing well. But the other piece of the story is that choosing plants that keep birds and small creatures alive is also part of the building blocks of our human food source. Aren’t we lucky to live in this world woven together by all creatures great and small?)
HOW TO ASSEMBLE A CONTAINER GARDEN THAT WEATHERS ALL SEASONS
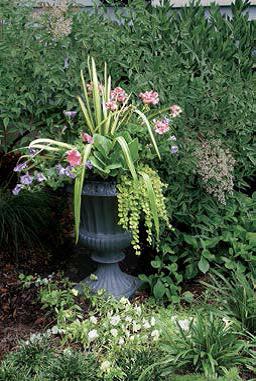

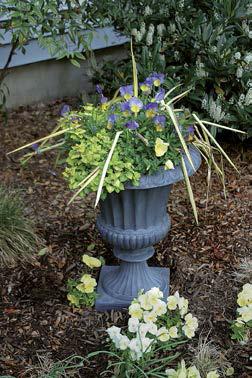

Eventually, we will get really cold weather in Northwest Louisiana. So, about that same time, shall we trash the container plants we so carefully purchased and placed in/around/about the garden and on the patio?
But, do they really have to be thrown away? If we choose plants carefully, and if we select containers that have sidewall thickness that protect the roots of a plant, could we not keep them through a Northwest Louisiana winter? The careful answer is ‘yes’. Keep reading, and you too will say a resounding YES.
Your spring and summer container plants have provided a beautiful show all summer long, but in mid to late autumn these plants begin to fade, lose color and are not beautiful anymore. And now, we have choices; discard the planting entirely into the compost pile, propagate, and find them a home in the spring garden, baby them through winter, or plant for year-round beauty.
What is your tendency for the above choices?
Maybe you have never considered planting containers for the entire year, and for many to come. But why not? Foundation containers, like foundation plantings, preserves the design and structure of a garden no matter the season.
So, let’s learn how to take advantage of plants that overwinter nicely, that reduce the amount of money you spend on new plants each spring, and decrease the time spent on replanting over and over again.
The general rule of thumb for container-plant survival is that the plant should be hardy for two zones colder than our USDA hardiness zone. We live in zone 8a. So, up to zone 10 would be the goal. (That does limit our choices but does NOT demand that we cannot have container gardens for the whole year)
While Yucca and Bergenia are the core plants of this container, we have many options, and many favorite container plants from which to select, to establish year-round beauty. Simply consider the perennial plants you favor, and which of these will fit the container you choose.
In this particular planting, ‘Golden Sword ’Yucca, works from zone 4 to zone 11 and combines well with many plants. It grows 2 to 3 feet high. Yuccas generally tolerate shade but are great in a sunny location. The texture and spread also make it a favorite for containers.
You can also use the following combination of plants which are effective for year-round gardening.
Use Boxwood, instead of Yucca for the main focus of the container. Creeping Jenny is a favorite for year-round gardens and is lovely for the edge of the pot. Sedum is a small plant that makes a big splash and is as happy in a container as well as in the ground.
You already know which plants you love, and which prosper in your garden. Just remember the rules; choose a plant that is not only for zone 8a, but also two zones above, give them excellent drainage, provide water and nutrients, and use a container that protects the roots from the especially cool weather which always comes as a surprise, but continually happens. (During our hot September, and often early October days, it is easy to forget the rules to which Mother Nature adheres.)
In the illustrations used for this story, note also how other plants are gathered around the foot of the container both mimicking and enhancing plants in the container. These flowers could be those which are seasonal or which accent the container plants.
Autumn Gardening
What is your favorite Fall Gardening Chore?
What is your favorite Fall Gardening Chore?
Imperceptibly, it is happening. While watering the plants of an evening, when walking your dog any time of day, or when just taking a stroll, have you noticed? Evening shadows come quicker and twilight time lingers longer this time of the year. Have you sensed the change?
The Fall equinox reminds us of Robert Browning’s poem “Pippa Passes” where he said: “God’s in his heaven, and all’s right with the world.”
So Autumn advances, and we are looking at our gardens anticipating a change from heat and humdity to cooler air. Forget philosophy. Let’s get this place ready for winter!
In September and on into October, gardening chores are far from over. Master gardeners find that they have a variety of tasks waiting in late summer and early fall, and each chore will help the garden thrive and overwinter in good health.
In September, it is time to…
• Examine the garden. But also remember that certain creatures want and need a bit of debris to overwinter. Don’t remove all rubble as some leaves and trash are necessary for insects and small beings to stay healthy in our mostly mild winters.
• What about your Fall Garden? It’s not too late to plant fall crops. Begin by removing whatever is left, dead or alive. Don’t disturb the soil too much as you plant. The helpful microbes that are present in your soil will immediately be helpful to the new plants you are using.
• What’s on Top of the Garden Bed? Because hot weather often lasts way deep into October, a 2-3 inch layer of compost is recommended to protect newly planted fall plants.
• Autumn is seed collecting time
• Now is a good time to get seeds from your favorite plants. You won’t have to buy them next year! Allow the seeds to come loose from the blooms as they dry, catch them and store in a cool, dry place.
• Divide and Move Perennials September is the time to divide perennials that are growing too large or thick. Daylilies, irises, phlox and other popular plants are good candidates for fall relocations, and they will easily set into their new spots.
• Plant Spring-Blooming Bulbs Take a cue from our October Bulb Sale. Now is a good time to plant the hardy bulbs that are popular in spring gardens. can be easily planted in fall.
• Save Delicate Bulbs Wait up for these bulbs. Even in Shreveport and Bossier, we have 1 degree nights. Not all flower bulbs can survive heavy freezes, and if cannas, gladiolas or other tender bulbs are part of the garden, they should be dug up in September and stored in a cool, dry, dark place until spring.
• Plant Fall Blooms New flowers can be planted to add autumn color to the garden in September. Chrysanthemums are the most popular choice but ornamental kale and cabbage also add great color and texture to fall flower beds.
• Plant Trees and Shrubs September to early winter is a great time to add new trees and shrubs to the landscape since the roots will thrive in warm soil and the plants can become established before winter. Evergreens are especially easy to plant in fall.
• Water New Plantings Newly planted trees and shrubs should continue to be thoroughly watered in September. Proper hydration will help strengthen roots, stems, and trunks so they can survive the winter with less stress and damage.
• Transplant Winter Herbs September is the time to bring aromatic and delicious herbs inside for tasty winter use. Cuttings of herbs can be repotted in the late summer and early autumn and will be ready to season dishes for hearty winter meals.
July August Seedling
Mark Wilson,
Northwest Louisiana
Master Gardener Agent
Reports….
High, Low and No - Tech Solutions for Vacation Irrigation.
Leaving your garden during the growing season can be a stressful ordeal for most. Nevertheless, there are a few ways to ease your mind about your garden, while enjoying time away. There are solutions for all budgets, scenarios, and situations. The ideal solution is actually one of the no-tech solutions: finding a friend or neighbor who is a gardener and would be willing to come over and look after the garden while you’re away. Even someone who isn’t a gardener, any water is better than no water at all. If you do not have a friend or neighbor who can help, try contacting your local Master Gardener for suggestions or join a gardening group that will take turns helping each other out during the vacation season. Asking for help through social media can also be a great solution. However, it is very important to remember that you should never tell everyone online when you will be out of town and that no one will be around. Remember to be vague online, then clearer to the person you find and trust to help. For those interested in a more complex and a permanent solution, an automated irrigation system involving several zones including, drippers and sprays to apply the correct amount of water in the right ways to the correct areas may the best way to go. The two most important things to remember on these systems are, (1) they are only as good as the controller running the system, and (2) more plants die from overwatering than under watering. Knowing the weather forecast and adjusting for any rain conditions helps prevent waterlogged roots. Some controllers allow for the attachment of a rain gauge that can turn off an irrigation system until the area dries out enough to require more watering. For a more inexpensive, lower tech and all around simpler solution involving only a few simple parts that will still allow for both large and small area irrigation. A battery-operated timer with a garden hose and sprinkler can work wonderfully. This also allows one sprinkler to cover them all while on vacation. For larger areas replace the simple yard sprinkler with a tripod-based impact spray to cover a longer distance. Make sure no trees or shrubs block the water from getting to critical areas. The two important things to remember with this method are: (1) make sure the weigh down the tripod sprayer, to make sure is doesn’t fall over while you are gone, creating a mess of the area it falls in and (2) for container plants, make sure to move them into a shady spot to slow down evaporation. Sometimes the simplest solutions can also be the best solutions. If automated irrigation systems are out of the question, then this no tech solution may be the way to go. Water bladders are a great solution for larger trees and shrubs. For flowerbeds, a soda bottle or milk jug with one or two small holes in the lid filled with water and buried upside down will allow the water to seep out into the surrounding ground. For the containers, fill a kiddie pool with about an inch or two or water then place your containers in the pool in a shady area. For those with small patios or indoor plants, this same idea can work for you using a bathtub. This works via capillary action with the soil pulling the water up though the soil. Mark A. Wilson Assistant Extension Agent – Horticulture Specialist Northwest Region How to Make Sure Your Irrigation Flows While You’re on the Go –an Irrigation Planning Guide for the Vacationing Gardener
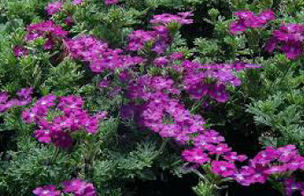
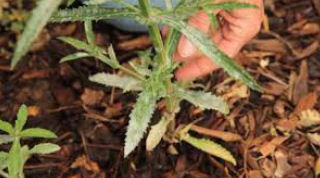
GROWING FLOWERS
INSTEAD OF WEEDS
Happy Gardening: Mike Livingston
Verbena canadensis (Homestead Purple) and Verbena bonariensis (purple top) are two of the best butterfly/pollinator plants you can have in your garden. Homestead Purple has already begun to carpet the ground with its clusters of purple blossoms bringing in scores of bees and early butterflies. Bonariensis, what I call tall verbena, will begin putting on its show late next month. Unlike the ground covering Homestead purple, bonariensis seems to float above the vegetation on its slender stems. Both of these excellent butterfly/pollinator plants are drought tolerant, do well on average soil and will bloom until fall if given excellent drainage and plenty of suns.
However, it is also during this time that we see the appearance of one of Verbenas most persistent nemesis: powdery mildew. Powdery mildew is a fungus consisting of many different species, which infects many different host plants. In appearance, it looks like a sack of flour has broken open and blown onto the leaves of the plants. It starts as small white spots on older leaves and spreads till it covers most of the leaf and may even spread to the stems and blossoms.
Powdery mildew overwinters on plant debris and is spread by wind, insects and splashing water. It thrives in an environment of high humidity and poor air circulation. While it rarely leads to the death of a plant, it does deprive the plant of its ability to photosynthesize and, therefore, severely weakens it, resulting in fewer and smaller flowers.
Prevention should be your first goal by buying mildew resistant plants. Homestead Purple is probably the best of the Verbenas for this. Next, water the soil, not the plant. If you must overhead water, do it in the morning so the plant has a chance to dry off. And always aim for good air circulation by making sure to leave plenty of space between your plants.
Once mildew has infected your plant, there are still several things you can do. Always aim for the simplest, least harmful solution first. In the butterfly garden, I prefer mixing one teaspoon of baking soda with a quart of water and then spraying every ten days. Neem oil is also an excellent all-purpose fungicide/insecticide, which will not harm pollinators or beneficial insects as long as you keep it away from the flowers.
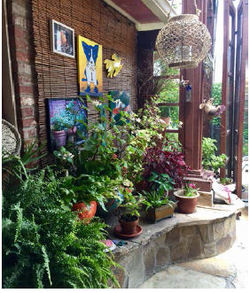
Small Garden Design:
Making your Small Garden POP
With These New Garden Ideas!
Making your Small Garden POP
With These New Garden Ideas!
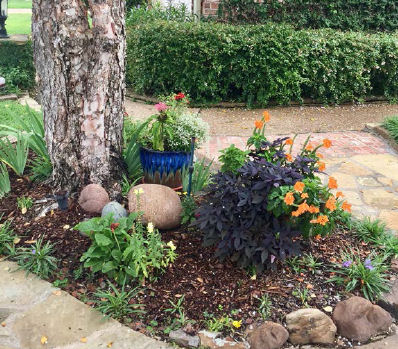
O My Goodness! Isn’t this a pretty touch for an area that is small and could be just any old tree all alone?
You are viewing the entry to Master Gardener Joyce Hooper’s beautiful small garden.
Now, the question is; How do WE make our small spaces so wonderful?
From a small rectangular space to a long narrow garden to a boxy no-nonsense place; the design is the key to creating the garden you love.
Look at the hardscape in the picture above, can you hear the sounds from birds? Do you feel a soft summer breeze, can you smell the air, as a pleasant fragrance wafts your way? Our senses are wonderfully engaged, as we step into Joyce’s garden.
Eyes naturally follow the measure of curving pathways to find comfortable seating on her covered patio which cozily finishes off this small garden. Close your eyes. Can you imagine yourself in this garden?
(Not yet?)
Then, consider what is necessary for designing a small garden such as the above one. First, the Bones of the garden must be well-thought-out. When you look at the garden patio/porch, your eye is drawn outside to the heavy plants and structures first.
Step this way toward the fish pond surrounded by hardscape and softened by plants. The fish surface watching and waiting for food to be thrown their way.
But, let’s get on with planning and executing the garden itself.
This first stage of defining your garden space may be the hardest one to complete. It both expresses what you do to fill the empty places, but also defines who you are. Like building a structure, you must concern yourself with a powerful beginning, before filling in the details of the space. This might be structured as a dry creek bed, a garden table, and bench, a corner pool of water. Then, let dwarf shrubs or trees, perennials, and evergreens be the next most important features, continuing to promise a sense of permanence. They also do wonders for adding winter interest and for inducing birds into your garden.
Color may be a stumbling block when you don’t have a favorite color palette, or when you just don’t know which colors would be best for your simple garden. In a small garden, don’t opt for all colors. For example, an all-white and green garden is stunning. A garden filled with the many colors of the rainbow distract and are a blur to eyes looking at them. In a small area, too much color, and too many plants destroy the cohesiveness which pulls the flower bed together.
Think small. Consider the color wheel and stick strictly to its conventions.
As you or a visitor views your garden, we tend to take a quick look around. Now, stop! This isn’t the whole story. Walking into any garden should be a leisurely discovery. An easy way to draw the visitor or yourself into your small garden is to develop focal points of interest. An outstanding plant along a garden path, a whimsical or small, well-loved piece of art or other ornaments tucked into a hidden space guide the visitor around the garden and are simple attractions giving the visitor time to pause, time to consider the surprise, and time where modest treasures are less than the whole but seem to meld together as one picture. (“Ohhh,”, you might say to yourself, with a catch in your throat)
Consider using different textures to spotlight key attributes of each plant. You could use plants with coarse, soft, billowy or smooth textures contrasting in the space, keeping it from being two-dimensional. Touch the different textures, allowing your sense of touch to distinguish them one from the other. Sound. As you look at this image you can imagine the sounds of water, of birds singing, of the breeze rustling through trees, of gravel underfoot, all of which breathes a broader life experience into the garden.
It is easy to incorporate these elements into your small garden space. Look how Joyce has done it. The rules of gardening in small spaces are not much different than giant garden rooms in large spaces. The garden you create is defined by YOU. The scale may be smaller, but design principles are the same.
It is just as rewarding, if not more so in small spaces, to create the garden you love by remembering family gardens from your youth and childhood. Yet, the general principles remain true: the bones of the garden set the tone. The color wheel determines the color palette (Try HARD to stick to it!) Determine or create focal points that bring a piece of YOU into the garden; select contrasting textures or ornaments, and spotlight them for a pleasant surprise. Lastly, when possible...add sound. It can be wind chimes tinkling, water moving, birds chirping around a bird feeder, or any other natural clamor, which is normal to the garden. Ummmmm. Sounds good. Looks beautiful. Flowers smell sweet, Herbs taste wonderful, The bench feels both solid and strong. We are totally engaged in our garden experience. Who needs lots of space? You can find it all in a small garden.
Lastly, Joyce Hooper tells me that a small garden may be harder to handle than a big one. Cramming many design elements into a small space is not impossible, but it certainly will create some head-scratching. Keep working at it. Gardens don’t happen in one season or one year. But, one sunny, summer afternoon, you will walk into your garden in the sweltering heat, you will look around, and say “YES! This is MY garden!”, and, smile.
You just know it when it happens.

FIVE STEPS TO A LIGHTER FOOTPRINT
Are you thinking, “Uh-Oh, did I miss Earth Day again?
Nope. It truly is still the beginning of summer, another time of the year when we stay outside as much as the Louisiana heat and humidity will allow. However, today is another good day to consider our planet, our impact in the spaces in which we inhabit, and especially as gardeners, to consider how we can effect change by modifying the impact of our actions.
With recycling and restoring our planet, there are three ‘R’s’, and you might remember this tired old mantra from the 70’s.
(That was really a long time ago! Am I supposed to remember that far back?)
"REUSE REDUCE, RECYCLE” was famous then, and is still appropriate now to avoid generating garbage in the first place. But, for now, let's forget the mantra and review some simple ways to be good to our homeplace; the planet we live in and love.
The trick with this admonition is to purchase high-quality, reusable items that you truly need. Also, we must take a pass on single-use products that cannot be swiftly recycled or composted.
( I have read that if every American asked for drinks without a plastic straw for one single day, we’d keep 500 million out of landfills and oceans. (Oh, my goodness gracious! Let’s promise not to sip through a straw ever again!)
When you order in, or at the pickup window, ask for no plastic cutlery. Use a cloth napkin. Stop it with the paper towels! Don’t snatch a paper towel, when a dishcloth is close by. Soft, old awful tee shirts are perfect for cleaning, dusting, and general messes.
• Recycle Religiously.
o In our area, recycling is a rather dicey solution. To recycle every scrap of plastic, paper, or cloth, takes up lots of space, and our trash disposal company is reduced to collecting items every other week. To recycle more, try this website: https://www.terracycle.com/en-US/collection-programs?utf8=%E2%9C%93&query=&location=Shreveport. ( You might be surprised at what you find, and DON’T find!) The website states that they will send you collection boxes, and you can fill them with things like thin plastics and toothbrushes and send them back. They find a way to recycle everything. (This is great!)
• Consider Composting
o Composting…how many of you have tried this and succeeded? Most people who have latched on to this safe way to leave a smaller footprint do succeed. And, your space is better for it.
The literature tells us that food scraps, paper, even cotton…anything biodegradable can be composted in a small area or container outside. What has been your experience? Have you found composting to be successful? It is a fine goal for everyone who values small steps to improve our community, even for small families. The Seedling Editor would like to hear your stories of successful composting…with directions! It is the right thing to do for our planet.
• Shop Smart
o Never go to the grocer without a shopping bag made of a recyclable material. Did you know that you can also skip those vegetable bags that refuse to open properly? Just choose your onions, potatoes and other produce, without a bag. The grocery checkers do not complain at checkout. (This is true! I’ve been trying the idea at local grocery stores. Sure enough…no checker will give you a dirty look or roll their eyes!) Choose bamboo toothbrushes and refillable, compostable silk dental floss if they are available.
o Instead of plastic razors, use a nice stainless steel one. They work great!
• Share and Share Alike
o Resellers such as eBay are great resources to sell secondhand fashion clothing. We have drop-off locations in may shopping centers that look for clothing suitable for working people needing fashionable everyday clothes to wear for the job, or for students needing smart clothing to wear to school.
• For your information: 2 billion plastic razors and blades are thrown out by Americans each year. 300 million tons of plastic waste are produced globally every year. Micro pieces of plastic are filling the bellies of the fish you eat. (Didn’t know you ate plastic, huh?)
• These companies are only a few of the businesses that care about the environment and make an effort to keep our planet a green place in which to live: Starbucks, Johnson & Johnson, Amazon, Google, Citibank, UnitedHealth Group, Whole Foods, Panasonic, Apple, Ikea, Chipotle, Seventh Generation, Wells Fargo, and Nike are a few with a commitment to our planet. There are many more. Look them up.
• Lastly, watch what you throw into the recycling bin. We have all done it. The greasy pizza box, a disposable coffee cup, often thought to be recyclable, but lined with a fine film of polyethylene, making it difficult and expensive to reprocess, yogurt cups, the odd plastic bag. Sometimes, if we want things to be recyclable, we just put them in the trash bin. If you are not sure what will fit into the trash bin, look on the bottom of items you are ‘trashing’ for a triangle with numbers in it. If numbered 3 to 7, this plastic is unacceptable.
• BTW…plastic bags are NOT acceptable. We might wish that plastic bags are tolerable, but they are NOT as they plug up recycling machinery. Some grocery stores in town (Albertson’s, Kroeger, Whole Foods, Brookshires) have bins that collect plastic bags. Look for them at your favorite store.
While it is sometimes a nuisance, and often viewed as ‘too little, too late”, recycling is one thing we all can do that will be good for our planet. Keep on plugging away. We love our gardens our plants and our environment. So, this, we Can do. This, we Should do. For this small action, we Must do.
Dave Taft, in the New York Times, has a lot to say about this beautiful plant. Excerpts from his story are reproduced in part in this article.
January 2018
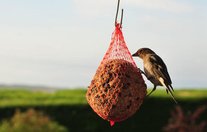
Attracting Winter Birds to Your Garden Is Easy. Here's How:
Winter is crouching down, and slouching around, insofar as Northwest Louisiana ever has a real winter. (I almost erased that sentence. The anomaly of the freezing temps we’re now experiencing almost make me retrack it. But, I didn’t) We shiver along with our human and not-so-human friends. The winter bird migration is over, and these birds who stay with us are establishing their foraging territories.
Use these suggestions to invite, encourage, and provide a winter meal to our cold weather friends.
Birds need high-calorie suet to survive the freezing weather. Hang around as many suet feeders as you can find places for. You might go the cheap route and hang mesh onion bags filled with suet. Local birds such as woodpeckers, chickadees, nuthatches, titmice, wrens, and more love this stuff! These suet cakes are popular amongst our birds all year long, but are especially appreciated when, in abnormally cool springs, birds’ eggs may hatch into hungry mouths before the local insect populations begin to grow.
Try these simple recipes for hungry birds in your neighborhood.
2 cups rendered fat from beef, pork, or meat you have on hand.
½ cup crunchy natural peanut or sunflower seed butter.
½ cup crushed raw peanuts or shelled sunflower seeds
Melt the fat in a heavy saucepan, stir in the nut butter until well blended, and then add the peanuts or seeds
Let mixture cool, stirring occasionally, until the peanuts, no longer settle out.
Scoop the stiffening mixture into a shallow mold (use whatever square or rectangular food container)
Allow cakes to cool for a few hours in the refrigerator or freezer. Pop them out of the molds and serve. Alternately, you can use your hands to make rough balls of the mix, and place on a cookie sheet to cool. When cooled, place in a mesh bag and hang from a tree. Store remaining cakes in the refrigerator or freezer until needed.
Or, try this one;
SUET CAKE WITH BIRDSEED AND FRUIT
This cake will appeal to a wider variety of birds.
2 cups rendered fat
1 cup crunchy natural peanut butter
2 cups stoneground whole cornmeal
1 cup chopped peanuts, shelled sunflower seeds, or mixed birdseed
1 cup chopped dried fruit or raisins
Prepare as for Basic Suet Cake, above.
KEEPING THE BIRD FEEDER CLEAN:
It is hard to keep your bird feeders clean. Even your most favorite and beautiful birds make a mess as they are eating. When the feeder tray gets wet from rain or other moisture, the leftover seeds form a cake of a nasty bacteria growing mess! It’s disgusting.
Here are suggestions to restore your bird feeders to a healthy and pretty place for your birds to feed again.
Wooden Feeders:
Wooden feeders will naturally fade over time. Here are some suggestions for maintaining them. Redwood or Cedar Feeders are used outside because of excellent weathering characteristics. Under normal conditions, wood remains functional for many years without any maintenance. If you don’t mind the weathered look, do nothing at all. If you want a more attractive bird feeder, simply give it a coat of wood sealer or linseed oil every few years. Be sure to use a water-soluble wood sealer to the outside area of the feeder only.
Redwood or Cedar Feeders: Under normal conditions, redwood or cedar remains functional for many years without any maintenance. If you are so inclined, you can give it a coat of a wood sealer or linseed oil every few years. Only apply to the outside of the feeder!
Pine Feeders: Pine feeders will weather nicely, but do fade with time. Apply linseed oil or a water-soluble stain every few years as needed, if desired.
Copper Information & Care: Copper adds warmth and color that cannot be duplicated by any other type of metal. It has the advantage of being highly corrosion resistant. Copper does discolor rapidly to a pale green if nothing is done to preserve the color. To restore the brilliant luster of copper, you will need to do these things: Polish the copper with a copper cleaner/varnish. Seal the copper with a clear lacquer. To prevent the discoloration, apply a clear lacquer before use.
Tube Feeders: These feeders are generally designed to prevent seeds from becoming caught in the bottom of the feeder. That often doesn’t work as expected. (Alas) You may try using a long brush that can be found at hardware stores, one which is designed to dig down into the tube for cleaning. If mold or debris is still present, use a solution of ten parts water to one part bleach, rinse well, dry and refill with fresh seed. Cleaning your feeder will help them to look better longer, but most importantly, it decreases the possibility of spreading sickness and disease amongst your birds.
Okay, birdies. Come into this place that I have prepared to feed you. Be happy. Grow and Multiply. Then, sing me pretty songs.
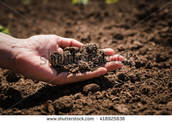
Soil Power! The Dirty Way to a Green Planet
The New York Times has written about the Good News of one of the most common materials in our environment. Could it be that the best last great hope of avoiding catastrophic climate change might lie in something so commonplace that we typically just walk all over it: the soil, everywhere we go?
Let’s follow this thought.
Science has taught us for years that the earth possesses five major sources of carbon. The atmosphere is already overloaded with the stuff; the oceans are turning acidic as they become saturated with it; the forests are diminishing, and underground fossil fuel reserves continue to be mined. Listen up, Master Gardeners. It appears that soil is the most likely repository for immense quantities of carbon. This is good news and, here is why.
Keeping carbon in the soil can produce a double dividend; It decreases climate change by extracting carbon from the atmosphere, it restores the health of degraded soil and increases agricultural yields. Many scientists and farmers believe the emerging understanding of the soil’s role in climate stability and agricultural productivity will prompt a total shift in agriculture, triggering the abandonment of conventional practices like tillage, crop residue removal, mono-cropping, excessive grazing and blanket use of chemical fertilizer and pesticides. Even cattle, usually considered climate change culprits because they belch at least 25 gallons of methane a day, are being studied as a potential part of the climate change SOLUTION because of their role in naturally fertilizing soil and cycling nutrients.
We read about, and understand that the climate change crisis appears to be far advanced; the amount of greenhouse gases already the atmosphere ensures dire trouble ahead.
On the other hand, carbon in soil and vegetation is an effective way to pull carbon from the atmosphere. Instead of overcoming nature, it reinforces it, promoting the propagation of plant life to return carbon to the soil that was there in the first place-until destructive agricultural practices prompted its release into the atmosphere as carbon dioxide. The process started with the advent of agriculture about 10,000 years ago and accelerated over the last century as industrial farming and ranching rapidly expanded.
It has been proven that a soil has the potential to sequester carbon at a rate of between 0.9 and 2.6 gigatons per year. Some scientists believe the estimate is low.
“Putting the carbon back in the soil not only mitigates climate change, but also improves human health, productivity, food security, nutrition security, water quality, air quality-everything.”It’s win-win-win option” opines Mr.Rattan Lal, the Director f the carbon management a Sequestration Center at Ohio State.
Until the advent of synthetics in the late 1800s., fertilizer consisted chiefly of carbon-rich manure or compost. But synthetic fertilizers contain no carbon, and as their use spread along with tillage practices to incorporate them, soil carbon content declined. The process accelerated after when America’s nitrogen-based munition plants were converted into nitrogen-based fertilizer factories. Many agricultural colleges still teach soil fertility chiefly as an exercise in applying inorganic chemical fertilizer, while overlooking soil biological role (and its carbon content). A 4-year study in California showed that a one-time application of compost caused an increase in plant productivity that has continued ever since, and that the carbon content of soil grew year after year, at a rate equivalent to the removal from the atmosphere of 1.5 metric tons of carbon dioxide per acre annually.
Farmers and home gardeners are learning a lesson that resonates throughout human interactions with the natural world; people reap more benefit from nature when they give up trying to vanquish it and instead see it clearly, as a demanding but indispensable ally. Because of the carbon-climate change connection, we’ve been conditioned of think of it as the enemy, when in fact it is as vital to life as water. The way to make amends is to put it back in the soil, where it belongs.
This article was originally written by Jacques Leslie@jacules, a Los Angeles Times contributing opinion writer.
Anyone Interested in Starting Your Spring Garden? Begin by planting seeds. Think Spring!
Tips for Indoor Seed Starting
What does it mean, to be ‘thinking spring’ with seeds? Think moisture control, proper containers, a good starting mix, and your favorite summer plants. Are you ready? Grab your favorite seed catalogs, because here we are, smack dab in the middle of the seed starting season. So, it seems like a good time to revisit some tips for germinating seeds and growing seedlings indoors ahead of outdoor planting. While the basics of seed starting are pretty simple, there are always some tried-and-true tricks as well as some timely reminders to make your seed starting experience a worthwhile one.
Most Important: Planet Natural Research Center has found these tips to be most important among many important things when starting seeds indoors.
Moisture control. This means not only controlling the moisture in your starting mix, but providing the proper drainage. And, in the circular, everything-is-related-to-everything-else world of gardening, this means using the right starting mix.
It also means controlling the moisture in your starting mix, and also providing the proper drainage.
It is a best practice to make a starting mix with your own compost. A good quality compost (be sure to screen it first) helps with drainage so, make your drainage inducing ingredients. Some recipes suggest equal parts compost, vermiculite/perlite, and coir or sphagnum moss. Using compost has the advantage of not having to use fertilizer in a seedling’s early, tender stages when they’re particularly sensitive to burn. And because compost is usually well-balanced, you don’t have to worry about too high a nitrogen source keeping some seeds, such as lettuce, from germinating.
Another element of good drainage is the container used to start your seeds. Some gardeners prefer to plant seeds in cardboard egg cartons, one seed per egg spot. Egg cartons are cheap and easily available containers for seeds. Watch carefully, however, if you use this tip. Not only do egg cartons make for bad moisture control conditions, they also don’t allow proper room for root growth. Make sure your seedlings have enough space, both in depth and between plants, for good growth. And make sure your containers have holes in the bottom for drainage.
If you’re starting something that will be in its container for a while, say tomatoes (though they’re easy to transplant), you might even want to put some broken pottery shards or pea-sized gravel at the bottom of the container to make a place for extra moisture to drain through.
Once your seeds are planted, covering the flat or container with plastic wrap will help control moisture levels until seedlings appear. Don’t overwater! Don’t let the planting medium dry out!
Use Light: Generally, you are instructed to use a window sill, or a sun porch, for initial placement of the seeds. There may not be enough light in this location to grow strong healthy compact starts. You really should use artificial lighting as it provides steady ongoing light, which fragile new seedlings prefer. Once seedlings emerge, bring the light as close to the plants as possible. Move the lights upward, as plants begin to grow.
Bottom Heat: A constant source of heat from underneath can be very good for seedlings. Bottom heat can help to prevent ‘damping off’ from occurring. A soothing, constant warmth is exactly what is needed.
Transplanting: When seedlings are strong enough, lift them by the rootball, using a spoon or plant tag for support. Never hold the seedling by its stem, as you may crush it, or harm the growing tip. Carefully move them to a larger container filled with the same starting material. Continue your watchful care.
Time to move outdoors? About two weeks before planting outdoors, start hardening off the seedlings by moving them outside for increasingly longer periods each day. Start by putting them outside for a few hours in the shade during the warmth of the afternoon. Choose a spot protected from the wind. Bring them back inside for the night before temperatures start to drop. Each day, leave the plants out a little longer, and expose them to a little more direct sunshine. By the end of two weeks, unless freezing temperatures are forecast, the seedlings can stay outside in a sunny area until you are ready to transplant them into the garden.
Follow these easy directions, and you have baby plants ready for summer!
Information for this story from Plant Natural Website

Butterflies have Migrated. But, Mike has hints for bringing them back next summer.
Up until this year, I’ve always taken my cold sensitive perennials inside for the winter. However, this year they’ve simply gotten too big to be hauling them in and out of my garage. Plus, I needed a way to save the plants I’m taking to the Randle Moore garden so I did some research and found these interesting ideas for keeping plants outside.
1. Do not prune or fertilize plants after August. This is because plants can adapt somewhat to the cold if exposed to it gradually by allowing carbohydrates to accumulate in the tissues which lower the temperature at which they freeze. But pruning a plant or adding nitrogen to it spurs growth, which uses carbohydrates, which the plant would be stored against the cold. This is also why they tell you to keep your plants in an unheated garage: because the heat will spur growth which will use up the stored carbohydrates.
2. Three days before a freeze begin watering the soil around your plant. Moist soils hold more heat than dry soils. Also, freezing temperatures don’t harm a fully hydrated plant as much as one that’s not.
3. Mulch the roots. This serves three purposes. It holds in heat and moisture, plus it reduces heaving, which is where shallow roots are shoved out of the earth as a result of repeated freezing and thawing of soil. But mulch has the opposite effect once the temperature rises because then it holds in the cold and moisture causing the roots to rot. So pull the mulch away from the roots when the freezing period is past and replace it during the hot summer to protect roots from the heat and retain moisture.
4. Cover the plant. Burlap is best. Store bought frost blankets can provide 4-8 degrees of protection. Plastic can be used as an extra protection against wind, but it should never be used alone because the plastic doesn’t breathe and can trap moisture which can freeze and harm the plant.
5. Cover the plant while it’s still light out. This will allow heat trapped in the earth to radiate up during the night.
6. Covering should not touch any part of the plant as these spots will be harmed by the cold. I used PVC pipe bent in the form of an arc to keep my covering from touching.
7. Make sure covering reaches all the way to the ground and place pine straw or other mulch around the bottom of the covering to make sure no heat is lost to the outside.
8. As soon as it rises above freezing, uncover the plant as condensation will form along covering which will refreeze during the night harming the plant.
9. If the temperature is going to drop below 24 degrees, the top of the plant will probably die and you’re going to need to worry about protecting the roots. The best way to do this is to place milk jugs or two-liter bottles filled with warm water around the base of the plant. This will ensure that the roots at least survive. Plus the extra heat radiating upward will also help warm the plant!
I hope these suggestions help. Happy gardening. Mike

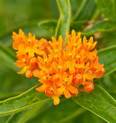
How does Cold Weather Affect Plants? Is Your Garden 'Sleeping' Through Winter?
The effects of cold in plants are most noticeable in plants that are marginally hardy or those that have not properly hardened off. Cold damage also shows up in early spring when a warm period encourages new growth, which makes your plant particularly susceptible to a sudden freeze. Temperature is a huge factor that breaks dormancy in seeds and plants, starting the growing cycle anew. While you may have a hardy plant for your zone, conditions such as microclimates can minimize that hardiness. Low areas hold cold pockets that can lower temperatures significantly. (Do you remember when we studied microclimates, and how they form?) These locations also gather moisture, which will freeze and cause frost heaves, damaging roots. Plants in higher locations become victim to cold winds and sunscald caused by exposure to winter sun. Often the damage is not noticeable until spring growth returns. For this reason, considering plants’ growth and temperatures, they will be encountering in extreme weather is always a consideration when locating your plants in the garden.
Plants are often badly affected by cold weather. After the first real frost, plants appear to be as miserable as we feel about the wretched temperatures.
In the last Seedling, we talked about ‘winterizing’ your garden, preparing it for the cold days, and freezing nights that often turn your garden into a ‘hell zone’ for plants. I hope you didn’t procrastinate too long, and forgot about the garden!
Let’s talk a little bit about plant growth and temperatures. The effects of cold in plants are most noticeable in plants that are marginally hardy or those that have not properly hardened off. Cold damage also shows up in early spring when a warm period encouraged new growth, which is particularly susceptible to a sudden freeze. Temperature is a huge factor that breaks dormancy in seeds and plants, starting the growing cycle anew. While you may have a hardy plant for your zone, conditions such as microclimates can minimize that hardiness. Low areas hold cold pockets that can lower temperatures significantly. These locations also gather moisture, which will freeze and cause frost heaves, damaging roots. Plants at higher locations become victim to cold winds and sunscald caused by exposure to winter sun. Often the damage is not noticeable until spring growth returns. For this reason, considering plants’ growth and temperatures to which they will be encountering is an important factor when locating plants.
Many plants, notably the spring-flowering trees and shrubs, set their flower buds at this time. As the days grow shorter, plants slow and finally stop any new growth. Then the plant withdraws nourishment from the leaves and enters a fully dormant phase. Actively growing plants cannot withstand freezing temperatures for an extended length of time, so plants have adapted by going dormant during the coldest months. Growth stops and the plant ‘sleeps’ until good growing conditions return.
We are told that during late summer most perennial plants are beginning to prepare for their upcoming winter sleep. It appears that the shortening days of Autumn are the trigger which motivates plants. Plant growth slows during this time period, and finally, most plants stop their growth.
Plants that have not finished the hardening-off process can be damaged by the onset of cold temperatures.Some other changes that influence whether or not damage occurs in use; the type of plant and its overall health, what stage had reached in the hardening off process, and whether the onset of low temperatures was gradual or sudden.
What is a gardener to do? Cold hardiness is genetically determined, but it is also influenced by cultural practices. Most winter injury occurs in late fall and early winter, when a freeze occurs before the hardening off process is complete. Gardeners should be careful to avoid anything that may slow this process. For example, fertilizing with a high nitrogen fertilizer after mid to late summer can stimulate plants to continue growing into the fall. Sometimes, late-summer pruning can also do the same thing.
Now, we relearn an old lesson. The wonder of using native plants in your landscape is that our southern natives have made their own adaptations to summer heat, little rain, and bitter winter cold through eons of the evolutionary process. They know when to sleep, when to wake, when the light changes, how to store moisture, and they respond to these signals; change is a-coming. And, this is why we talk to our plants! They’re pretty smart, and can teach us some lessons about preparing for bitter cold weather.
November 2017
DO THESE LITTLE THINGS NOW FOR a BIG, GORGEOUS SPRING GARDEN
If we get on with gardening chores now, beautiful gardens are in your future in the spring of 2018. Let’s move on doing the things we love in our outdoor spaces and plan great things for the future. Look around. Assess your garden as it is today (you may even need a pencil and paper, or my favorite-my iPad, to jot down your good ideas!)
- Now is a good time to get a new soil test. Evaluate soil health and amend now before spring.
- Clear away rotten fruit from the ground, from trees. These rotten items can cause major pest infestations later on.
- Clear annuals that are beginning to fade before they drop seeds. (Alas, this advice may be too late! We’ve already had some wind and cool weather to spread seeds.)
- Trim perennials that are spent. Leggy, used-up perennials will overwinter slugs, snails, and other pests. You will be glad you did come next spring.
- Clean up dead wood and foliage that have fallen to the ground. Dispose of this detritus; do not try to save it unless you are composting.
- Add mulch to every bed. Master Gardeners know why. Mulch prevents weed growth, improves the soil, adds nitrogen, protects your plants from winter damage, and provides a home for many beneficial insects. (However, a bug hotel does that very nicely.) Besides, all of these good things, mulch adds eyeball candy to the garden.
- Look through catalogs, get online, or however you like to shop, purchase coverings that will protect cold-intolerant plants from winter winds.
- If you have room in your garden, leave dried flowers and seed heads that provide winter food for the birds.
- Rake and dispose of or compost leaves.
- Remove diseased plants. Do not throw them in the compost pile. Bag and discard.
- Plant bulbs.
- Clean your tools. Wipe blades with vegetable oil, and use sandpaper on the handles of your garden implements.
Amazing Reasons Plants LOVE Cinnamon
Did You Know Plant life loves Cinnamon?
Plain old kitchen cinnamon is the go-to spice for many a cook. Did you know that it is also an amazing fungicide?
Not only that, but it can be used in gardening for cheaper and better organic gardening.
(Awwww. Get out of here. Cinnamon? I thought it was just for making spiced tea and cinnamon toast!)
Three things you should know right now:
Cinnamon is MORE than a cooking spice.
Compared to commercial fungicides, cinnamon is cheap.
Cinnamon is a natural way to combat fungal disease.
Cinnamon is an organic but an unusual part of the whole notion that you can garden without harsh chemicals. (Did you know this?)
Here are some of the ways you can incorporate cinnamon into your regular disease prevention program for all plants.
Seedlings: Master Gardeners know about ‘dampening off” which covers a range of diseases and which attacks a seed/seedling either before or after germination, causing the seedling to die. All of us have had this sad experience at one time or another. (It has caused many a gardener to throw hands up and say “I quit!”). Several fungi and soil issues cause this problem. But, if you dust these seeds/seedlings and soil with cinnamon, either before or after germination, it will prevent the dampening off syndrome. Dusting with cinnamon also gets rid of those little fungus gnats that somehow appear around seedlings, whether in trays or in garden soil.
Ant Deterrent: (Ed Note: Am I talking about ants too much? Well, there is a lot to say about these pesky insects!) Ants do NOT like cinnamon! Sprinkle it in your greenhouse or around garden beds to deter garden pests. It will NOT kill ants, but they will stay away from it. Sprinkle cinnamon by doors or windows if ants are coming into your house this way. Ants REALLY do not like to cross a line of cinnamon.
Plant Wounds: Too much pruning, or a slip of the weed whacker and you may have a plant with a wound that needs help. Simply dust cinnamon around and on the wound to encourage healing and prevent fungal infections at the same time.
House Plants: Cinnamon gets rid of molds and mildew in house plants. Just sprinkle a bit of cinnamon on the soil. It will also get rid gnats if they happen to be buzzing around. These are the same gnats seedlings get, the cinnamon destroys the fungus they feed on and they will die.
Who would have thought that the same spice that makes apple pie taste so good could be your best friend in the garden?
“Feathers in the Woods”, an organic gardening site, is the source of the above information.
September 2017
There are several milkweeds in use for attracting butterflies, but the one we have planted in the Butterfly Garden at the Randle T Moore Center, and the one commonly sold in stores, is Asclepias tuberosa. This plant grows from a perennial root and rises to about 3 feet where it is crowned by bright red and orange flowers.
After pollination by a bumblebee, the plant will produce a seed pod filled with hundreds of parachute-like seeds in the fashion of a dandelion that will fly everywhere and likely leave volunteers all over the yard.
Milkweeds are easy to grow, requiring about six hours of sunlight, moderate water and excellent drainage. They do have two big problems, however. The first is aphids. If you have milkweeds you’re going to have aphids there’s no way of getting around it. Aphids can be killed off easily by a mixture of two teaspoons of dawn liquid to a gallon of water. But you have to be conscientious in looking for aphids because there will be so many you’re liable to miss some and they can come back quickly. *
The second and third problems usually arrive together. As explained, milkweeds need good drainage. If the roots are allowed to sit in water they will rot. They also come out of dormancy slowly, which causes two problems. It gives fast growing weeds a jump on Asclepias, allowing them to smother the plant blocking sunlight and keeping it cool and wet.This is what I believe happened to our milkweeds. Weeds simply overwhelmed our plants, preventing them from getting sunlight or drying out so they had no chance to survive.
They grow easily from seeds, however, so I won’t have any trouble planting some more next year. And I’ll definitely be planting more because this plant is a must for any butterfly garden.
*The Asclepias Plant should be considered a ‘companion plant’, with the benefits of companion planting having been discussed in the July/August Seedling. If aphids inhabit to the Asclepias, they will leave your roses and other juicy plants alone! Your editor attests to this problem solver, as I grow an Asclepias at the back of my rose garden. Consequently, my roses do NOT have to fight those little orange vampires sucking the life out of them! Onions and Marigolds have also been shown to repel aphids, but do not permanently scare them away.
Thanks to Master Gardener Mike Livingston, for writing the good news about attracting monarchs and other butterflies to adorn our gardens with grace and beauty.
https://www.youtube.com/watch?v=7r3W-1n7DVY&feature=youtu.be&mc_cid=751522519f&mc_eid=eb0a64646d
RULES FOR A MOSQUITO-FREE GARDEN
We ALL know this one! Eliminate stagnant and standing water sources. Even a saucer or shovel that has collected rain can be a breeding ground for a mosquito. Walk your garden, especially after rains or watering, and look for objects that collect water and turn them over. Refresh your bird baths and water for pets and butterflies daily or twice a day if necessary.
• Have you heard bout mosquito dunks? If there are places of water collection that are too big to manage, use Mosquito Dunks or Bits - which contain Bti - Bacillus thuringiensis, a very effective bacteria that kills the larvae. This is a crucial step – make them die before they can fly around and bite. This bacterium is safe, organic and will not harm birds or pets that may drink water that contains it. The pellets can also be sprinkled around moist areas in the landscape for the same purpose.
• Organic gardeners don't recommend spraying non-organic pesticides for killing adults. Actually, it is difficult to come in contact with each and every mosquito. Furthermore, widespread spraying with a pesticide cannot discriminate between a mosquito and a bee or anything else, so sadly all insects will be affected by the pesticide. This is a pretty bad bargain. (A solution to the issue, but Not recommended.)
• Yard sprays. There are handy, safe hose-end yard sprays that will repel mosquitoes. Spray repellents around the areas where you are working or hang out. Repellents come in three types: citronella, cedar and garlic - mosquitoes do not like these scents and will stay away. This is especially useful before a party or other outdoor activity. Ambient repellents: There are a variety of products and plants of which mosquitoes don't like the smell, and which can be used in the immediate areas where you spend your outdoor time. Incense, candles, and diffusers are useful. (You cannot wander too far from these products, or their effect will be gone.). Bear in mind that plants which contain these repellents must be rubbed in order to release the essential oils of the plants to be effective. So while they can be beautiful and smell great they will not do the trick on their own.
• Personal creams and sprays: These are also a must. There are new herbal based creams that have been tested and found to be very effective and which smell delightful! These new products can be found in all gardening supply stores. You can even concoct your own mosquito repellent! (Check below for a recipe.) Whatever spray or cream you use is your personal choice, but, truly for pleasure in a garden, it is a necessary one.
• Stay inside, especially during their highest feeding hours such as early evening, (This option is NO FUN. It’s the best time to work or enjoy your garden!) Another alternative is to wear long pants,shirts, gloves, socks and shoes. Spray mosquito repellent on any exposed flesh. This is truly the best alternative, but terribly hot in our climate.
• Last, organic gardening and planting companion plants that attract wildlife will also help as you attract predators of the mosquito – such as birds, bats, dragonflies.
In the food chain, mosquitoes are indeed a food source for many creatures, so keep on planting and recruit some help and advice from friends in this battle against getting mosquito bites. (BTW: bats LOVE mosquitoes! Invite them into your home with a Bat House!)
Local, organic insect/mosquito sprays can be found at many nurseries and also local farmer’s markets. Should you want to make your own, it is much cheaper. Try these recipes. Essential oils can be found anywhere organics are sold.
Homemade Bug Spray Ingredients:
30 drops geranium essential oil
30 drops citronella essential oil
20 drops lemon eucalyptus essential oil
20 drops lavender essential oil
10 drops rosemary essential oil
1 Tablespoon vodka or rubbing alcohol
1/2 cup Natural Witch Hazel
1/2 cup water
1 teaspoon of vegetable glycerin (optional)
Homemade Bug Spray Instructions:
Place essential oils in a glass spray bottle. Add vodka or alcohol and shake well to combine. Pour in witch hazel and shake to combine.
Add 1/2 tsp vegetable glycerin if using. This is not necessary, but helps everything stay combined.
Add water and shake again. Shake before each use as the oils and water will naturally separate some over time.
Fresh or Dried Herbs Bug Spray Ingredients:
Distilled water
Witch hazel or rubbing alcohol
Dried herbs: peppermint, spearmint, citronella, lemongrass, catnip, lavender, etc. I recommend using at least one herb from the mint family.
Fresh or Dried Herbs Bug Spray Instructions
Boil 1 cup of water and add 3-4 TBSP of dried herbs total in any combination of the above. I use 1 TBSP each of peppermint, spearmint, catnip and lavender, and also throw in a couple of dried cloves.
Mix well, cover and let cool (covering is important to keep the volatile oils in!)
Strain herbs out and mix water with 1 cup of witch hazel or rubbing alcohol. Store in a spray bottle in a cool place (fridge is great because then it's nice and cool). Use as needed. Added bonus: it smells great and is very refreshing to the skin.
TIP: If you have the time and want to make a stronger version of this recipe, prepare the herbs in an alcohol mixture as a tincture instead
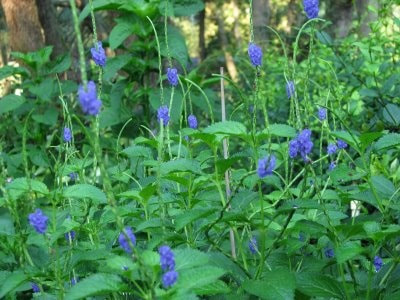
August 2017
Today we’re going to talk about one of the super stars of the Butterfly garden, a plant I call the poor man’s butterfly bush: Porter Weed (Stachytarpheta jamaicensis).
Porter weed is long with twisting snake like flowering spikes that can reach up to three feet long, but are usually around two feet. Porter Weed blooms continuously and so will always be visited by butterflies and hummingbirds. The flowers, which range from blue to violet to red and pink, are about the size of a fingernail and usually appear in clusters of four to six, though during August the entire spike bursts into bloom and is simply gorgeous.
One of the things that makes Porter weed so special, in my opinion, is that it’s not picky about soil and has no real pests. It needs regular watering, but fertilizing the plants will actually inhibit flower growth by causing the leaves to grow at the expense of flowers. It also needs to be cut back nearly to the ground in spring to promote new growth. It will do well in the sun, but actually seems to do best in light to partial shade. In my home garden, I have placed a bench directly behind the porter weed in the shade of several oak trees where I can sit in the cool shade and watch the scores of butterflies, bees and hummingbirds that come to visit.
Porter weed is cold sensitive, however. Only in zones 9B and above is it a perennial. Any temperature below 25 degrees will kill it. The Porter weed I placed in the butterfly garden last year died even though I covered it with three inches of pine straw. To save my own porter weed I dig it up and bring it inside my heated garage and then bring it out whenever the temperature rises above 45. I will do that this year with the Porter weed I planted in the Randle Moore garden. My wife, who helps me lug out all my cold sensitive plants from the garage each year, is going to be just delighted to hear this!
I would definitely recommend Porter weed for anyone who wants a butterfly garden. It’s about the best there is when it comes to attracting butterflies. As far as overwintering it, if you don’t want to dig up the whole plant, it’s quite easy to grow from cuttings… I just like to make my wife work!
Submitted by: Master Gardener, Mike Livingston,
May 2017
“PLANTS YELLOWING"
As we enter into Spring we tend to look at our plants closely in anticipation of new growth along with colorful flowers and fragrance. Occasionally we see things that concern us and we become alarmed, such as the plant having yellow leaves. Before running frantically to the local garden center to buy every product on the shelf, it’s a good recommendation to research and analyze the situation so that an accurate diagnosis can be made.
DIAGNOSTICS
So, when diagnosing the problem, you look at all the possibilities that may have contributed to this condition. Try to recall the recent history of the plant, including the over-all health conditions the plant has displayed in the past and try to remember any instances or past care, or a situation including the weather, to determine which is more likely the issue. Research any deviation that occurred, such as a new construction process of your home which might have involved chemicals. Occasionally, in the process of construction, workers could have spilled chemicals in washing equipment. Also, notice if the condition involves one plant or all plants.
GARDENIAS
One plant that has historically been subject to yellowing leaves issues is the gardenia. There are a couple of issues involving gardenias and, and that would be leaf yellowing and leaf drop.
Watering: In general, over-watering is not good for most plants. Gardenias are especially sensitive to excess moisture, and are responsive to soil conditions such as overly wet soil. If your irrigation/sprinkler system control schedule is set too long, and you have been watering these plants regularly, you may be having issues. In addition, over-watering promotes matters such as leaf diseases and root diseases such as root rot. If you water less frequent the probability of root rot decreases.
Leaf Drop: Another issue gardenias are subject to, is leaf drop. First of all, the ideal conditions for gardenias is in full sun. Gardenias need plenty of sun, and if the leaves start to drop, it may be related to too much shade. In shade you’ll probably notice the plant will grow less dense and will be spindly as well. If gardenias are placed in full sun you have better results than with a healthier and denser plant. Notice the trees nearby. If they have grown horizontally, you may find your gardenias are in too much shade.
SOIL FERTILITY
Sometimes, when a plant doesn’t look good, the garden owner may think the plant has a disease or needs water. Another factor that is related to this condition includes nutritional/fertilizer needs. In terms of humans, not everyone eats and enjoys onions and some people may be even allergic to them. As a result, problems may occur if they are eaten. You can think of the plant in a similar way, not all plants are alike in nutritional requirements. For instance, azaleas grow well with a soil pH range of 5.0 – 5.5 while tomatoes grow well with a soil pH of 6.0 – 6.8. If plants are not in their ideal soil environment, problems may occur, such as exhibiting yellowing and chlorotic leaves. It may sound contradictory, but by simply adding fertilizer may not be the cure. Without the proper or suitable soil pH, the plant will NOT absorb nutrients no matter how much you add and the plant will still look malnourished. The pH has to be at the specific level required for the specific plant and therefore, the plant will be able to absorb the nutrients. So, soil chemistry is very important.
pH and nutrient availability: Some nutrients become insoluble if the soil pH is too high or too low, limiting the availability of these nutrients to the plant root system. For instance, iron (Fe) is readily available in acidic soil (i.e. Below pH 7), where its optimum range is pH 4.0 - 6.5. Potassium is most available from slight acidic to alkaline soils that are above 6.0 and tapers off in its availability below pH 6.0. Nitrogen is readily available in a soil pH mid-range of 6.0 - 8.0, then below 6.0 and above 8.0, nitrogen becomes less available. Finally, molybdenum is readily available at higher pH (i.e. above pH 7) and limited in acidic (i.e. below pH 7).
pH and the availability of specific nutrients: Other nutrients are subject to pH fluctuation. Soil chemistry and pH is quite challenging. Landscape plants may exhibit nutrient deficiency or toxicity symptoms, as a result of highly acidic or alkaline soil ph.
In acidic soils, the availability of plant nutrients such as potassium (K), calcium (Ca), and magnesium (Mg) is reduced, while availability of potentially toxic elements such as aluminum (Al), iron (Fe), and zinc (Zn) are increased.
In alkaline soils, iron, manganese (MN), zinc, and boron (B) are commonly deficient.
Plants and their optimum pH and problems associated with pH: Each plant has an ideal pH range it best performs at. Some plants can tolerate a wide range. Optimal ornamental ranges can vary from 4.5 - 8.0. For instance, azaleas require a specific pH range of 5.0 - 5.5, citrus needs a range of 5.5 - 6.5, in contrast, verbena prefer a range of 6.0 - 8.0. Leatherleaf fern is one plant that is tolerant of a wide range of soil ph. It can grow and look great in soil having a pH range of 4.0 - 6.5. If the pH range does not match the plant requirements, although there may be ample nutrients in the soil, the plant simply cannot and will not be able to absorb them. There are varying degrees of pH and growth responses.
Altering pH: To alter the soil pH takes time. In short, you can typically raise or increase the soil pH with the use of agricultural limestone. If you wish to lower the soil pH, sulfur or a fertilizer with sulfur such as ammonium sulfate, is normally used. This process may take up to four to six months or even longer depending on the soil or media type. In general and as a rule, the heavier the soil (i.e. more clay or organic matter) the longer the process of change.
Alkaline soils: The common materials used to lower the soil pH is with the use of elemental sulfur (S), microbes oxidized the elemental sulfur into a sulfate (SO4) and H+ resulting in lowering the ph. Hydrogen (H+) ions also are produced with the use of ammonium (NH4) based fertilizer. The addition of soil organic matter (SOM) will also aid in lowering the pH of your soil.
Acidic soils: Depending upon where you live and soil type (i.e. sandy vs clay), over time, with rain in our humid climate, soils become acidic due to the leaching. In addition, with the addition of fertilizers and organic matter, the acidulation process is enhanced.
Monitoring of soil pH is important, for the fact if the pH becomes very acidic, (below pH 5.4), some minerals such as aluminum and manganese become very soluble and often are toxic to plants. Leaf yellowing, puckering, and burning symptoms may appear. Plant nutrients such as calcium and magnesium often are deficient in acidic soils. For legumes, beneficial soil bacteria that fix nitrogen on the roots of legumes such as beans and peas will not survive in acidic soils, and then those crops will suffer.
The most common material used in raising soil pH is with the use of lime. Lime comes in many forms such as CaCO3, CA Mg (CO3) 2, Cano, or CA (OH) 2 to name a few. In the soil, the lime reacts with carbon dioxide and water yielding bicarbonate (HCO3-), thus displacing or removing (H+) ions and raising the pH in the process.
Weeds in the Lawn:
As a general rule, in the winter, an indicator of poor over-all fertility in a lawn is the presence of clovers. Excessive weeds may indicate the pH is too acidic. Years of annual applications of Ammonia sulfate may result in this condition. Alternating alternative sources of nitrogen based fertilizer, such as urea, is recommended.
So, before you run to the garden center to purchase expensive fertilizer, first check your soil ph. Soil chemistry with special interest directed towards soil pH is very important. pH is “THE” controlling factor for nutrient uptake.
LAWN DISEASES
Brown Patch Disease:
This disease is most likely to be observed when temperatures are below 80°F. Infection is triggered by rainfall, excessive irrigation, or extended periods of high humidity resulting in the leaves being continuously wet for 48 hours or more. That’s why it’s important to NOT water the lawn in the evenings or night.
Symptoms/Signs: The fungus infects the leaf area closest to the soil and will eventually kill the leaf. A soft, dark rot will occur at the base of the leaf and leaves where the leaf can easily be pulled off the stem. The base of a pulled leaf has a rotted odor. The good thing is that the roots are not affected by this pathogen. Brown Patch Disease will usually begin as small patches (about 1 ft. in diameter) that will turn yellow and then reddish brown, brown, or straw colored as the leaves start to die. The patches will typically expand to several feet in diameter. It is not uncommon to see rings of yellow or brown turf with reoccurring healthy turf in the center. Turf at the outer margin of a patch may appear dark and wilted. The disease is often mistaken for herbicide or even fertilizer damage on St. Augustine grass. Herbicide damage may cause the same overall symptoms of yellow or brown patches. The leaf may still pull out of the leaf sheath, but the base of the leaf is not dark and rotted. Instead, the leaf base will be dry with a tan discoloration and there will be no distinct smell of rot.
Cultural Controls: The two most important means of cultural practices to control brown patch, are nutrient and water management.
Nutrient Management: When you have excessive nitrogen or apply nitrogen during potential disease development periods a problem is most likely to occur. As a precaution, just prior to or during disease development periods, slow-release nitrogen sources should be used as opposed to readily available forms, such as soluble liquids or quick-release nitrogen sources. A balanced fertilizer containing equivalent amounts of potassium and nitrogen, preferably a slow-release potassium form, should be applied.
Water Management: Irrigation should only occur when necessary and during in the early morning hours (between 4:00 and 8:00 a.m.) when dew is already present. Diseased areas should be mowed last and clippings removed carefully since mowers can spread this disease. The mower should be washed of all turf clippings before proceeding to the next site.
Chemical Controls: The most effective and assured method of complete control of brown patch is with the proper use of fungicides. Fungicide options include: azoxystrobin, chlorothalonil, fludioxonil, flutolanil, iprodione, Junction®, mancozeb, metconazole, myclobutanil, polyoxin D, propiconazole, pyraclostrobin, thiophanate-methyl, thiram, triadimefon, trifloxystrobin, triticonazole, and vinclozolin.”